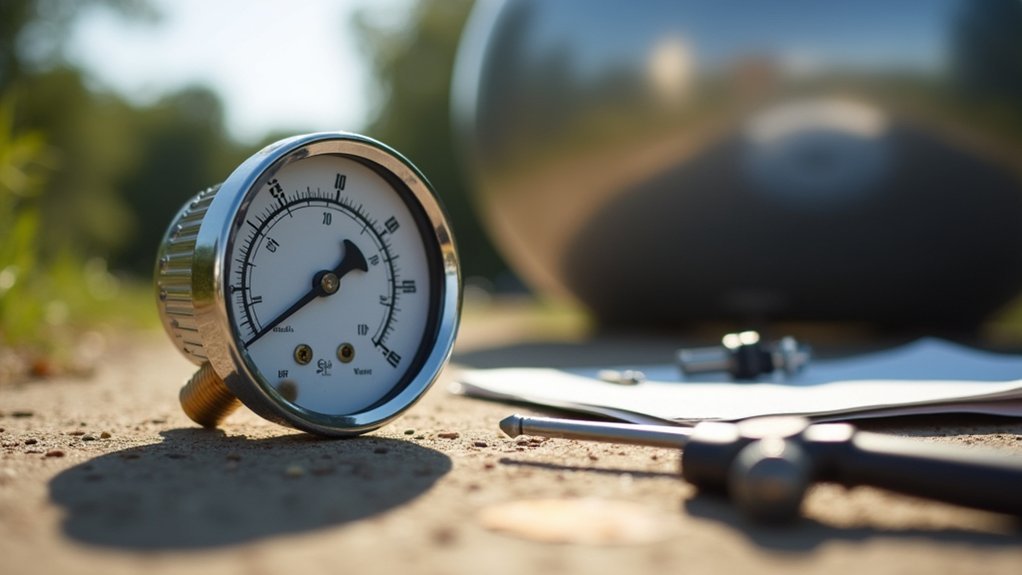
To install a propane tank gauge, first shut off your gas supply and disconnect the tank from your grill or appliance. Position the gauge’s black collar over the tank’s threaded valve opening and turn it clockwise until snug, using a wrench carefully to avoid over-tightening. Reconnect your gas line to the gauge’s outlet fitting, then slowly open the tank valve and test for leaks using soapy water. This guide covers everything you’ll need for proper installation and maintenance.
Understanding Propane Tank Gauge Types and Functions
Before you can properly install a propane tank gauge, you’ll need to understand the different types available and how they function. Face gauges are the most common option, displaying your tank’s capacity as a percentage.
Understanding propane tank gauge types and their functions is essential before attempting any installation work.
You’ll find three main varieties: analog propane scales, digital propane tank scales, and inline pressure gauges. Each offers different monitoring methods for tracking your propane level.
Face gauges work by measuring gas pressure rather than actual volume. High pressure indicates a full tank with green readings, while declining pressure shows yellow and red readings when you need a refill.
Fixed liquid level gauges, also called bleeder valves, serve delivery personnel during refilling to guarantee tanks don’t exceed the recommended 80 percent capacity for safety.
Tools and Materials Needed for Installation
Before you begin installing your propane tank gauge, you’ll need to gather the right safety equipment to protect yourself during the process.
Essential installation tools like wrenches and pliers are required to secure proper connections and guarantee a leak-free installation.
You’ll also need to verify that your chosen gauge is compatible with your specific tank type and gather sealing materials to complete the job safely.
Essential Safety Equipment
Safety remains your top priority when installing a propane tank gauge, making proper equipment selection essential for a successful project.
You’ll need safety goggles to protect your eyes from potential propane escapes or debris during installation. Don’t overlook safety gloves, which shield your hands from sharp edges and chemical exposure while handling tank components.
Keep leak detection solution like soapy water readily available to test connections after installation. This simple mixture reveals dangerous gas leaks through bubble formation at connection points.
Verify your work area stays clean and dry to prevent contamination that could compromise the gauge’s performance. These safety measures aren’t optional extras—they’re fundamental requirements that protect you from serious injury while verifying your propane system operates safely and reliably.
Required Installation Tools
Having the right tools streamlines your propane tank gauge installation and prevents costly delays or safety hazards. You’ll need specific installation tools to complete this project safely and efficiently.
First, gather an adjustable wrench to secure all threaded connections properly. A screwdriver becomes essential if your gauge requires mounting to a bracket or panel.
Don’t forget a gas line hose to establish the connection between your gauge and propane tank. Teflon tape or quality thread sealant guarantees leak-proof connections on all threaded fittings.
Finally, keep a bucket or container nearby to organize your tools and materials throughout the process. Having these installation tools ready before you begin eliminates unnecessary trips and helps maintain focus on proper installation procedures.
Gauge Compatibility Components
When selecting your propane tank gauge, you’ll need to verify it matches your tank’s specific valve type to confirm proper installation. The two most common valve types are POL (Prest-O-Lite) and QCC1 (Quick Closing Coupling).
Gauge compatibility depends entirely on matching these connection types correctly.
POL valves feature left-hand threads and are typically found on older propane tanks, while QCC1 valves have right-hand threads with a safety mechanism that’s standard on newer tanks. You can’t interchange these valve types without proper adapters.
Before purchasing your gauge, examine your tank’s valve carefully to identify which type you have.
Check the manufacturer’s specifications to confirm the gauge you’re buying specifically states compatibility with your valve type, preventing costly installation problems.
Safety Preparations Before Starting Installation
Before you begin installing your propane tank gauge, you’ll need to take several vital safety steps to protect yourself and prevent accidents.
Start by completely turning off your propane tank using the gas supply knob to prevent leaks during installation. Disconnect the tank from any connected appliances like grills to stop gas flow entirely.
Essential safety preparations include:
- Work in a well-ventilated area to avoid inhaling dangerous propane fumes
- Inspect your tank thoroughly for visible damage or existing leaks before starting
- Wear protective gear including gloves and safety goggles during the entire process
These safety measures create a secure working environment and greatly reduce installation risks.
Proper safety preparations significantly minimize hazards and establish a protected workspace for successful propane gauge installation.
Never skip these preparatory steps, as they’re essential for preventing accidents and ensuring your personal safety throughout the gauge installation process.
Shutting Off Gas Supply and Disconnecting Equipment
Before you can install your propane tank gauge, you’ll need to completely shut off the gas supply by turning the tank’s valve knob to the ‘off’ position.
Next, carefully disconnect the tank from your grill or appliance by unscrewing the hose pipe from the tank’s valve.
Always perform these steps outdoors in a well-ventilated area while keeping the tank upright to prevent damage and guarantee safety.
Turn Off Gas Valve
Start by shutting off your propane tank’s gas supply completely—turn the gas valve knob clockwise until it stops turning. This critical first step guarantees no gas flows while you’re working on the installation. The gas valve must be completely closed before proceeding with any gauge installation work.
Safety is paramount when working with propane systems. Always remember these essential points:
- Turn the gas valve clockwise until it won’t turn anymore—this guarantees complete shutoff
- Work in a well-ventilated area away from any potential ignition sources like pilot lights or electrical equipment
- Double-check that the valve is fully closed by attempting to turn it further clockwise
Once you’ve confirmed the gas valve is properly shut off, you’re ready to proceed with disconnecting your equipment safely.
Disconnect Tank Safely
With your gas valve securely shut off, you’ll now disconnect the propane tank from your grill or appliance.
Carefully remove the tank while supporting it securely to prevent accidents. When you disconnect the hose pipe from the tank, loosen the connection gently without using excessive force to avoid damaging the fittings.
Before proceeding with your tank gauge installation, inspect the hose and connections for visible signs of wear or damage.
This safety check guarantees you’re working with equipment in good condition. After disconnection, store your propane tank in a well-ventilated area away from heat sources and direct sunlight.
Now that you’ve safely disconnected everything, you’re ready to install the tank gauge without any safety concerns.
Removing the Existing Tank Connection
First, turn off your propane tank completely using the control knob to cut off the gas supply. This prevents any gas from escaping during the removal process.
Next, disconnect the gas line from your propane tank by loosening the connection point with appropriate tools if needed.
Carefully remove the propane tank from its installation location, keeping it upright throughout the process.
Before proceeding, inspect all connection points for potential issues:
- Check for wear or corrosion on threaded connections
- Look for cracks or damage in rubber gaskets or seals
- Examine metal fittings for signs of deterioration or rust
Finally, store or dispose of old connections according to your local regulations. This guarantees you’re compliant with safety standards while preparing for the gauge installation.
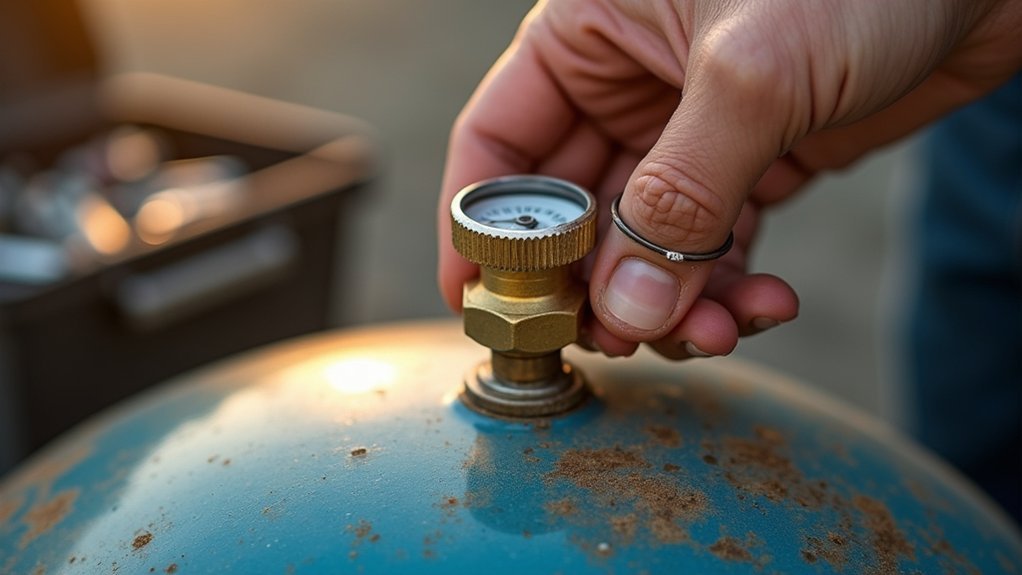
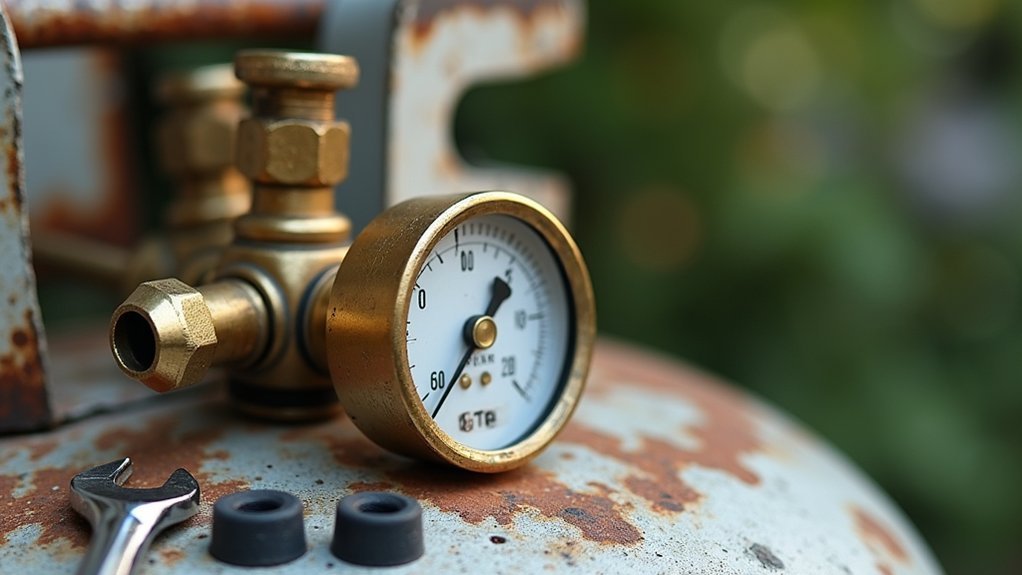
Connecting the Black Collar to Your Propane Tank
Once you’ve prepared your tank and workspace, you’ll connect the black collar component of your gauge system.
Position the black collar directly over the threaded opening of your propane tank valve. Turn the black collar clockwise, twisting it firmly to create a secure attachment to the tank. You’ll want to guarantee a tight fit that prevents any potential gas leaks.
If hand-tightening doesn’t provide sufficient security, use a wrench to further tighten the connection.
However, exercise caution during this step—over-tightening can damage the fitting and create expensive repair issues. The goal is achieving a snug, leak-proof seal without forcing the threads.
Once you’ve properly secured the black collar, you’re ready to reconnect your gas line to complete the installation.
Attaching the Gas Line to the Gauge
Take the gas line and position it over the outlet fitting on your newly installed gauge. Before making any connections, inspect your gas line thoroughly for cracks, wear, or damage that could compromise safety.
Verify the gas line is compatible with both your gauge and tank to guarantee proper fitting.
Always confirm your gas line matches both gauge and tank specifications before installation to ensure secure, leak-free connections.
Thread the gas line onto the gauge’s outlet fitting by hand, turning clockwise until snug. Avoid over-tightening, which can damage the threads and create future leak points.
Here’s what to check during installation:
- Hand-tighten only – excessive force damages fittings
- Inspect for wear – replace damaged gas lines immediately
- Test connections – open the tank valve and listen for hissing sounds
Once attached, open your tank’s gas valve slowly and listen carefully for any hissing that indicates leaks.
Testing Your New Gauge for Proper Operation
After connecting your gas line, you’ll need to verify your gauge functions correctly before relying on its readings. Start by ensuring all burners are off to prevent gas leaks. Slowly open your propane tank’s valve while listening for hissing sounds. Turn on one burner for five seconds to clear trapped air, then shut it off.
| Gauge Color | Tank Pressure Status | Action Required |
|---|---|---|
| Green | Sufficient propane | Continue normal use |
| Yellow | Low propane level | Plan refill soon |
| Red | Very low/empty | Refill immediately |
| No reading | Gauge malfunction | Check connections |
| Flickering | Inconsistent pressure | Inspect installation |
If your gauge doesn’t respond properly, check all connections and verify proper installation for accurate tank pressure readings.
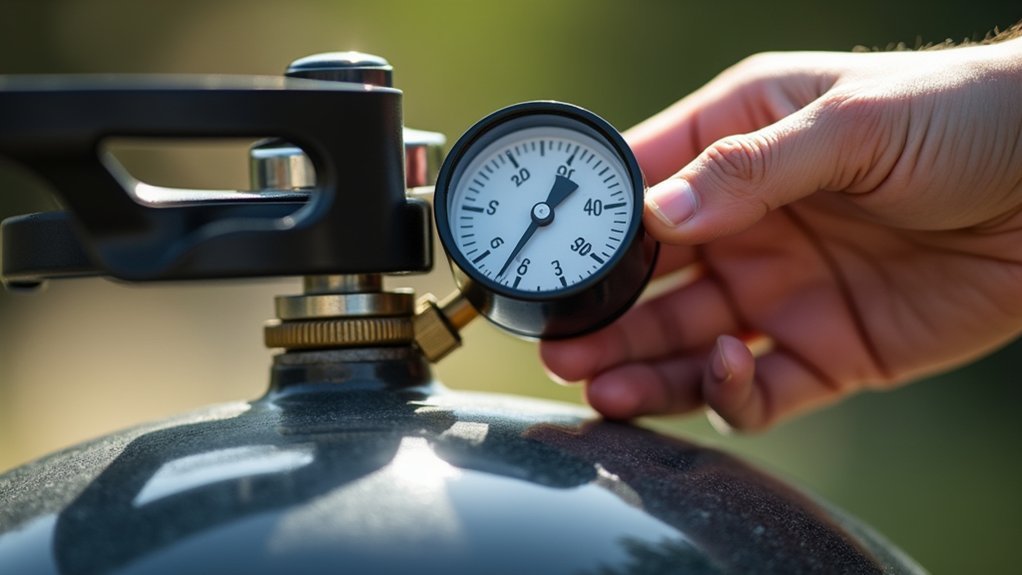
Reading Gauge Indicators and Pressure Levels
Understanding your gauge’s color-coded system and pressure readings will help you monitor your propane supply effectively. Your gauge displays tank capacity as a percentage, typically ranging from 10% to 80%. The color indicators provide quick visual references for your tank’s status.
- Green readings indicate high pressure and a full tank with sufficient propane for extended grilling sessions.
- Yellow readings signal low levels and diminished heating efficiency, meaning you should schedule a refill soon.
- Red readings show insufficient gas and near-empty conditions, requiring immediate attention.
For accurate readings, turn on your burner for about 5 seconds to release trapped air.
Monitor your gauge regularly to prevent unexpected propane shortages, remembering that a full tank contains approximately 80% liquid propane and 20% gas.
Troubleshooting Common Installation Issues
When installation problems arise, start by verifying that your propane tank is completely shut off and disconnected from your grill. This prevents dangerous gas leaks and guarantees safe troubleshooting.
Next, examine the black collar connection to your propane tank and tighten it securely to eliminate potential leaks during operation.
If your gauge displays inaccurate readings, turn on the burner briefly to purge trapped air that’s affecting pressure measurements.
Check that the gas line connects properly to the gauge with secure, aligned fastening, as loose connections cause reading errors.
For non-R3D gauges, confirm compatibility with your ALTA Propane Tank Level Sensor before installation.
Incompatible components lead to functionality issues and improper readings, compromising your gauge’s effectiveness.
Maintenance Tips for Long-Term Gauge Performance
You’ll need to establish a routine maintenance schedule to keep your propane tank gauge functioning accurately for years to come.
Regular leak inspections should become second nature, as even small leaks can compromise both safety and gauge performance.
Don’t forget to plan for eventual gauge replacement, since all mechanical components have a finite lifespan that depends on usage and environmental conditions.
Regular Leak Inspections
Since gas leaks pose serious safety risks, you’ll need to establish a routine inspection schedule for your propane tank gauge and its connections.
Regular visual checks help identify wear, damage, or corrosion before they become dangerous. Listen for hissing sounds and smell for gas odors around your propane tanks during each inspection.
The soapy water test remains your most reliable detection method:
- Apply soapy water solution to all connections and joints
- Watch for bubble formation indicating escaping gas
- Test immediately after any maintenance or tank changes
Ensure all equipment meets proper pressure ratings to prevent system failures.
You should also schedule professional inspections periodically to maintain compliance with safety standards and catch potential issues early, protecting both your property and family.
Gauge Replacement Schedule
A well-maintained propane tank gauge typically requires replacement every 2-3 years to maintain accurate readings and reliable performance. Following a proper gauge replacement schedule guarantees you won’t unexpectedly run out of propane during critical times.
Monitor your gauge’s performance by maintaining a reading log. If you notice inconsistent readings or frequent malfunctions, replace the gauge promptly rather than waiting for the standard replacement interval.
| Gauge Type | Replacement Interval | Warning Signs |
|---|---|---|
| Analog Dial | 2-3 years | Stuck needle, cracked face |
| Digital Display | 3-4 years | Dim screen, error codes |
| Magnetic Float | 2-3 years | Inconsistent readings |
| Inline Pressure | 2-3 years | Leaking connections |
| Smart Sensors | 4-5 years | Connectivity issues |
Consider upgrading to digital monitors or wireless sensors if your current gauge frequently fails.
Frequently Asked Questions
How to Attach a Propane Tank Gauge?
You’ll attach the gauge’s black collar to your propane tank by tightening it firmly, then connect your gas hose to the gauge’s other side, ensuring tight connections to prevent leaks.
How to Wiring a Fuel Gauge?
You’ll connect the gauge’s three terminals: positive wire to power source, sender wire to tank’s sending unit, and ground wire to tank’s grounding point, then test functionality.
What Is the 80/20 Rule for Propane?
You should fill your propane tank to only 80% capacity, leaving 20% space for gas expansion. This prevents dangerous overfilling and pressure issues while ensuring proper vapor space for ideal equipment performance.
How to Install a Gas Safety Gauge?
Turn off your propane tank, attach the gauge’s black collar to the connection point, connect your gas line, check for leaks with soapy water, then test the reading.


Leave a Reply