
You’ll transform your dining pergola into a private retreat by installing weather-resistant curtains with proper mounting hardware. Start by measuring your space and choosing between ceiling-mounted rods, tension wire, or non-drilling options. Secure brackets level and 2 inches from the beam, then hang panels at 1.5 to 2 times the opening width for full coverage. Use stainless steel hardware, tiebacks, and wind weights to keep everything stable. The specifics of each step reveal how to achieve a polished, functional outdoor dining space.
Why Add Curtains to Your Dining Pergola
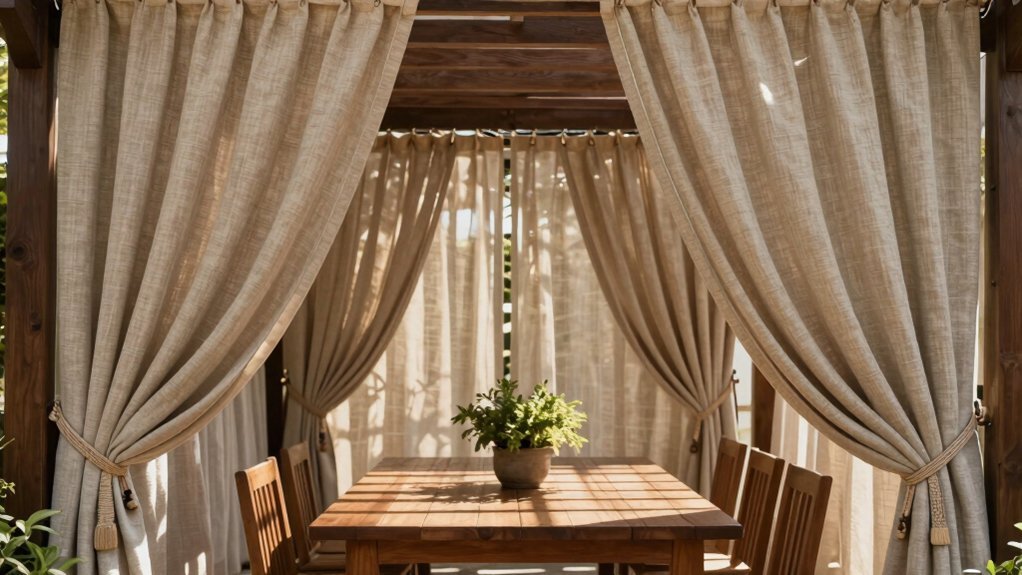
Why settle for an exposed dining area when you can transform your pergola into a private retreat? Pergola curtains create a secluded dining nook that shields your table from neighboring views, allowing you to enjoy meals without feeling watched.
Beyond privacy, these curtains deliver practical benefits. They block harmful UV rays, keeping your dining space cooler while protecting your furniture from fading. You’ll appreciate the comfort during hot summer months.
You’re not limited to one style either. Choose lightweight sheer curtains for breezy occasions or opt for heavier, weather-resistant fabrics when wind conditions demand durability. This flexibility lets you customize your outdoor dining experience based on seasons and events, transforming your pergola into a versatile entertaining space that adapts to your needs.
What You’ll Need for Installation
Before you hang your first curtain, gather the essential materials and tools that’ll make installation straightforward. You’ll need weather-resistant curtains sized to your pergola’s dimensions, along with curtain rods, hanging rails, or tension rods. Choose rings with clips, hooks, or grommets based on your curtain type. Stock up on screws, brackets, and mounting hardware appropriate for your structure.
For tools, grab a drill, measuring tape, and ladder. If you prefer non-drilling alternatives, consider ceiling-mounted rods, frame-attached options, or tension wire with eye bolts. Select outdoor-grade curtains that resist fading, mildew, and weather damage. Having everything ready before starting ensures a smooth installation process and long-lasting results.
Measure Your Pergola Dimensions

You’ll start by measuring the height from the pergola’s top to the ground, allowing extra inches so your curtains graze the floor with gentle fullness.
Next, measure the width across the opening where you’ll hang the curtains to determine how many panels you’ll need and account for the 1.5 to 2 times fabric multiplier for gathered draping.
If you’re covering multiple sides, measure the depth to ensure you’ve got adequate fabric for each layer without creating crowding or bunching.
Height and Ground Clearance
How do you guarantee your pergola curtains hang perfectly? You’ll measure from the pergola’s top to the ground, accounting for proper clearance that lets your curtains graze the floor with several extra inches for fullness and movement.
| Measurement Type | Purpose | Action |
|---|---|---|
| Top to ground | Curtain length | Measure vertically from pergola peak |
| Ground clearance | Fabric movement | Allow 2-4 inches above floor |
| Hardware height | Even alignment | Position rods level across opening |
Start at the pergola’s highest point and extend your measuring tape straight down. Note any obstacles or louvers that require clearance space. Don’t pull the tape taut—let it hang naturally to reflect how fabric will drape. Record measurements at multiple points if your pergola’s structure varies. This precision prevents binding and ensures your curtains operate smoothly while maintaining that elegant, gathered appearance you’re after.
Width Across Opening
Getting the width right is essential for achieving those elegant, flowing curtains that define your dining space. Measure across your pergola opening from edge to edge along the top mounting points where you’ll install tracking or rods.
Add extra width to accommodate a soft, billowing appearance when curtains are drawn. Plan for 1.5 to 2 times the opening width to create that luxurious drape. This fullness prevents gaps and ensures seamless coverage across your entire dining area.
If you’re installing curtains on multiple sides, measure each opening separately. Record these dimensions carefully since they’ll determine how many panels you’ll need. Use these measurements to calculate your total panel requirements, factoring in standard panel widths and your desired fullness level.
Depth for Multiple Sides
When you’re installing curtains on multiple sides, why not start by measuring the depth—the distance from your mounting point to the opposite edge of the pergola?
This measurement ensures your curtains hang properly and don’t interfere with movement or louvers. You’ll want to account for how the fabric will move and gather as people pass through your dining space.
Consider these key points:
- Measure from each mounting plane to the outer edge for uniform drop across all sides
- Account for corner overlaps where curtains meet, requiring extra fabric width
- Use 1.5 to 2 times the opening width to achieve that fuller, gathered aesthetic
Taking precise depth measurements now prevents installation headaches later and guarantees your curtains provide both privacy and visual appeal.
Select Your Mounting Method
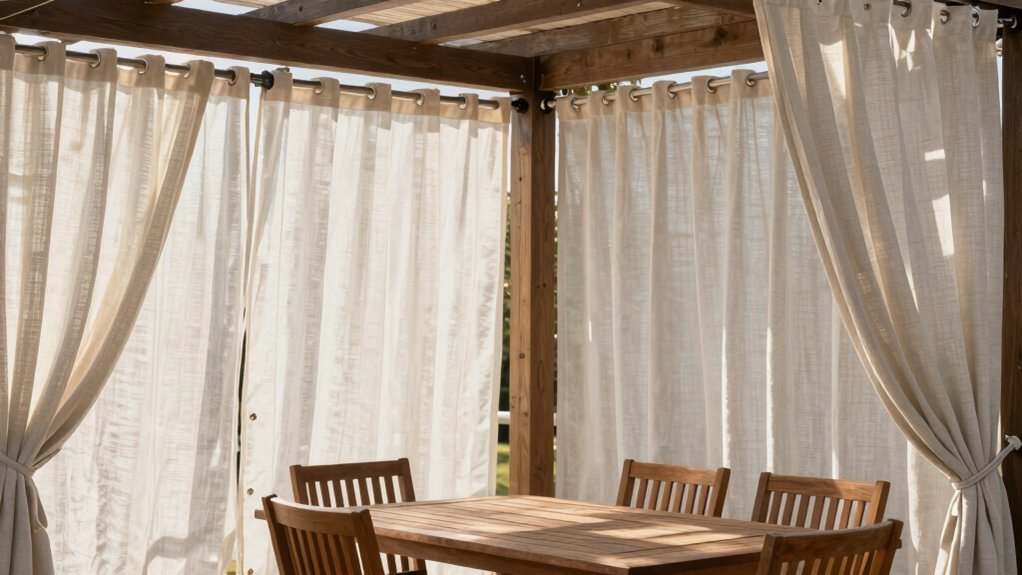
Where you’ll hang your pergola curtains depends on your pergola’s construction and your preference for permanence. For non-permanent, adjustable solutions, ceiling-mounted rods work well and won’t interfere with louvers. You can also install rods on the underside of your pergola’s frame for a cleaner look.
If you prefer avoiding drilling entirely, tension wire between eye bolts offers flexibility, though you’ll need to tension it carefully to prevent sagging. For freestanding pergolas, tiebacks secured to posts provide stability, especially with wind-damping ties that keep curtains from flapping.
Regardless of your method, prioritize rust-resistant materials like stainless steel or aluminum. Ensure all brackets and eye bolts attach securely to sturdy surfaces, and confirm that tiebacks don’t obstruct louver operation.
Install Brackets or Eye Bolts
How you secure your mounting hardware will determine whether your curtains hang reliably or sag over time.
For a successful installation, you’ll want to follow these essential steps:
- Pre-drill pilot holes before inserting any screws to prevent wood splitting and ensure bracket stability
- Position brackets about 2 inches down from the ceiling on your mounting surface to align with standard curtain rod hardware
- Use rust-resistant hardware like stainless steel or aluminum for outdoor installations to withstand weather exposure
If your posts lack suitable holes for brackets, swap wall-mount brackets for ceiling-mount curtain rod brackets instead. For tensioned wire solutions, securely mount opposite eye bolts on each post using pre-drilled holes to avoid splitting. These preparations guarantee your curtains stay properly secured throughout the season.
Mount Your Curtain Track or Wire
You’ll need to select the right mounting hardware based on your pergola’s material and the track system you’ve chosen.
Position your tracks carefully to ensure they’re level and properly spaced for smooth curtain operation and visual balance.
Then you’ll secure the brackets firmly using pre-drilled holes and the manufacturer’s recommended fasteners to guarantee a sturdy, long-lasting installation.
Choosing Your Mounting Hardware
The foundation of your pergola curtain installation depends on selecting the right mounting system for your space and fabric weight. You’ll find three primary options worth considering:
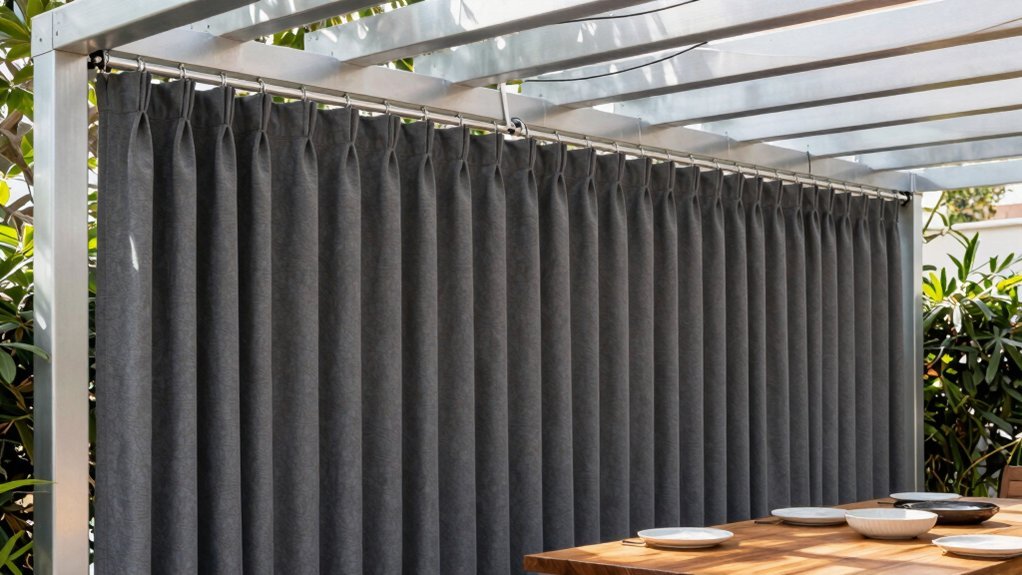
- Curtain tracks deliver a sleek, modern aesthetic with smooth operation, making them ideal for heavier fabrics that demand reliable support.
- Tension wire with eye bolts offers a tool-free, adjustable alternative that works exceptionally well for freestanding pergolas and areas prone to wind.
- Non-drilling solutions like ceiling-attached rods or underside-frame mounting work when you can’t drill, though they require precise measurements to avoid louver interference.
Regardless of your choice, prioritize outdoor-grade hardware with rust-resistant materials—stainless steel or aluminum withstand sun, rain, and humidity. Mount brackets level and aligned with post locations, using pre-drilled pilot holes to prevent wood splitting. This preparation ensures your curtains hang perfectly and last for years.
Positioning Tracks for Stability
Once you’ve selected your hardware, proper track positioning determines whether your curtains operate smoothly and remain stable through weather and use. You’ll want to mount ceiling tracks to align precisely with your curtain span, cutting them to exact length before installation. Secure them using pre-drilled holes and provided hardware for maximum support.
When installing on pergola beams or posts, ensure brackets are firmly anchored to prevent shifting. Use outdoor-rated hangers designed to support multiple panel weights without sagging. Maintain adequate clearance around louvers so they operate freely without obstruction.
After installation, test your track tension and check curtain alignment carefully. Adjust as needed to eliminate binding or uneven hanging. Regularly inspect mounting points throughout the season to catch any loosening before weather causes problems.
Securing Brackets and Support
Proper bracket installation is everything—it’s what keeps your curtain system stable and functional through seasons of use. You’ll want to secure your brackets with these essential steps:
- Use pilot holes and a level to prevent wood splitting and ensure your brackets sit perfectly straight, providing stable support for your track or wire system
- Position brackets about 2 inches down from your ceiling or beam to guarantee proper curtain clearance and professional appearance
- Choose appropriate hardware for your mounting surface—use ceiling-rated anchors for overhead installation, or substitute ceiling-mount brackets if porch posts aren’t available
For wire systems, install eye bolts on opposite posts and connect them with a secure turnbuckle. Tighten the tension so your curtain hangs straight without sagging. This foundation ensures your pergola curtains perform reliably.
Hang and Adjust Your Curtains

How will you know if your curtains hang correctly? Start by draping your panels onto the rods or tracks you’ve installed, then step back and assess the overall appearance. You’ll want even gaps on both sides of your opening, ensuring symmetrical spacing that frames your dining area beautifully.
Adjust your panels so the fabric drapes smoothly without twisting or bunching. Check that the curtain length aligns with your pergola’s measurements—they shouldn’t pool excessively on the ground or fall short of your desired coverage.
Once positioned, secure your curtains using tiebacks, weights, or wind anchors. These additions keep your panels stable during breezy conditions while allowing you to easily release them whenever you need dining privacy.
Secure Curtains for Stability and Wind Protection
Your curtains are now hanging beautifully, but they’ll need reinforcement to withstand outdoor elements.
Wind protection requires strategic anchoring and quality hardware. Install outdoor-rated materials like stainless steel or aluminum to prevent rust and corrosion. Secure your mounting brackets firmly to solid pergola framing for maximum stability.
Strategic anchoring with outdoor-rated stainless steel or aluminum hardware ensures your pergola curtains withstand wind and weather year-round.
Consider these essential reinforcement techniques:
- Use tiebacks or wind weights to prevent flapping while allowing louvers to operate freely
- Choose longer panels with 1.5 to 2 times opening width for a fuller, gathered look that resists wind intrusion
- Space curtains evenly with symmetrical rod placement to distribute wind pressure and minimize sag
Maintenance is crucial. Regularly tighten mounting screws and inspect fabric, hardware, and eye bolts for wear. This ongoing care ensures your dining privacy setup remains secure and functional throughout the seasons.
Frequently Asked Questions
How to Hang Privacy Drapes off a Pergola?
You can hang privacy drapes off your pergola using ceiling-mounted rods, tension wires on eye bolts, or decorative ties. Choose rust-resistant hardware, measure to your pergola’s dimensions, and allow extra fabric width for a billowing effect when you close them.
How to Attach Pergola Curtains?
You can attach pergola curtains using ceiling-mounted rods, underside-of-frame rods, or tension wire on eye bolts. For non-permanent setups, you’ll secure decorative ties to posts. Choose rust-resistant materials like stainless steel to ensure durability.
How to Create Privacy With a Pergola?
You’ll create privacy with a pergola by hanging weather-resistant curtains on rust-resistant rods or tension wires. Use 1.5–2 times the opening width for fuller coverage, add weights or tiebacks, and you’ll block neighboring views while maintaining airflow.
How Do You Hang Outdoor Curtains Without Drilling Holes?
You can hang outdoor curtains without drilling by using ceiling-mounted rods, tension wire on eye bolts between posts, or tie-backs to posts. These non-drilling methods keep your pergola structure intact while providing flexible privacy solutions.


Leave a Reply