First, you’ll need to let your fire pit cool completely before starting the cleaning process. Remove all ash and debris using a long-handled brush and dedicated ash bucket, ensuring ashes are fully extinguished. Clean different materials accordingly—use soapy water for steel, vinegar solution for stone, and oil cast iron after drying. Store your pit in a dry location with a quality cover to protect against weather damage. Following these essential steps will reveal additional techniques for ideal maintenance.
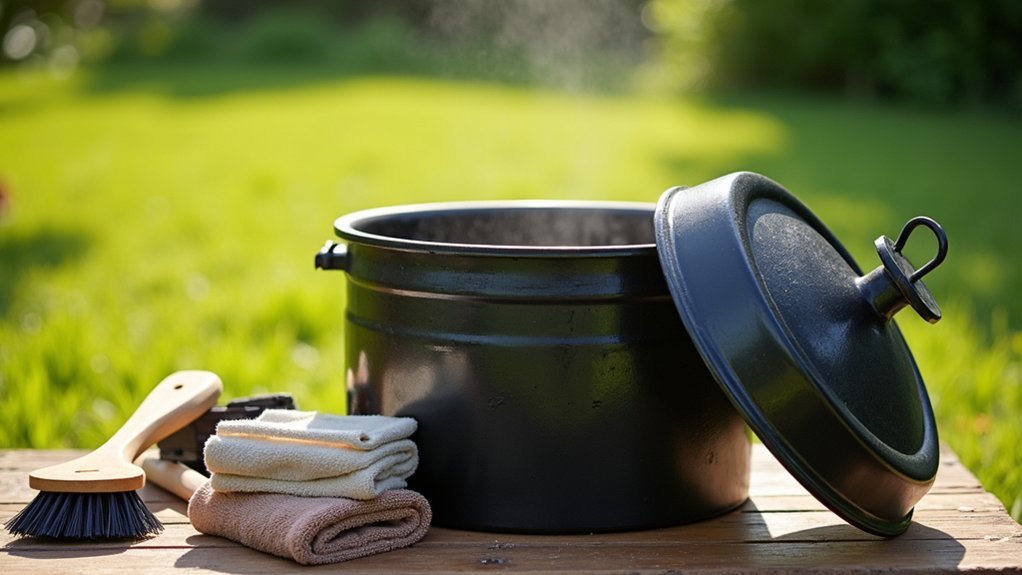
Essential Tools and Supplies for Fire Pit Cleaning

Five essential tools will make cleaning your fire pit safer and more efficient.
Start with a long-handled grill brush for grill cleaning and scrubbing surfaces without getting too close to heat sources.
You’ll need a dedicated ash bucket for collecting and disposing of cooled ash safely.
A scraper tool removes stubborn residue from the firebox and surrounding areas effectively.
Keep soft cloth or sponges handy along with soapy water solutions for wiping down exterior surfaces, preventing rust and maintaining appearance.
Finally, a wet/dry vacuum efficiently removes fine ash and debris from inside the pit, making cleanup faster.
These tools guarantee thorough maintenance while keeping you safe during the cleaning process.
Step-by-Step Cleaning Process for Different Fire Pit Types
While the basic cleaning principles remain consistent, different fire pit materials require specific approaches to maintain their integrity and appearance.
Each fire pit material demands tailored cleaning methods to preserve both structural integrity and visual appeal over time.
Start by allowing your fire pit to cool completely before beginning any cleaning process.
For steel fire pits, use a wire brush to scrub both interior and exterior surfaces, removing rust and debris. Follow with warm soapy water for deeper cleaning, then rinse thoroughly.
Stone fire pits need different care:
- Scrape out ash and debris with a shovel
- Wash surfaces with vinegar and water mixture to remove stains
- Allow to air dry completely
Cast iron requires complete drying after cleaning to prevent rust, followed by applying vegetable oil for protection.
When you clean out your offset or brick fire pit, vacuum loose debris first, then scrub with stiff brushes.
Removing Ash and Debris Safely

Once your fire pit has cooled completely, you can begin the essential task of removing ash and debris safely.
Never attempt to remove ashes while they’re still warm, as this creates serious burn risks. For Pit Barrel Cookers, you can invert the barrel over a trash can or use the convenient ash pan for cleaner disposal.
Consider lining your barrel’s bottom with tinfoil before cooking—you’ll simply fold and discard it afterward, making cleanup effortless.
Empty the ash pan after each use to maintain proper airflow and cooking performance.
When you dispose of ashes, make certain they’re completely extinguished to prevent fire hazards.
Proper ash disposal protects your storage area and prevents potential accidents during your pit’s off-season storage.
Scrubbing and Degreasing Techniques
You’ll need the right cleaning products and techniques to tackle grease and grime that’s built up on your pit’s surfaces.
Start with a quality grill brush while the grates are still warm, then move to specialized degreasers for tougher stains.
For stubborn buildup in hard-to-reach areas, you’ll want to use scraper tools and let cleaning solutions sit before scrubbing them away.
Choose Right Cleaning Products
Although many grill owners reach for harsh chemicals, selecting the right cleaning products makes all the difference in maintaining your pit’s performance and longevity.
You’ll want to choose cleaning solutions that effectively cut through grease without damaging your grill’s finish.
For best results, consider these product options:
- Fast-acting grill and smoker cleaners – Apply these degreasers to tough stains and burnt-on grease, letting them sit for several minutes before scrubbing.
- Natural alternatives – White vinegar and baking soda work as gentle abrasives that won’t harm your grill’s surface.
- Quality grill brush – Essential for scrubbing grates while they’re still warm for maximum effectiveness.
Always rinse removable parts with warm, soapy water after applying any cleaning solutions to guarantee complete residue removal.
Apply Effective Scrubbing Methods
Three essential scrubbing techniques will transform your dirty pit into a spotless cooking machine.
Start by using a grill brush on warm grates to effectively remove particles and grease without damaging the porcelain finish.
For stubborn stains on your grill or smoker, apply a degreaser like Red Max to grates and interior surfaces before scrubbing for enhanced results.
Focus your scraping efforts on the firebox using a scraper tool to eliminate residue buildup, which guarantees peak airflow during cooking.
After scrubbing, rinse removable parts with warm, soapy water to eliminate all grease.
Finally, wipe down exterior surfaces with a soft cloth and soapy water solution to maintain appearance and prevent greasy buildup.
Remove Stubborn Grease Buildup
Stubborn grease buildup requires specialized techniques that go beyond basic scrubbing to restore your pit’s performance.
When dealing with tough, burnt-on residue, you’ll need targeted approaches that break down accumulated grease effectively.
Start by scrubbing grates with a wire brush while they’re still warm, as heat helps loosen debris.
For heavy buildup, try these methods:
- Apply grill-specific degreasers directly to affected areas, letting them sit before scrubbing
- Create a baking soda paste or use diluted ammonia for burnt-on grease
- Utilize steam cleaning techniques to penetrate and break down stubborn residues
After applying any degreaser or cleaning solution, use a soft cloth to wipe away loosened grease.
Prevent future buildup by placing aluminum foil liners at your pit’s bottom to catch drippings during cooking sessions.
Proper Drying and Seasoning Methods
After you’ve thoroughly scrubbed your Pit Barrel Cooker, you’ll need to make certain it’s completely dry before applying any protective treatments.
The drying process prevents rust formation, while proper seasoning creates a protective barrier that keeps your grates in prime condition.
You’ll accomplish this through strategic oil application and controlled heat exposure that transforms your clean cooker into a ready-to-use cooking machine.
Essential Drying Techniques
Proper drying stands as the most vital step in maintaining your Pit Barrel Cooker’s longevity and performance. After cleaning, you’ll need to eliminate every trace of moisture to prevent rust and preserve your grill’s integrity.
The most effective approach involves lighting a small fire inside the pit, which naturally evaporates remaining moisture while heating the interior surfaces. This method guarantees complete dryness without causing thermal shock to the porcelain coating.
Essential drying steps include:
- Allow gradual cooling to prevent damage to porcelain surfaces
- Light a controlled fire to dry interior components thoroughly
- Monitor temperature to avoid excessive heat that could crack coatings
Once completely dry, your Pit Barrel Cooker’s ready for the next vital phase: proper seasoning techniques.
Oil Application Methods
Three critical oil application methods will transform your freshly cleaned Pit Barrel Cooker into a perfectly seasoned cooking machine.
First, select a high-temperature cooking oil and spread it evenly across the grates using a cloth or dedicated oil spray gun. Avoid excess oil that’ll drip and cause dangerous flare-ups.
Second, preheat your grill to 350°F for 15-20 minutes after oiling, allowing the oil to bond properly and create an effective non-stick surface.
Third, let your grill cool gradually after the seasoning process—rapid cooling can crack or damage the surface.
These oil application methods protect against rust, prevent food from sticking, and extend your cooker’s lifespan when performed regularly after each cleaning session.
Heat Seasoning Process
Once you’ve applied oil to your Pit Barrel Cooker’s surfaces, the heat seasoning process becomes your next essential step for creating a durable, protective coating.
This process bonds the high-temperature cooking oil with the metal surfaces, forming a non-stick barrier that prevents rust and sticking during future cooking sessions.
Follow these steps for proper heat seasoning:
- Preheat your cooker to 350°F and maintain this temperature for 15 to 20 minutes
- Allow the oil to properly bond with the grates and Flame Broiler plate surfaces
- Let the pit complete its full shutdown cycle to seal the protective coating
Regular heat seasoning after deep cleaning maintains your cooker’s longevity and performance, ensuring peak results for every barbecue session.
Winter Storage Best Practices
When winter approaches, you’ll need to prepare your Pit Barrel Cooker for months of storage to prevent costly damage from harsh weather conditions.
Start by ensuring your cooker is completely cleaned and cooled before putting it away. This prevents rust and corrosion during extended storage periods.
Invest in a quality Pit Barrel cover to shield your grill from snow, ice, and moisture that can cause deterioration.
Store your cooker in a dry, sheltered location away from direct weather exposure to maximize its lifespan.
Before storage, inspect and tighten any loose screws or components to prevent wear during the off-season.
If possible, elevate your Pit Barrel off the ground to avoid ground moisture contact, providing additional protection against rust and damage.
Protective Covers and Long-Term Maintenance

Beyond winter preparation, investing in quality protective covers forms the cornerstone of long-term Pit Barrel maintenance.
You’ll want covers made from heavy-duty materials like polyester with PVC backing to guarantee durability against environmental factors including rain, snow, and UV rays. This protection prolongs your grill’s lifespan while maintaining its appearance.
Regularly inspecting your cover helps identify damage or wear before it compromises protection.
Inspect your cover regularly to catch damage early before it compromises your Pit Barrel’s protection.
Additionally, implement these essential maintenance practices:
- Store your Pit Barrel in dry, elevated locations away from moisture to prevent rust and corrosion
- Conduct periodic maintenance checks, tightening loose screws as needed
- Inspect seals and gaskets to guarantee peak performance
These proactive steps keep your Pit Barrel in excellent condition for years of reliable cooking performance.
Frequently Asked Questions
Can I Store My Pellet Grill Outside?
You can store your pellet grill outside, but it’s not recommended. Use a heavy-duty weather cover, position it under shelter, keep it clean, and regularly check for rust or damage.
How Often Should You Clean Your Pit Boss Pellet Smoker?
You should clean your Pit Boss pellet smoker after every cooking session to prevent grease buildup. Perform deep cleaning every few months and scrape tuning plates every 3-5 cooks for ideal performance.
How to Properly Clean a Ball Pit?
Remove all balls and drain water. Wipe interior surfaces with mild soap solution. Soak balls in warm disinfectant water for 10-15 minutes, rinse thoroughly, air dry completely, then refill.
Can You Use Dawn Dish Soap to Clean a Smoker?
Yes, you can use Dawn dish soap to clean your smoker’s exterior surfaces. Dilute it with warm water, avoid abrasive scrubbers, and rinse thoroughly to prevent soap residue from affecting food flavor.
Leave a Reply