You’ll need a sturdy terra cotta pot, Real Flame Gel Fuel, colorful fire pit glass, and 1/4 galvanized hardware cloth to create your stunning centerpiece. Cut the mesh to wrap around your fuel can, add fire glass to the pot’s bottom, then insert the wrapped can and fill with more glass. Place on a heat-resistant surface with three feet clearance from decorations, keep sand or a fire extinguisher nearby, and guarantee proper ventilation. The following guide reveals advanced styling techniques and seasonal adaptations.
Essential Materials and Tools for Your Tabletop Fire Pit
Gathering the right materials sets the foundation for a successful tabletop fire pit project. For your DIY Tabletop Fire Pit, you’ll need Real Flame Gel Fuel, which provides clean burning without toxic emissions. This essential material guarantees safe indoor use while creating beautiful flames.
Fire pit glass in various colors enhances your centerpiece’s visual appeal. You’ll require a sturdy terra cotta pot as your base container and 1/4 galvanized hardware cloth for structural support and proper ventilation around the fuel can.
The tools needed include wire snips for cutting hardware cloth to size, a sharpie for marking precise measurements, and a lighter for ignition.
Always place your finished fire pit on a heat-resistant surface to protect your table, and maintain constant supervision while the flame burns.
Safety Considerations and Placement Guidelines
You’ll need to choose the right fuel and avoid flammable liquids to keep your tabletop fire pit burning safely.
Place your fire pit on a stable, heat-resistant surface that won’t catch fire or sustain damage from the flames.
Keep fire extinguishing materials like sand or water within arm’s reach so you’re prepared to handle any emergency quickly.
Safe Fuel Selection
When choosing fuel for your tabletop fire pit, you’ll want to prioritize clean-burning, non-toxic options like Real Flame Gel Fuel or bioethanol that produce minimal harmful emissions. These non-toxic options create beautiful clean-burning flames while reducing fire hazards considerably.
| Fuel Type | Safety Rating | Emission Level |
|---|---|---|
| Real Flame Gel Fuel | Excellent | Minimal |
| Bioethanol | Excellent | Very Low |
| Isopropyl Alcohol | Poor | High |
Safe fuel selection directly impacts your family’s health and safety. Avoid using household items like rubbing alcohol or improvised fuels, as they create toxic fumes and unpredictable flames. Quality fuels burn consistently without producing smoke or dangerous gases. Always purchase fuel from reputable manufacturers who specify their products are designed for indoor tabletop use.
Proper Surface Placement
Proper placement of your tabletop fire pit forms the foundation of safe indoor entertaining.
You’ll need to position your DIY fire pit on a stable surface that won’t wobble or shift during use. Choose non-flammable materials like stone, metal, or ceramic to avoid fire hazards that could damage your table underneath.
Maintain at least three feet of clearance from decorations, curtains, or overhead structures. This distance prevents accidental ignition and gives you adequate space to manage the flames safely.
Select areas with proper ventilation to allow smoke dispersal and guarantee clean combustion.
Keep your fire pit away from high-traffic zones where guests might accidentally bump into it.
Always have extinguishing tools nearby and monitor the flames continuously throughout your event.
Fire Extinguishing Methods
While tabletop fire pits create stunning ambiance, having the right extinguishing methods within arm’s reach can mean the difference between a memorable evening and a dangerous situation.
You’ll want to keep a fire extinguisher or bucket of sand nearby for quick access. These fire extinguishing methods should be positioned strategically around your outdoor space where guests can easily reach them.
Don’t rely on water alone, as it can cause dangerous splattering with certain fuel types. Sand works effectively by smothering flames completely.
Make sure everyone knows where safety measures are located before lighting your fire pit. Practice using your chosen extinguishing method beforehand so you’re prepared. Quick response times are vital when dealing with unexpected flare-ups or emergencies.
Step-by-Step Assembly Process
Five essential steps will transform your materials into a functional tabletop fire pit.
First, measure your fuel can’s diameter—typically 11 inches—and cut a rectangle from galvanized hardware cloth that’s three times this measurement. This DIY approach guarantees proper support for your tabletop firepit project.
Precise measurements and quality materials form the foundation of any successful DIY tabletop fire pit construction project.
Next, wrap the mesh around the can’s top and secure with wire, extending it above the rim.
Add fire glass to your decorative pot’s bottom before inserting the mesh-wrapped can. Fill around the can with more fire glass up to the mesh’s top.
For ignition, only remove the fuel can lid when ready to light. Replace it afterward to extinguish flames safely.
These table centerpiece ideas create stunning outdoor decor that’s both functional and beautiful.
Fuel Options and Burning Techniques

Once you’ve assembled your tabletop fire pit, selecting the right fuel becomes vital for safe and attractive flames. Your fuel options include Real Flame Gel Fuel, isopropyl alcohol, and bio ethanol—all providing clean-burning flames perfect for indoor and outdoor use.
- Ventilation matters: Don’t completely cover the fuel can with decorative materials to guarantee proper airflow.
- Timing is important: Remove the fuel can lid only when ready to ignite, replacing it immediately after extinguishing.
- Enhance aesthetics: Surround your fuel with fire glass or heat-resistant decorative stones for visual appeal.
- Monitor constantly: Keep flammable materials at safe distances and watch flames closely throughout use.
These burning techniques guarantee you’ll enjoy beautiful, safe burning while creating an inviting centerpiece atmosphere.
Decorative Elements and Styling Ideas
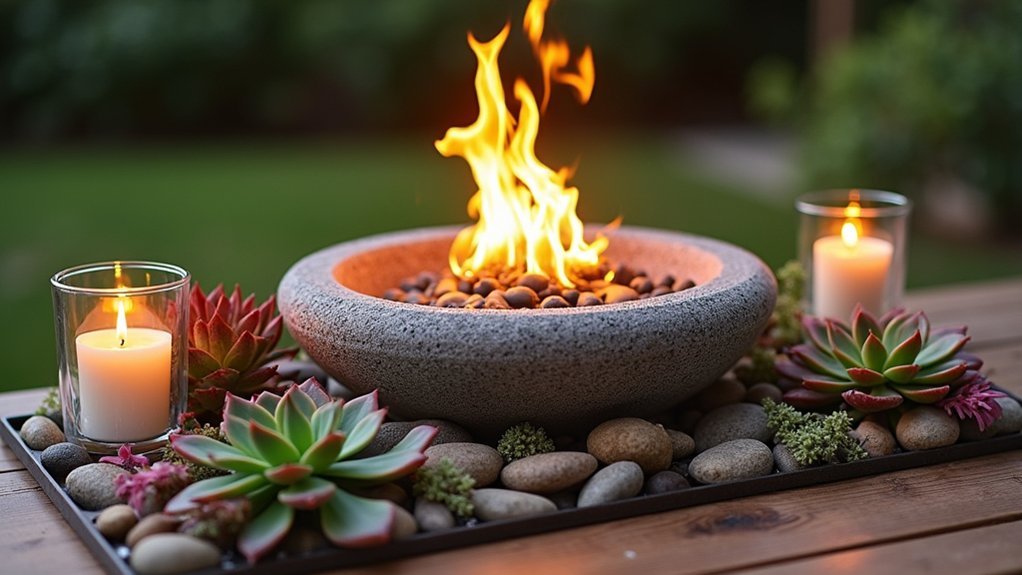
Transform your tabletop fire pit from a simple flame source into a stunning centerpiece with thoughtful decorative elements that reflect your personal style. Incorporate decorative fire pit glass in vibrant colors like light green or onyx black to enhance your fire’s visual impact.
Transform your tabletop fire pit into a stunning centerpiece with thoughtful decorative elements that reflect your unique personal style.
Surround the pit with natural elements such as driftwood or stones for rustic outdoor charm.
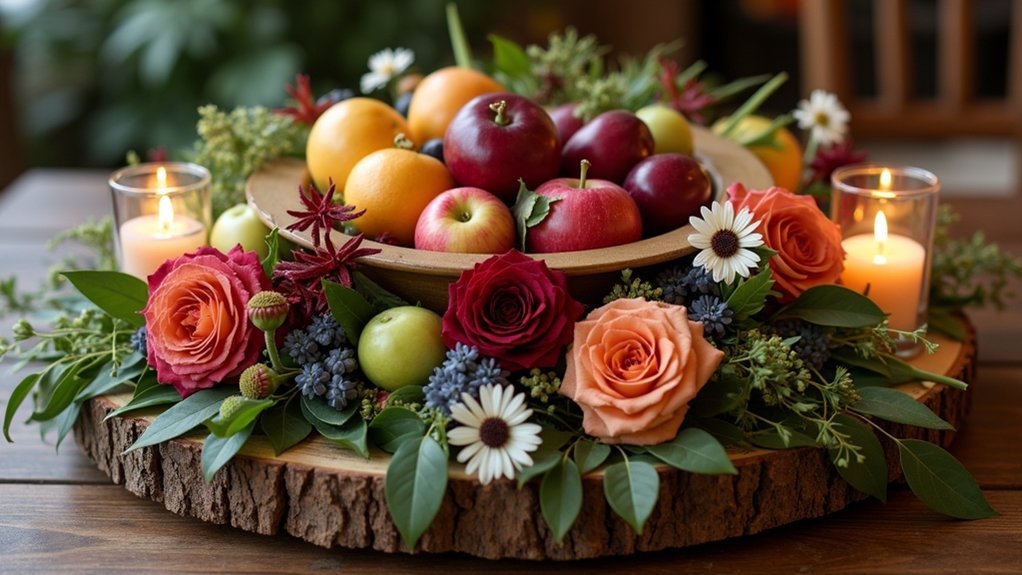
Elevate your Tabletop Decor Ideas by pairing the fire pit with woven chargers that add texture and sophistication. Create balance with seasonal flowers displayed in hurricane vases on either side of your centerpiece.
For magical evening ambiance, arrange fairy lights or candles around the pit’s perimeter. These decor choices transform simple outdoor gatherings into elegant experiences, making your fire pit the perfect focal point for memorable social interactions.
Seasonal Variations and Theme Adaptations

Your tabletop fire pit centerpiece can showcase the beauty of each season through carefully chosen decorative elements that capture nature’s changing moods.
These seasonal variations transform your centerpiece design while enhancing home ambiance year-round.
For autumn displays, arrange pumpkins and colorful fall leaves around your tabletop fire pit.
Winter themes work beautifully with evergreen branches and pine cones, creating cozy holiday atmospheres.
Spring adaptations shine with pastel tulips and fresh lilacs that celebrate renewal and growth.
- Summer vibes: Incorporate vibrant flowers, citrus elements, shells, and sand for beach-themed gatherings
- Winter warmth: Use evergreen branches, pine cones, and festive decorations for holiday charm
- Spring freshness: Feature pastel colors with tulips, lilacs, and other seasonal blooms
- Scented enhancement: Add candles or essential oils for multisensory experiences
Maintenance and Storage Tips
While your tabletop fire pit brings warmth and ambiance to gatherings, proper maintenance guarantees it’ll continue performing safely for years to come.
Clean the fire glass regularly and inspect fuel cans for wear or damage to confirm safe operation. Check your fuel supply frequently, replacing it according to manufacturer guidelines for proper storage of flammable materials.
When not using your fire pit, cover it with a protective lid to keep dust and debris away.
For long-term storage, bring the unit indoors during off-seasons to protect it from harsh weather that could damage materials. Avoid exposing your fire pit to excessive moisture, and always use heat-resistant surfaces underneath to prevent table damage and promote ideal longevity.
Frequently Asked Questions
What Are the Don’ts in Making a Table Centerpiece?
Don’t use flammable materials, glass containers, or overly complex designs. You shouldn’t overcrowd with decorations or neglect safety precautions. Avoid unsuitable materials that can’t handle heat properly.
What Is the Rule With Centerpieces?
You should keep centerpieces between 12-24 inches tall, guarantee they don’t obstruct conversation, leave 12 inches space on each side for dishes, and match the occasion’s formality level.
What Makes a Good Centerpiece for a Table?
You’ll create a good centerpiece by choosing theme-appropriate elements, maintaining proper proportions, incorporating varied heights and textures, adding natural elements, and ensuring it’s functional without obstructing conversation or dining space.
What Do I Need for a Tabletop Fire Pit?
You’ll need Real Flame Gel Fuel, a clay or cement pot base, fire pit glass, 1/4 galvanized hardware cloth, wire snips, a sharpie, securing wire, and a lighter.
Leave a Reply