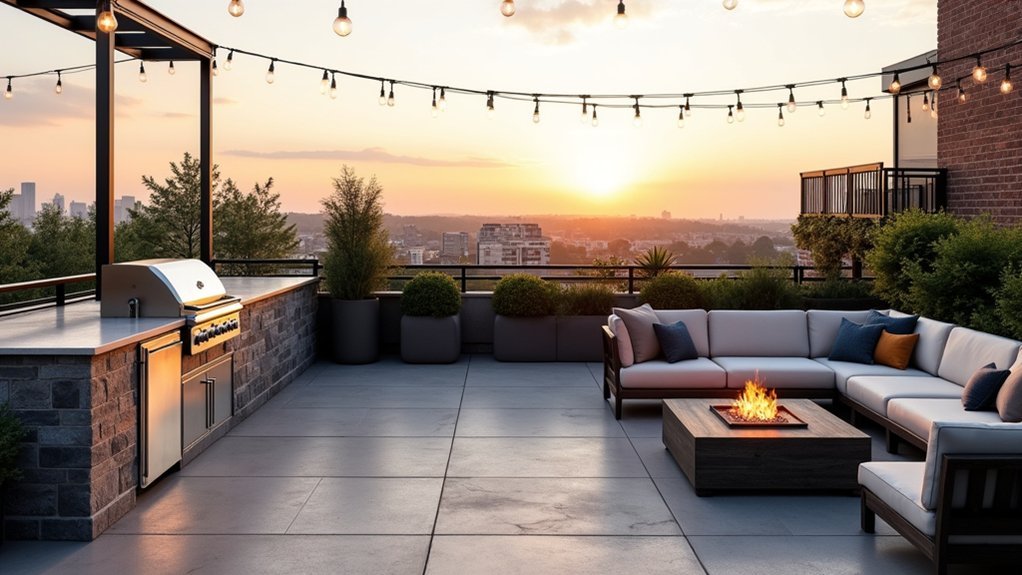
Your deck kitchen’s footprint matters less than its configuration. An L-shaped or linear layout tucked against one or two edges can free up to 70% more usable gathering space than a centered island design. You’ll want to position your grill at the corner apex or along a single wall, keeping prep counters within arm’s reach while leaving the central deck open for guests. Each layout option below offers distinct advantages for your entertaining style.
L-Shaped Deck Kitchen Designs for Open Gathering Areas

When you’re designing an outdoor cooking space that encourages guests to mingle freely, an L-shaped deck kitchen creates the perfect balance between functionality and social flow.
L-shaped deck kitchens let you cook and socialize simultaneously, keeping the party flowing around you.
This configuration tucks your grill, prep counter, and storage into two perpendicular walls, leaving the remaining deck area completely open for seating and conversation.
You’ll find the L-shape works exceptionally well because it keeps the cook connected to guests without blocking traffic patterns.
Position your grill at one end and your beverage station at the other to create natural movement zones.
The corner junction provides prime real estate for a built-in smoker or additional counter space.
You can face outward while preparing food, maintaining eye contact and conversation with your guests rather than turning your back on the party.
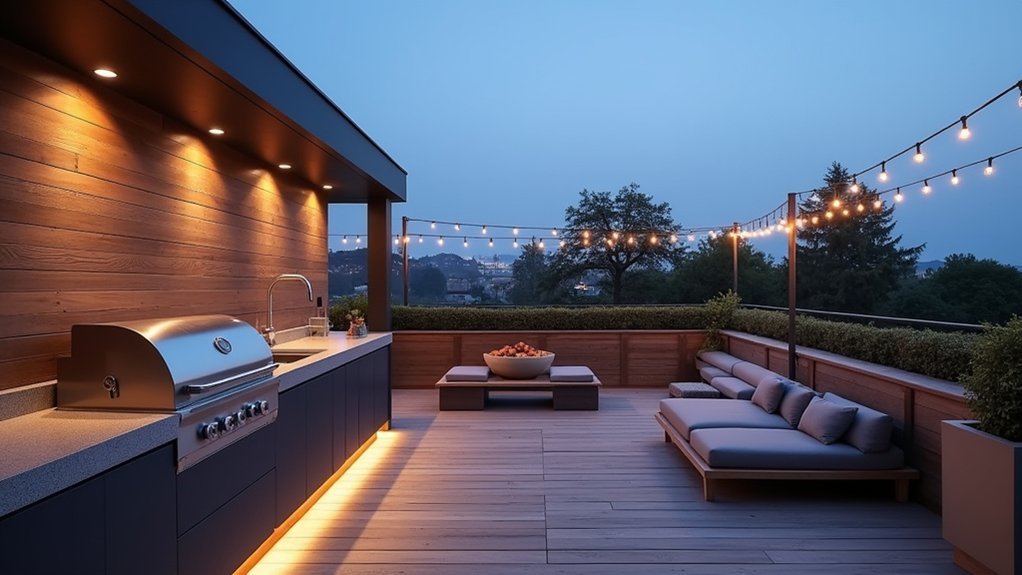
Linear Kitchen Layouts That Create Maximum Flow Space
Although L-shaped configurations offer excellent corner utility, a linear deck kitchen stretches your cooking zone along a single wall to maximize open floor space for guests.
You’ll gain unobstructed traffic patterns that let people move freely between seating areas, the grill station, and entertainment zones.
This single-wall approach works exceptionally well on narrow decks where every square foot matters.
Benefits of linear deck kitchen layouts:
- You create one efficient work zone that keeps all appliances within arm’s reach
- Guests can interact with you without crowding the cooking area
- You’ll spend less on countertop materials with a streamlined footprint
- Installation becomes simpler with utilities running along one wall
Position your linear kitchen against your home’s exterior wall to keep plumbing and electrical connections accessible.
U-Shaped Cooking Stations With Built-In Seating Options
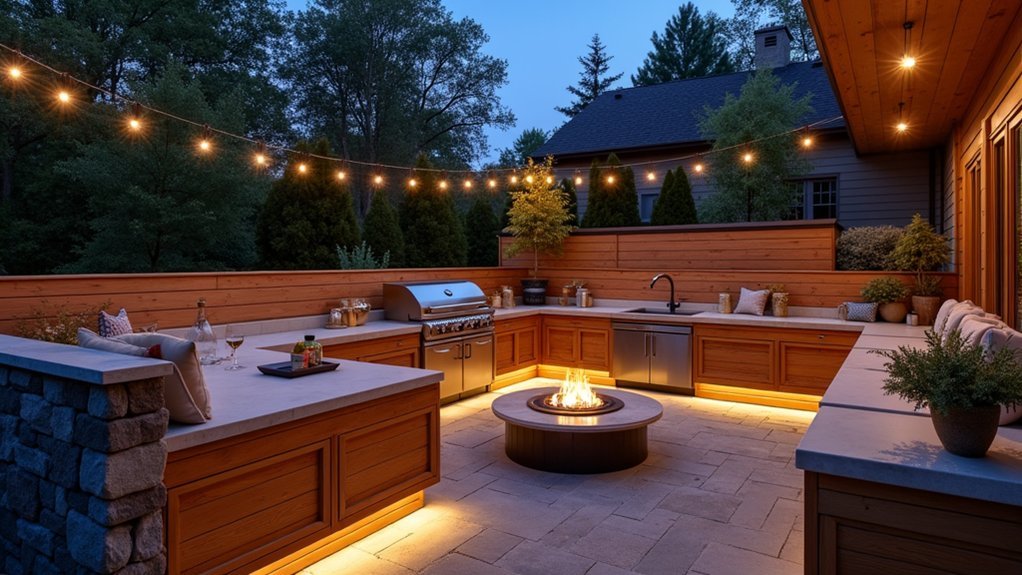
A U-shaped cooking station transforms your deck into an efficient entertaining hub where guests can gather around wraparound counter seating while you prepare food just steps away.
You’ll want to position your seating areas on the outer edges of the U, keeping the interior workspace clear for cooking and prep activities.
Strategic placement of entry points at the open end of the U optimizes traffic flow, preventing bottlenecks while allowing easy access for both the cook and guests.
Wraparound Counter Seating Benefits
Wraparound counter seating opens up your deck kitchen to genuine social cooking experiences that standard linear layouts simply can’t match. Your guests stay engaged with you while you prep and cook, eliminating the isolation that traditional kitchen setups create.
This configuration transforms your cooking station into the entertainment hub it should be. You’ll maximize your deck’s square footage while accommodating more guests in less space.
Key benefits you’ll experience:
- Guests face each other naturally, encouraging conversation across the counter
- You maintain eye contact with everyone while working at the grill or prep area
- The continuous surface doubles as a buffet line during larger gatherings
- Traffic flows smoothly around the perimeter without interrupting your cooking zone
Traffic Flow Optimization Tips
When you’re designing a U-shaped cooking station, traffic flow becomes your most critical consideration for keeping guests comfortable and your cooking efficient. Position your primary cooking zone at the back of the U, creating a natural barrier between hot surfaces and passing guests.
Leave at least 42 inches of clearance between the U’s opening and any seating areas. This width allows two people to pass comfortably without disrupting your workflow. Place frequently accessed items like beverages and appetizers at the counter’s outer edges so guests can serve themselves without entering your workspace.
Install built-in seating along the U’s exterior perimeter, facing outward toward your deck’s views. This arrangement keeps conversation flowing while maintaining clear sightlines between you and your guests throughout the evening.
Island-Centered Deck Kitchens for 360-Degree Access
Island-centered deck kitchens transform how you interact with guests by eliminating the barrier between cook and company. You’ll move freely around all sides while maintaining eye contact and conversation with everyone present. This layout turns meal preparation into a social activity rather than an isolating task.
The central positioning creates natural gathering zones where guests can pull up stools or stand comfortably without crowding your workspace.
Key benefits of island-centered layouts:
- Multiple people can assist with prep simultaneously from different angles
- Serving becomes seamless since guests access dishes from any direction
- You maintain clear sightlines to children, the pool, or other deck activities
- Heat and smoke disperse more effectively without walls trapping them
Position your island at least 42 inches from deck railings for ideal circulation.
Galley Style Arrangements Along Deck Perimeters
When you position your deck kitchen components along the perimeter in a galley configuration, you’ll gain maximum linear counter space for food prep and serving stations.
This arrangement keeps cooking equipment and surfaces along one or two parallel walls, freeing up the central deck area for guests to mingle without disrupting your workflow.
You’ll want to plan your traffic flow carefully, placing frequently accessed items like the grill and beverage station at opposite ends to prevent bottlenecks during peak entertaining moments.
Maximizing Linear Counter Space
Stretching your prep surfaces along the deck’s railing or perimeter walls creates an efficient workflow that keeps everything within arm’s reach. You’ll move seamlessly from chopping to grilling without crossing through your guests’ gathering space.
Linear counter arrangements work exceptionally well because they maximize usable workspace while minimizing your kitchen’s footprint. You’re effectively borrowing space from the deck’s edge rather than stealing it from the center.
Consider these strategies for ideal linear counter placement:
- Position counters at 36 inches high for comfortable standing prep work
- Install continuous surfaces without gaps to prevent food debris accumulation
- Place your most-used items at the counter’s midpoint for balanced access
- Add under-counter storage to keep supplies hidden but accessible
This approach leaves your deck’s center open for mingling guests.
Traffic Flow Optimization
Your linear counter setup naturally leads to the next consideration: how people move around it. A galley-style arrangement positioned along your deck’s perimeter creates a natural circulation path through the center of your entertaining space.
You’ll want to maintain at least 42 inches of clearance between your counter edge and any seating or railings. This allows guests to pass behind someone grilling without disrupting the cook’s workflow. Position your primary cooking station away from high-traffic entry points to prevent bottlenecks.
Consider placing your prep zone closest to interior door access, making supply runs efficient. Your serving area should face the main gathering space, creating a natural bar-style interaction point. This perimeter placement keeps hot surfaces safely away from wandering guests while maximizing your deck’s open center for mingling.
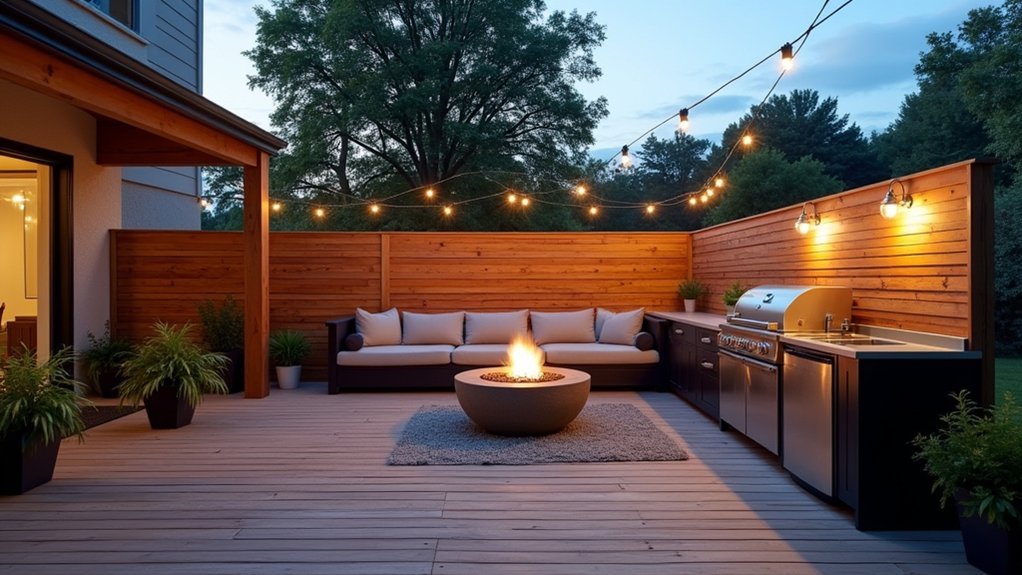
Multi-Zone Deck Layouts Separating Cooking and Dining Areas
Creating distinct zones on your deck transforms a simple outdoor space into a functional entertainment hub where cooking activities don’t interfere with guest comfort.
Smart deck zoning creates seamless entertaining by separating cooking chaos from guest comfort zones.
Strategic zone separation keeps smoke, heat, and prep chaos away from your guests while maintaining easy host-to-guest interaction. You’ll want to position your cooking zone near the house for utility access while placing dining areas where views and breezes are ideal.
Key zone separation strategies:
- Use planters or built-in benches as natural dividers between cooking and dining spaces
- Position your grill station at least 8 feet from seated dining areas
- Create a connecting bar or serving counter between zones for food handoffs
- Designate a separate lounge zone with comfortable seating for pre-dinner gatherings
Corner Kitchen Configurations That Free Up Central Space
When you’re designing a deck kitchen for entertaining, an L-shaped corner configuration gives you the best of both worlds—functional workspace tucked neatly along two adjacent edges while your guests enjoy an open central gathering area.
You’ll want to position your grill at the corner’s apex with prep counters extending along both arms, creating an efficient workflow that keeps you connected to the party without blocking foot traffic.
Strategic appliance placement along this layout means your most-used items stay within arm’s reach while bulkier equipment like refrigerators anchor the ends, maintaining clear pathways for guests moving between zones.
L-Shaped Layout Benefits
Because outdoor entertaining demands flexibility and flow, the L-shaped deck kitchen layout stands out as one of the smartest configurations you can choose.
This design tucks your cooking zone into two perpendicular walls, opening up the central deck area for guests to mingle freely.
You’ll find the L-shape creates a natural work triangle between your grill, prep station, and sink while keeping traffic out of your cooking space.
Key benefits of an L-shaped deck kitchen:
- Maximizes open floor space for seating and socializing
- Creates efficient workflow with everything within arm’s reach
- Allows the cook to face guests while preparing food
- Provides flexible counter space along two separate walls
This layout works exceptionally well on medium to large decks where entertainment takes priority.
Maximizing Traffic Flow
Corner kitchen configurations take the L-shaped concept further by tucking all cooking elements into a single deck corner.
You’ll position your grill, prep counter, and storage units at a 90-degree angle, creating a compact workstation that leaves the remaining deck area completely open for guests.
This setup eliminates the common problem of guests wandering through your cooking zone.
You’re stationed in one corner while traffic flows naturally around the perimeter.
Your guests can move freely between seating areas, the dining table, and entry points without crossing your workspace.
You’ll also benefit from improved sightlines.
From your corner position, you can monitor the entire entertainment space while cooking.
Place your most-used items within arm’s reach, and you’ll minimize movement while maximizing interaction with your guests.
Strategic Appliance Placement
Positioning your grill at the corner’s apex creates the foundation for an efficient outdoor kitchen that keeps the deck’s center completely clear.
This configuration naturally directs cooking smoke away from your guests while giving you sightlines to the entire entertaining area.
When arranging your corner setup, follow these placement priorities:
- Install the grill at the corner’s point, angled at 45 degrees for prime access
- Place your refrigerator on the shorter cabinet run, closest to the house for easier electrical connections
- Position prep counters between the grill and fridge to create a functional work triangle
- Mount side burners adjacent to the grill for seamless multi-dish cooking
You’ll maintain conversation with guests while preparing food, transforming cooking from isolation into entertainment.
Split-Level Deck Designs With Dedicated Kitchen Platforms
With multiple elevation changes, split-level deck designs create natural zones that separate your cooking area from dining and lounging spaces. You’ll find that positioning your kitchen on a dedicated platform keeps smoke, heat, and food prep away from guests while maintaining visual connection.
| Level Type | Best Use |
|---|---|
| Upper platform | Grill station and prep counter |
| Lower platform | Dining table and seating |
| Transitional steps | Built-in planters or drink rails |
| Ground level | Fire pit or conversation area |
When you’re designing your split-level layout, consider placing your kitchen platform 8-12 inches above your main entertaining space. This height difference allows you to interact with guests while cooking and creates a natural stage for your culinary work.
Wraparound Counter Layouts for Serving and Socializing
Wraparound counters open up your outdoor kitchen by creating a U-shaped or L-shaped workspace that naturally draws guests into the cooking experience.
Transform your outdoor kitchen into a gathering space with wraparound counters that invite guests to join the experience.
You’ll find this layout transforms your deck into a social hub where friends can gather without crowding your prep space.
The extended counter surface serves multiple purposes—you’re cooking on one side while guests enjoy drinks and appetizers on the other.
Benefits of wraparound counter layouts:
- Provides bar-style seating that keeps guests engaged while you grill
- Separates hot cooking zones from casual dining areas for safety
- Maximizes serving space during large gatherings without requiring additional tables
- Creates natural traffic flow that prevents bottlenecks near cooking equipment
Position your wraparound counter facing your deck’s best views to enhance the entertainment atmosphere.
Modular Kitchen Components for Flexible Entertainment Setups
Modular kitchen components let you switch up your deck’s layout whenever your entertaining needs change. Rolling carts, portable prep stations, and freestanding grills give you the freedom to reconfigure your space based on guest count and event type.
You’ll find that modular units with locking casters provide stability during use while allowing easy repositioning. Consider investing in stackable storage modules and collapsible work surfaces that you can store when not needed.
For maximum flexibility, choose components with standardized heights so they align seamlessly when grouped together. Stainless steel units withstand weather exposure and clean up quickly after events.
You can expand your cooking capacity for large gatherings by adding temporary modules, then scale back to a minimal footprint for everyday family meals on the deck.
Frequently Asked Questions
What Permits Are Required Before Installing an Outdoor Deck Kitchen?
You’ll typically need a building permit, electrical permit, gas permit if connecting gas lines, and plumbing permits for water features. Check your local zoning regulations and HOA requirements before starting your outdoor deck kitchen project.
How Much Does a Typical Deck Kitchen Installation Cost?
You’ll typically spend between $5,000 and $20,000 for a deck kitchen installation. Your final cost depends on appliance quality, countertop materials, plumbing requirements, and whether you’re adding gas lines or electrical upgrades.
What Weather-Resistant Materials Work Best for Outdoor Kitchen Appliances?
You’ll find stainless steel 304 or 316 grade works best for outdoor appliances, resisting rust and corrosion effectively. You should also consider powder-coated aluminum and marine-grade polymers that’ll withstand rain, humidity, and temperature extremes.
How Do You Properly Winterize a Deck Kitchen in Cold Climates?
You’ll need to drain all water lines, disconnect gas connections, and cover appliances with weatherproof covers. Don’t forget to remove portable items and seal cabinet doors to prevent moisture damage throughout winter.
What Electrical and Plumbing Requirements Are Needed for Deck Kitchens?
You’ll need a dedicated 20-amp GFCI circuit for outlets, potentially 240V for electric grills, and weatherproof covers. For plumbing, you’ll require hot and cold water lines, proper drainage, and freeze-proof connections in colder regions.


Leave a Reply