You’ll start by pouring a concrete slab foundation and building adobe-inspired walls with dry-stacked blocks. Next, you’ll create the dome using compacted clay-sand mix over a sand form, then add insulation layers with sawdust and clay-straw plaster. After a three-week drying period, you’ll construct a sealed door and conduct staged fire tests. Finally, you’ll integrate cooking elements like grills, smokers, and a sink around your oven centerpiece. Discover the specific techniques and layouts that’ll transform your backyard into a fully functional outdoor kitchen.
Planning Your Layout and Design Concept
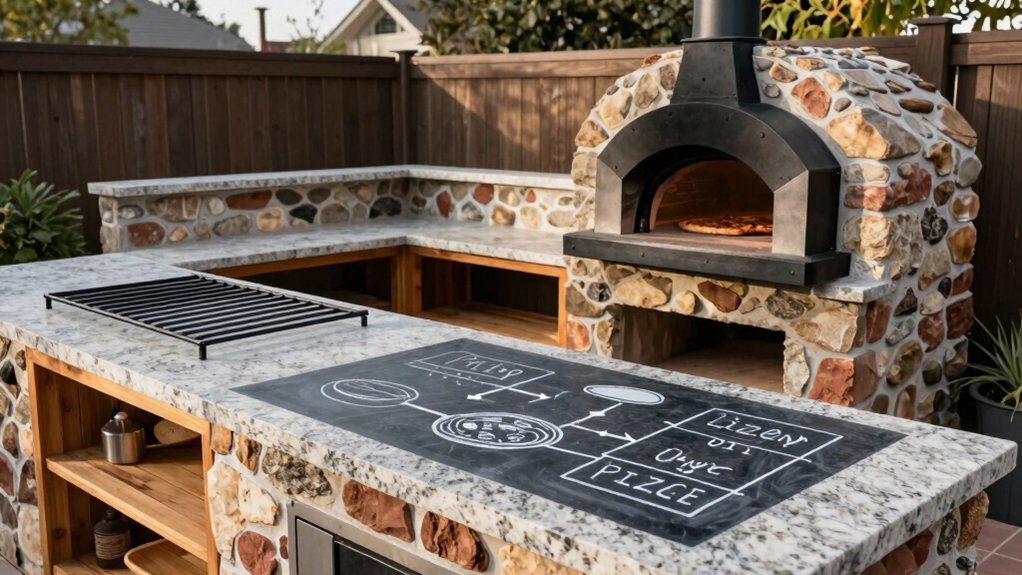
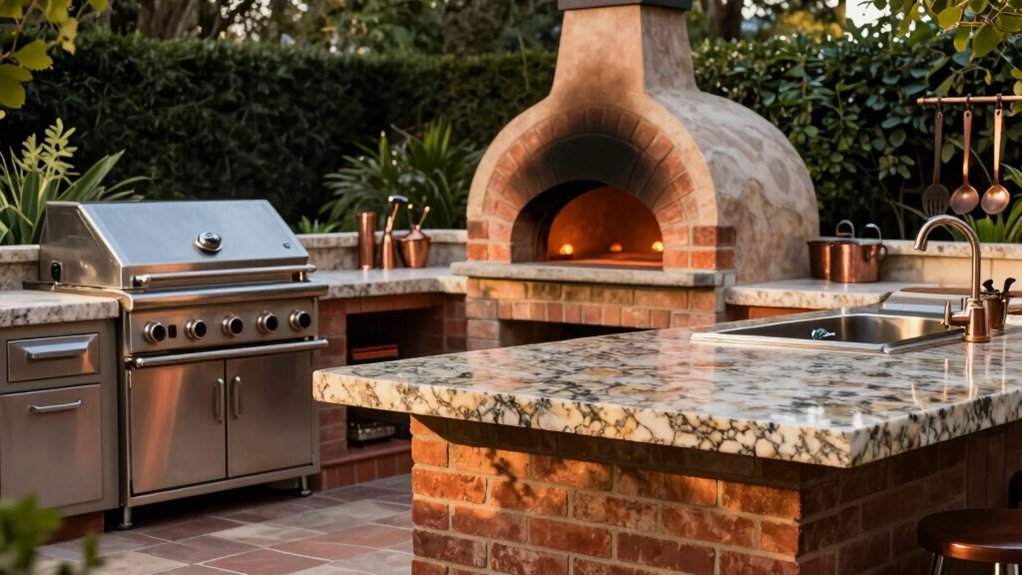
Where should your pizza oven sit within your outdoor kitchen? Position it as your central focal point, ideally in a corner where an L-shaped counter naturally frames the space. This layout maximizes efficiency while creating a visually cohesive design.
Consider an adobe-inspired aesthetic with planter blocks forming structural support. You’ll want to integrate complementary cooking elements—a gas grill, charcoal grill, smoker, 2-burner gas hob, sink, and refrigerator—around your oven to establish a complete cooking zone.
Prioritize airflow and moisture management from the start. Design a ventilated roof system that keeps your oven dry while improving heat retention. Make the front roof removable for safe access and heat containment. Draw inspiration from community forums and shared builds to refine both functionality and visual appeal before breaking ground.
Building the Foundation and Base Structure
How you lay your foundation determines everything that follows—structural integrity, heat retention, and longevity all depend on getting this right. You’ll start by pouring a concrete slab, then build walls atop it using dry-stacked blocks within a planter-based support system. Four square flag stones provide interim support during construction.
| Component | Material | Purpose |
|---|---|---|
| Base Slab | Concrete | Primary structural support |
| Hearth | Concrete with board base | Heat containment and rot prevention |
| Foundation Layer | Adobe clay and slip mix | Leveling and insulation |
Next, you’ll prepare your hearths by pouring concrete and fitting a concrete board base for added strength. The adobe clay and clay slip mix creates a level, well-insulated foundation for your fire bricks. Consider adding rebar reinforcement for durability. This layered approach ensures proper heat distribution and lasting performance.
Constructing the Oven Dome and Insulation
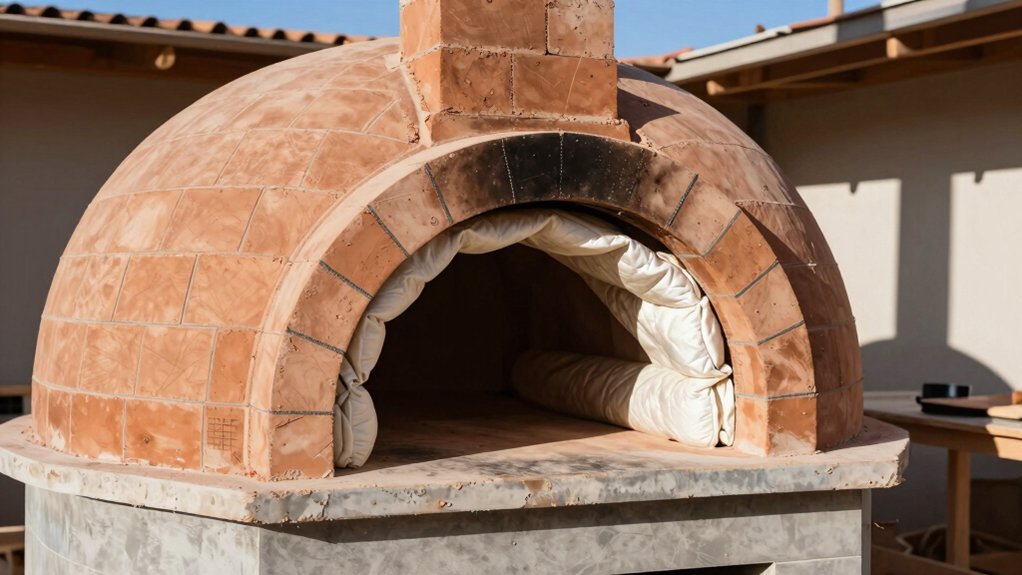
With your foundation set, you’re ready to shape the oven’s heart—the dome itself. You’ll create it using a compacted clay-sand mix molded over a sand form, reaching approximately 16 inches in height. This non-straw approach provides structural integrity while you work.
Next, you’ll build your insulation system in layers. Start with a clay slip base mixed with sawdust, creating loose pockets about 4 inches thick. Follow this with a thin clay-sand-straw plaster layer roughly 1 inch thick for added protection.
Install a removable ventilated roof to enhance dryness and reduce moisture retention. This crucial addition improves heat retention while protecting your dome during the 3-week drying period under tarpaulin. Allow adequate time for proper curing before proceeding to fire testing.
Drying, Testing, and Installing the Door
After you’ve installed your insulation layers, you’ll need to manage moisture carefully during a drying phase that typically lasts about three weeks under protective covering.
You’ll want to monitor temperatures with a flue thermometer and conduct careful fire testing to ensure your oven’s structural integrity before regular use.
Finally, you’ll construct a custom door from 4×4 fence posts and use an electric planer to achieve an airtight fit that reduces heat loss and maintains cooking efficiency.
Moisture Management and Drying
Why does patience matter most when your pizza oven is freshly built? Moisture trapped within the clay will crack your structure if you rush the drying process.
You’ll need a strategic approach to managing this moisture:
- Start with small fires using tea lights or candles, gradually progressing to larger burns—this minimizes hairline cracks and controls curing stresses.
- Install a ventilated roof and removable front on your enclosure to improve dryness and reduce moisture ingress during storage and drying phases.
- Place a flue thermometer inside without exposing flame, allowing you to monitor moisture and heat while managing drying progression effectively.
Apply multi-layer insulation—a clay slip with sawdust (~4″ thick) plus thin clay-sand-straw plaster (~1″ thick)—to enhance heat retention. Your sealed door with stove rope maintains consistent temperatures throughout the entire process.
Fire Testing Protocol
Once your drying strategy’s in place, it’s time to test your pizza oven’s readiness through controlled burns. Start with tea lights, large chunky candles, and small fires to monitor crack formation and heat behavior. You’ll likely notice early cracks forming outside (~5 mm) while the interior stays crack-free, signaling the need for improved insulation and venting. Address these issues by enhancing your roof ventilation and enclosure sealing to reduce moisture.
Next, design and install a proper door using three 4×4 fence post pieces with a carved handle and stove rope seal. This addition minimizes airflow loss and boosts heat retention significantly. After multiple fires, conduct pizza tests. Expect cook times around 5–6 minutes initially, with improvements as drying and insulation enhance heat retention capabilities.
Door Construction and Sealing
How critical is a well-sealed door to your pizza oven’s performance? Extremely—it directly impacts heat retention and airflow control.
Start by constructing your door from three 4×4 fence posts, then refine it with an electric planer for a precise fit. You’ll want to:
- Route a gully into the door frame and install stove rope seal for airtight sealing
- Position a flue thermometer to monitor oven temperature without exposing the flame
- Apply removable front roof segments to enhance dryness and prevent moisture ingress
After initial fire testing, inspect for hairline cracks that indicate heat loss. These gaps compromise your oven’s efficiency and cooking performance. Seal any cracks immediately and verify the door closes completely. This investment in proper sealing ensures consistent temperatures and optimal pizza-cooking results.
Integrating Your Kitchen Components
The true magic of your outdoor kitchen emerges when you thoughtfully position each element to create a unified, functional space. You’ll want your pizza oven anchored in the corner, with your grill positioned to its left. This L-shaped counter arrangement maximizes workflow and encourages natural movement between cooking stations.
| Component | Placement | Purpose | Benefit |
|---|---|---|---|
| Pizza Oven | Right corner | Primary focal point | Heat retention & efficiency |
| Grill | Left of oven | Secondary cooking | Versatile meal prep |
| Stone Planter Stand | Foundation base | Structural support | Aesthetic integration |
| Counter Space | Between stations | Prep & service | Seamless transitions |
Your stone planter-style stand connects these elements visually while maintaining proper spacing for safety and accessibility. This integrated design transforms separate components into one cohesive cooking hub that enhances both functionality and aesthetic appeal.
Cooking and Pizza Recipes

With your outdoor kitchen properly arranged and your pizza oven built, you’re ready to put it to work. You’ll achieve authentic Napoletana-style pizzas by following a dough recipe emphasizing proper hydration and fermentation techniques. Your brick oven reaches ideal temperatures quickly, delivering perfectly baked pizzas in just 5–6 minutes.
Master your cooking process with these essential steps:
- Use your flue thermometer to monitor internal temperatures without exposing the flame, ensuring precise cooking control
- Prepare dough using traditional Napoletana methods that develop flavor through extended fermentation
- Manage airflow with your three-piece door, adjusting heat retention for consistent results
As your oven seasons through multiple fires, insulation improves and moisture decreases, enhancing performance. Document your experiments to refine technique and timing.
Frequently Asked Questions
What Permits or Building Codes Apply to Outdoor Pizza Ovens in Residential Areas?
You’ll need to check your local building codes and zoning regulations, as requirements vary by jurisdiction. Most areas require permits for permanent structures, setback distances from property lines, and compliance with fire safety standards. Contact your municipal building department for specific guidelines.
How Much Does It Typically Cost to Build a Complete Outdoor Pizza Oven?
You’ll typically spend $3,000 to $5,000 building a complete outdoor pizza oven yourself. If you’re purchasing a pre-made kit, you’re looking at $1,500 to $3,000. Professional installation’ll cost you considerably more, ranging from $5,000 to $10,000+.
What Safety Precautions Should Be Taken When Operating a Wood-Burning Pizza Oven?
You should wear heat-resistant gloves and keep flammable materials away from your oven. You’ll want to use long-handled tools, ensure proper ventilation, never leave your fire unattended, and keep a fire extinguisher nearby for emergencies.
Can a Pizza Oven Be Built in a Small Yard or Apartment Balcony?
You can absolutely build a pizza oven in a small yard or apartment balcony by choosing a compact model. You’ll want to select a smaller, portable unit that you can safely install on reinforced surfaces while adhering to local building codes.
How Do You Maintain and Clean a Pizza Oven After Regular Use?
You’ll maintain your pizza oven by sweeping out ash after each use, wiping the interior with a damp cloth, and checking for cracks seasonally. You should cover it when not in use to prevent weather damage and rust.


Leave a Reply