You’ll want to position your kitchen 10–15 feet from the pool edge to minimize splash damage while maintaining clear sightlines for safety. Plan utilities—water, gas, and electrical—before installation begins. Choose weather-resistant materials and durable appliances that withstand poolside conditions. Integrate dining and refrigeration nearby to streamline service. Work with a landscape designer to optimize your layout for both functionality and visibility. There’s more to explore about specific placement strategies and equipment selection.
An Outdoor Kitchen by the Pool Should Have Good Views
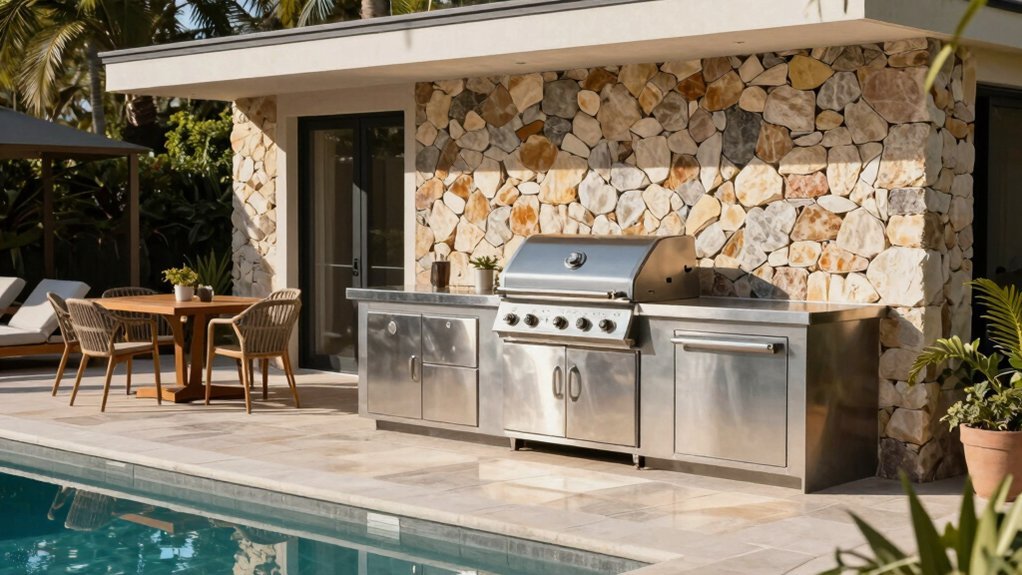
Why settle for an outdoor kitchen that turns its back to the action? Position your kitchen to command a clear view of the pool so you can supervise swimmers while you cook. This strategic placement enhances safety by allowing you to watch activities constantly without interruption.
If you’re installing your kitchen under a pavilion, ensure no walls or beams obstruct your sightlines to the water. Work with a landscape designer who’ll optimize your layout for unobstructed pool views. You’ll create shared experiences with family and friends, transforming meal preparation into quality time together.
A well-positioned outdoor kitchen becomes a central gathering hub where you’re never disconnected from the fun. You’ll cook confidently while staying connected to everyone enjoying the pool.
Get Out of the Splash Zone
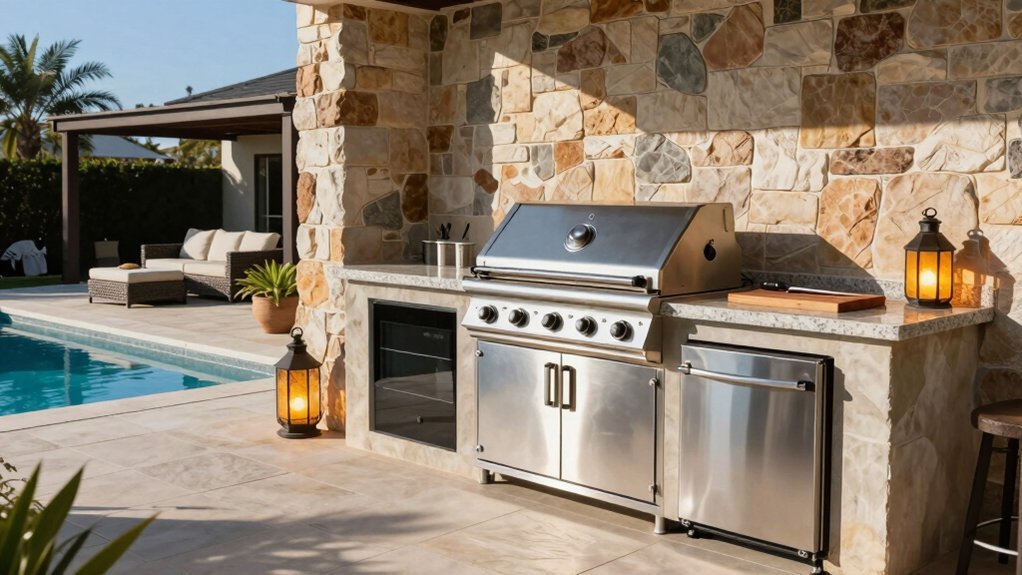
While positioning your outdoor kitchen for pool views is important, you’ll also want to keep it far enough away to avoid constant splashing and water damage.
Strategic placement protects your appliances and countertops from the inevitable chaos of pool activities. Consider these placement strategies:
Strategic placement protects your outdoor kitchen appliances and countertops from the inevitable chaos of pool activities.
- Position your kitchen at least 10-15 feet from the pool edge to minimize splash exposure
- Choose U-shaped or wraparound designs that reduce water interference while maintaining sightlines
- Account for cannonballs, diving, and vigorous swimming when determining distance
- Install your kitchen under a pavilion with an unobstructed view of the water
A landscape designer can help you find the optimal spot that balances safety, visibility, and protection. This thoughtful positioning ensures your outdoor kitchen remains functional and enjoyable for years to come.
An Outdoor Kitchen by the Pool Might Include a Dining Space
You’ll want to decide whether you’re integrating your dining space directly with the kitchen in a covered pavilion or positioning it separately for more flexibility.
If you choose a separate dining area, you can incorporate wraparound counters and strategic seating that maintain sightlines to the pool while keeping food service convenient from your kitchen.
Counter seating alongside your cooking station also encourages socializing, so you can interact with guests while you’re preparing meals.
Integrated vs. Separate Layouts
How should you arrange your poolside dining and kitchen spaces—integrated or separate?
Each layout offers distinct advantages. Consider these key factors:
- Integrated pavilions combine cooking and dining under one roof, providing weather protection and minimizing serving distances between kitchen and table.
- Wraparound counters preserve pool views while enabling guests to dine comfortably without blocking sightlines to swimmers.
- Separate dining areas work well when you position them close enough for easy food transport from the kitchen, reducing trip frequency.
- Proximity to amenities matters most—whether integrated or separate, your dining space should stay near refrigeration, water, and cooking equipment for efficiency.
Both approaches maintain supervisor access to the pool. Choose integration if you prioritize weather protection and cohesive design, or separation if you prefer distinct zones while keeping serving convenient.
Seating and Counter Options
Three seating arrangements can transform your poolside kitchen into a social hub: wraparound counters with bar seating, integrated dining within covered pavilions, and separate dining areas positioned for convenient food service.
| Seating Option | Key Benefit |
|---|---|
| Wraparound Counters | Maintains pool views while guests socialize with the chef |
| Covered Pavilions | Integrates cooking and dining under one structure |
| Separate Dining Areas | Reduces server trips while preserving sightlines |
Counter seating lets you engage guests while they watch food preparation, creating entertainment and connection. Covered pavilions blend cooking and dining seamlessly, protecting diners from elements. When you position separate dining areas strategically, you minimize food-serving distances without sacrificing pool supervision. Each arrangement balances comfort, functionality, and guest interaction differently. Choose based on your space, entertaining style, and how you want to supervise pool activities.
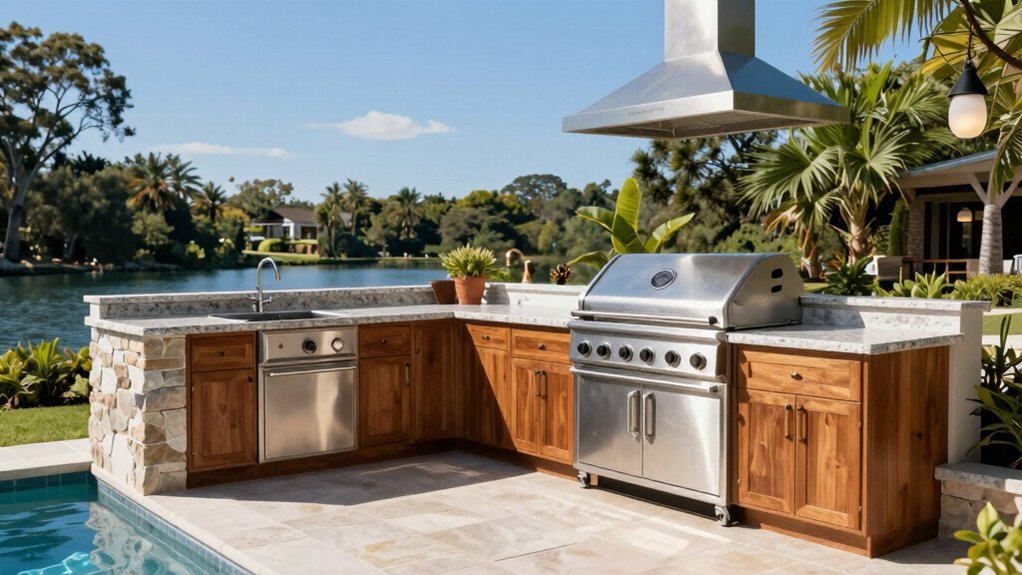
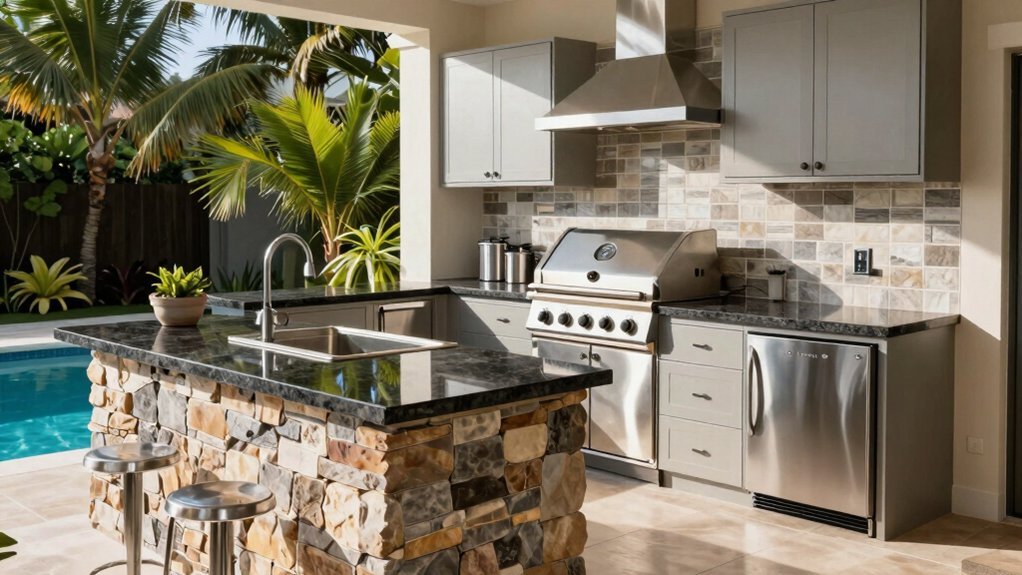
An Outdoor Kitchen by the Pool Should Have All the Amenities
What makes a poolside kitchen truly functional? You’ll want to minimize trips inside by installing built-in amenities that keep you poolside longer.
Focus on these essential features:
- Built-in refrigeration and running water – Access cold drinks and clean water without leaving your guests
- Dishwasher and trash management – Handle cleanup efficiently without interior kitchen visits
- Multiple cooking appliances – Include grills, burners, and prep surfaces for versatile meal preparation
- Comprehensive storage – Install cabinets for tools, dishes, and supplies within arm’s reach
An outdoor kitchen designer can tailor these amenities to your specific space and layout, ensuring everything fits perfectly. Add lighting, infrared heaters, ceiling fans, and shade structures like pergolas for year-round comfort. Standard setups typically range from $25,000 to $50,000, depending on materials and complexity.
Add Audio/Visual Components That Can Be Enjoyed by Everyone

You’ll transform your poolside kitchen into an entertainment hub by integrating audio and visual systems that reach every corner of your outdoor space. Install an outdoor television visible from both the kitchen and pool area, allowing guests to enjoy entertainment while cooking or lounging.
Weatherproof speakers positioned across the deck, dining area, and pool deck deliver surround sound for music, games, and announcements without requiring direct TV visibility.
This integrated approach enhances your outdoor living experience, providing entertainment during meals and swimming.
Work with an AV specialist to ensure proper wiring, weather protection, and synchronized control across all components.
Quality outdoor equipment withstands moisture and temperature fluctuations while delivering reliable performance throughout the season.
Location, Design, and Planning
How you position your poolside kitchen dramatically impacts both functionality and enjoyment. Strategic placement ensures safety, convenience, and seamless flow between zones.
Consider these essential planning elements:
- Sightlines from cooking area – Position your kitchen to maintain clear views of pool activity without walls or beams obstructing your perspective.
- Traffic flow optimization – Design pathways connecting kitchen, seating, and pool areas that feel natural and uncluttered.
- Site conditions assessment – Evaluate sunlight exposure, wind patterns, and weather direction before finalizing placement.
- Future expansion planning – Account for additional features and utility placement to accommodate growth without costly relocations.
Balance safety oversight with convenient kitchen access. Coordinate your layout with existing seating and shade structures. This comprehensive planning prevents costly mistakes and creates an integrated outdoor space you’ll genuinely use and enjoy for years.
Permits and Approvals
Before breaking ground on your poolside kitchen, securing the proper permits and approvals is non-negotiable. You’ll need to obtain permits covering construction, electrical work, and gas lines if you’re installing a gas setup.
Rather than navigating regulatory requirements yourself, engage a contractor or landscape designer familiar with local codes—they’ll streamline the approval process significantly.
Work with your chosen professional to coordinate with local authorities on your behalf, minimizing your direct involvement in bureaucratic steps. Ensure permits address both construction and utility connections upfront, preventing costly rework later.
This comprehensive approach protects you legally and guarantees your outdoor kitchen meets all safety standards and local regulations before installation begins.
Project Cost and Budgeting
You’ll want to establish a realistic budget before diving into your poolside kitchen project, as costs typically range from $5,000 for modest setups to $50,000 and beyond for luxury installations. Your actual expenses depend on several variables—the materials you select, appliances you prioritize, structural complexity, and whether you’re customizing elements—so understanding these factors helps you avoid overspending. A mid-range budget of $12,000–$13,000 serves as a practical starting point, though you should align your spending with your primary goals, whether that’s culinary quality or entertaining capacity.
Budget Range and Pricing
What’s your poolside outdoor kitchen really going to cost? You’re looking at a wide range depending on your vision and priorities.
Budget expectations:
- Modest setups start around $5,000 for basic functionality
- Mid-range projects typically run $12,000–$13,000 with quality materials and equipment
- Luxury configurations exceed $30,000 with premium features and custom designs
- Essential investments include refrigeration, running water, built-in dishwashers, storage, lighting, and cooking appliances
Before you commit funds, clarify your primary goal. Are you focused on culinary excellence or entertaining guests? Your answer directly influences which features deserve your budget allocation.
Track prices throughout planning to prevent cost overruns. By identifying must-haves upfront, you’ll avoid expensive add-ons later and ensure your spending aligns with your poolside kitchen vision.
Cost Variables and Planning
Understanding what drives your poolside kitchen’s final price tag requires examining several interconnected factors that’ll shape your budget. Location, materials, and labor costs vary significantly by region, directly impacting your total investment. You’ll also need to decide between professional installation and DIY approaches, each affecting expenses differently.
Before you commit funds, identify your primary purpose. Are you prioritizing culinary quality or entertainment hosting? This clarity helps you allocate resources strategically. Next, distinguish between must-have features and nice-to-haves. Essential appliances and structural elements deserve priority funding, while upgrades can wait.
Finally, plan for future expansion rather than compromising core features now. Building flexibility into your design prevents costly retrofits later. Tracking expenses meticulously throughout planning ensures you stay within your chosen range and avoid budget overruns.
Custom Solutions and Appliance Selection
How do you envision your ideal poolside cooking setup? Your custom solution depends on selecting appliances that match your cooking style and space constraints.
Consider these key elements:
- Built-in grills vs. custom-built ovens – Choose ready-made modules for convenience or construct units from scratch for complete customization
- Essential utilities integration – Plan gas, electricity, and water connections to ensure seamless functionality without compromising your outdoor aesthetic
- Material durability – Select concrete and high-quality materials that withstand poolside humidity and weather exposure
- Professional placement optimization – Work with a landscape designer to position appliances strategically, maintaining sightlines and maximizing convenience
Your choices should balance practical maintenance requirements with your cooking preferences. Collaborate on design details and material selection before installation begins, ensuring every component integrates smoothly with your poolside layout.
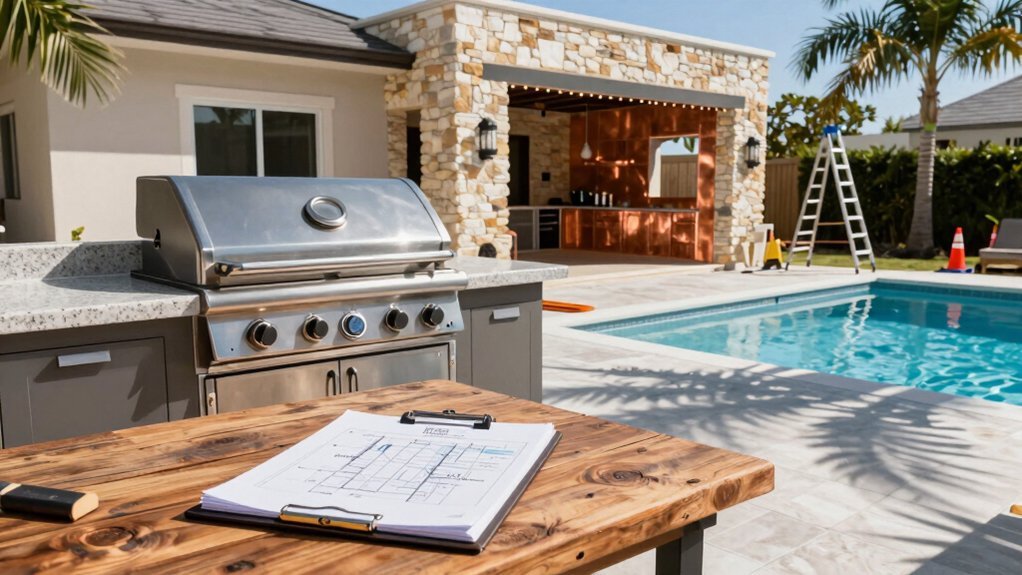
Installation Progress and Related Projects
Once you’ve finalized your custom design and selected your appliances, the real transformation begins. You’ll receive visual progress updates as your kitchen takes shape, allowing you to track each phase of installation. Coordinate your kitchen build with related pool projects like decking upgrades or Diamond Brite resurfacing to create a cohesive outdoor living space.
| Phase | Timeline |
|---|---|
| Foundation & Framing | Week 1-2 |
| Appliance Installation | Week 3-4 |
| Countertop & Finishing | Week 5-6 |
| Pool Integration Work | Week 6-7 |
| Final Inspection | Week 8 |
Your design and landscape team will ensure all elements align seamlessly. This integrated approach guarantees long-term reliability and maximizes your outdoor space’s functionality and aesthetics.
Utilities and Site Preparation
Before construction begins, you’ll need to plan your utility infrastructure carefully—water lines, electrical systems, and potentially gas connections all require strategic placement and proper budgeting.
- Water planning: Budget $500–$2,000 for hookups and drainage solutions that prevent poolside flooding.
- Electrical systems: Plan circuits based on your appliances and lighting needs, coordinating with local codes.
- Gas lines: If you’re using gas appliances, expect $15–$25 per linear foot for installation costs.
- Site assessment: Evaluate your foundation and substrate durability, accounting for slope variations that affect flush mounting and drainage.
Coordinate all utilities with permits and code requirements simultaneously. This streamlines approvals and inspections, preventing costly delays. Significant site slopes require extra grading work, so assess your terrain early to budget accurately for additional labor.
Durability, Performance, and Safety Considerations
With your utilities and site properly prepared, you’ll now focus on building a poolside kitchen that withstands harsh outdoor conditions while keeping everyone safe. Select durable materials like concrete that resist coastal salt air and freeze-thaw cycles, minimizing corrosion and maintenance. Invest in weather-resistant appliances and high-quality components designed for harsh environments. Seal cabinets and fixtures properly to prevent water intrusion from pool splashes and rain.
Design for safety by maintaining proper clearances around grills, routing gas lines securely, and installing non-slip flooring near water. Finally, choose UV-resistant finishes and surfaces that maintain their appearance and performance despite sun, wind, and chlorine exposure. These considerations ensure your poolside kitchen remains functional, attractive, and safe for years.
Frequently Asked Questions
How Much Does It Cost to Have an Outdoor Kitchen Installed?
You’ll typically spend $25,000 to $50,000 for a standard outdoor kitchen installation, though you can start with modest projects around $5,000. You should budget $12,000–$13,000 for mid-range setups, accounting for materials, equipment, permits, and utilities.
Is It Cheaper to Build Your Own Outdoor Kitchen?
Yes, you’ll likely save money building your own outdoor kitchen, but you’ll invest significant time and labor. You’ll need construction expertise to avoid costly mistakes that could exceed professional installation savings.
What Is the Best Layout for an Outdoor Kitchen?
You’ll want a U-shaped or wraparound design that keeps you facing the pool for safety while minimizing splash. Position your kitchen close enough for convenience but far enough from water zones. This layout balances supervision with functionality and smooth traffic flow.
Can I Build an Outdoor Kitchen Without Planning Permission?
You’ll likely need planning permission for your outdoor kitchen, especially if it includes gas lines, water, or permanent structures. Check your local codes first—they’re specific to your area. Working with a professional designer helps you navigate requirements efficiently.

Leave a Reply