Start with Plan and Site Prep, choosing a flat, well-drained spot and checking local rules. Unpack, organize, and inspect every part, lay out pieces, and cross-check against the manual. For Base, Foundation, and Anchoring, set a level base, choose concrete pads, and test the ground. In Frame Assembly and Roof, build the frame plumb, install the roof on the ground if possible. Finish with safety checks and maintenance, and you’ll uncover more guidance soon here.
Plan and Site Prep
Where should you start when planning a gazebo installation? Begin by choosing a flat, level location with room to work around the footprint, and plan for drainage, sun, and wind exposure to prevent future issues. Check local regulations, permits, HOA rules, and setback requirements before planning or anchoring, since these vary by city and region. In GTA and Ontario contexts, some gazebos under 108 sq ft may not require a permit but must comply with zoning, height, and distance rules. For clay soils, expect frost heave and water-softening effects; adjust anchoring with pilot holes or longer anchors for stability. Conduct a site readiness review—remove obstacles, ensure overhead clearances, and verify nearby utilities or power lines. Prepare notes on permits and access routes for reference.
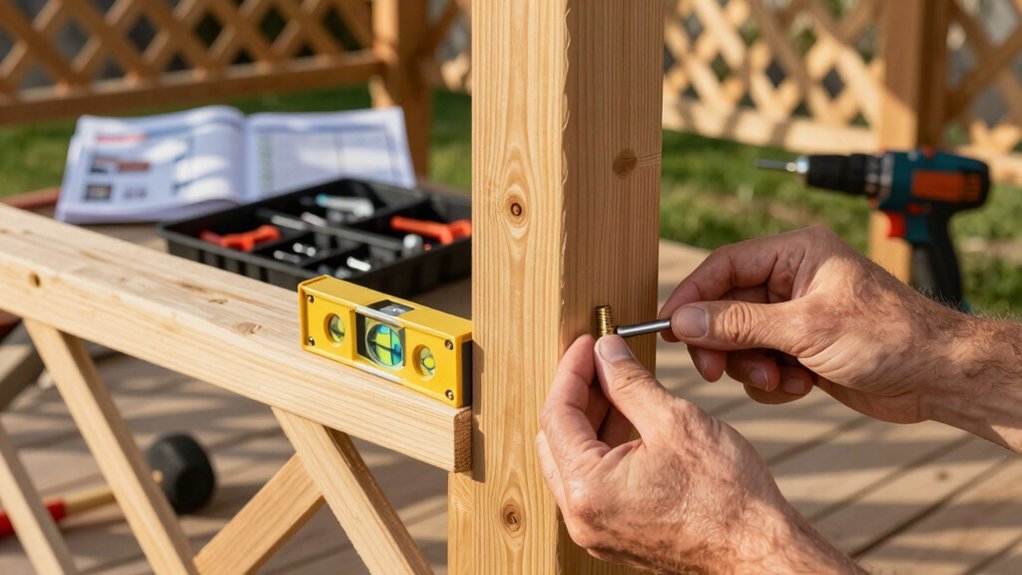
Unpack, Organize, and Inspect Parts
How you start—unpacking, organizing, and inspecting the parts—sets the tone for a smooth gazebo install. Begin by taking inventory and laying out components so nothing is missing before you start.
- Unpack carefully, verify all kit components, and compare against the parts list.
- Lay out components around the work area in a logical order and group identical pieces together in labeled containers.
- Cross-check the parts list with the manual to confirm no pieces are missing and read the instructions end-to-end to understand the assembly sequence and warnings.
Professional assembly can save time, with DIY projects taking 4–6+ hours for a basic 10×10 ft gazebo, while pros finish sooner.
A workmanship warranty (for example, 12 months) may cover defects or stability issues too.
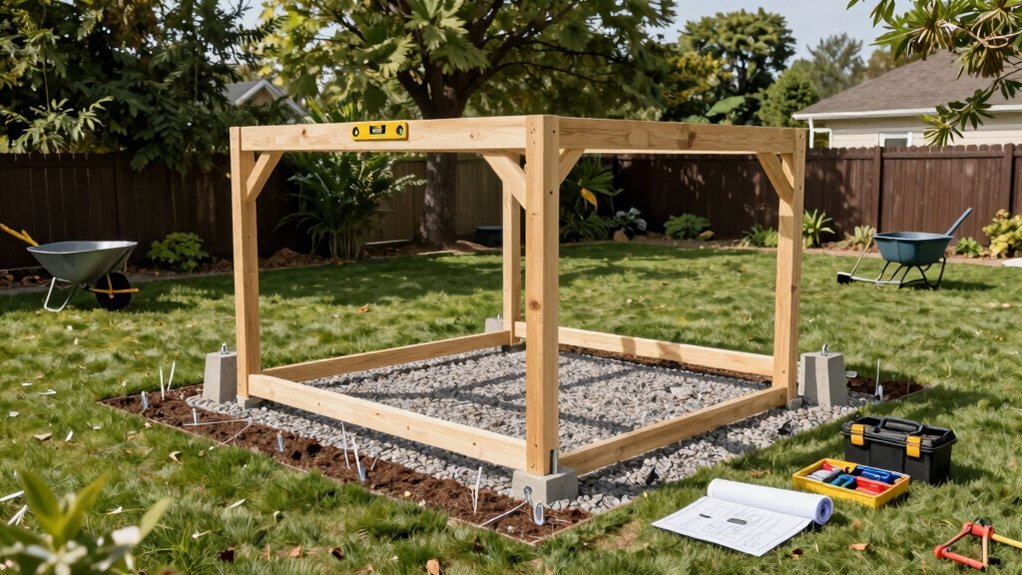
Base/Foundation and Anchoring
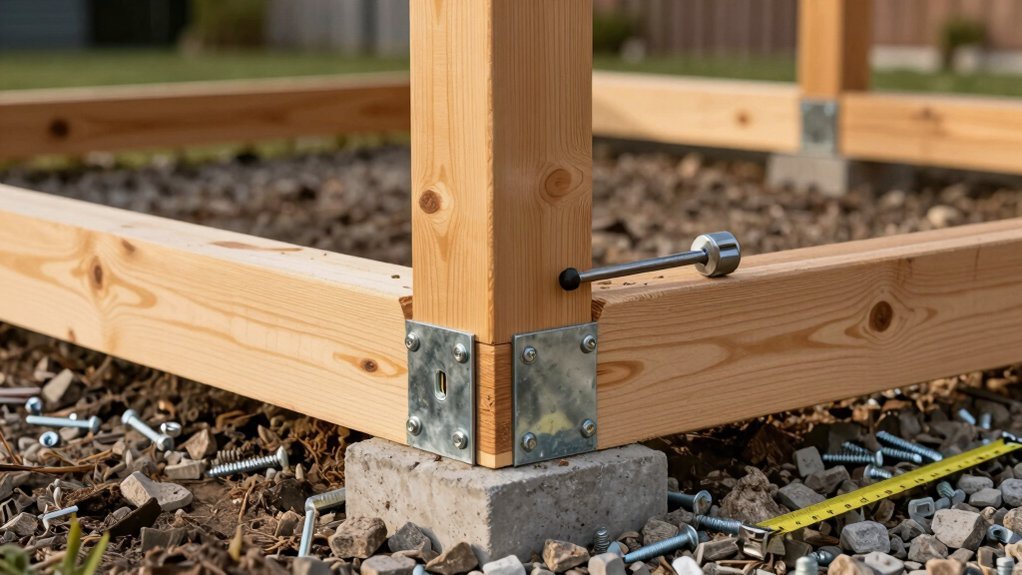
Base foundations and anchoring set the stage for a stable gazebo, so choose a base that matches your surface and install it level before you attach the frame. Concrete pads offer durability but cost more and are harder to install, while gravel bases and ground-level setups save time.
For clay soils, you may need pilot holes or screw-type anchors, and longer or more robust ground anchors can improve grip. Ensure a level is achieved so posts stay plumb and overall stability won’t suffer.
Select anchors by surface: masonry anchors on concrete, lag bolts on decks, and stakes or augers for soil or grass. Before final attachment, test the ground with a steel rod to guide your anchoring approach. Take notes for adjustments as needed.
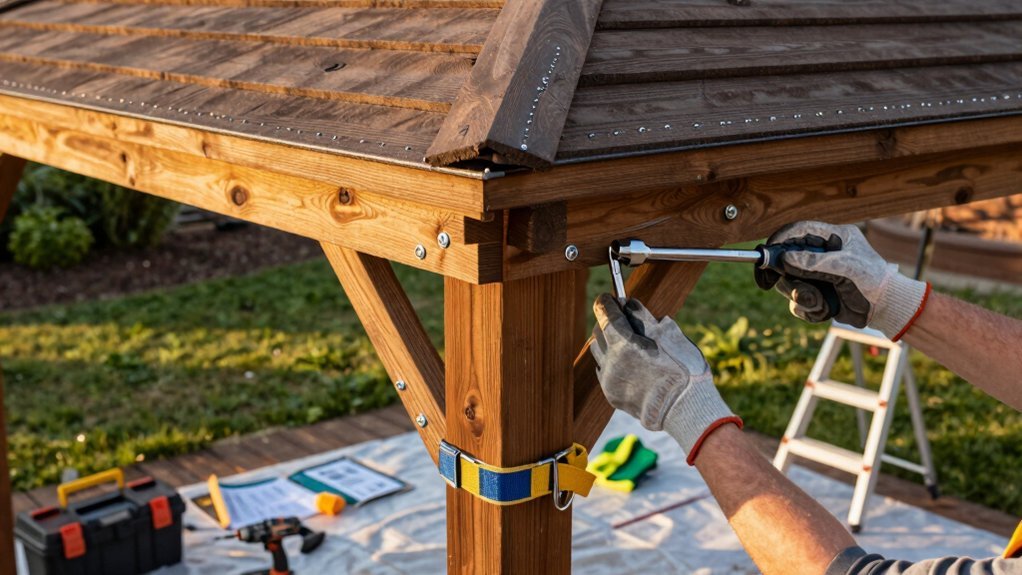
Frame Assembly and Roof/Canopy Installation
With base secured, begin frame assembly by laying out the posts and crossbars, connecting them to form the skeleton, and checking plumb and level as you go before lifting the roof into place.
For hardtop gazebos, assemble roof sections on ground first, then hoist onto the frame to simplify alignment and reduce handling risk.
Use three helpers for larger gazebos to stabilize the frame during roof attachment and ensure safe lifting of components.
Install panels sequentially, secure them with appropriate fasteners, and avoid fully tightening bolts until every panel is in place to allow final adjustments.
After installation, check for gaps or leaks and install caps or gaskets as needed.
Practice safety by working from one side around the gazebo with ladders stable and a ground spotter.
1) Assemble roof sections on ground before lifting
2) Install panels sequentially and don’t fully tighten bolts yet
3) Use three or more helpers and maintain a ground spotter
Finishing Touches, Safety Check, and Maintenance
Did you know finishing touches like mosquito netting, gutters, lighting, and seating can turn the gazebo into a functional, all-season retreat? You’ll inspect all fasteners and anchors after assembly, re-tightening as needed to keep stability against wind and weather.
Add finishing touches to seal the space—netting keeps insects out, gutters manage runoff, lighting extends use, and seating invites lingering. Do a final safety walk-around, tightening bolts, trimming exposed ends, and ensuring doors or enclosure elements operate smoothly.
Verify the base is level, anchors are secure, and canopy seams are sealed to prevent leaks. Schedule periodic maintenance: reseal wood, check for deteriorating components, and address any wobble or misalignment promptly. Document results and adjust schedule to fit seasonal use and exposure for optimum performance always.
Frequently Asked Questions
How to Assemble a Gazebo Step by Step?
First, choose a level spot, clear debris, attach bottom legs to the base, and level ’em. Then lift the roof frame onto posts, secure corners, tighten bolts for alignment, install panels, and anchor gazebo secure.
What Are Common Gazebo Mistakes?
Common gazebo mistakes include skipping steps, under-tightening bolts, and eye-balling measurements. Don’t misalign holes or rush framing; misaligned posts topple. Don’t skip site prep or level the foundation; secure roof panels properly, avoid over-tightening either.
Are Gazebos Hard to Put Together?
Yes, gazebos can be hard to put together, especially solo. You’ll handle unwieldy panels, align holes, and level the base, but with an adaptable plan, proper prep, and tightening, you’ll finish more quickly and sturdily.
How to Put a Gazebo up for the First Time?
First, you pick a level spot and clear space; lay out parts, label hardware; assemble frame in sections with a helper, connect posts loosely; install anchors, then lift roof sections and tighten bolts after alignment.


Leave a Reply