Start with your purpose and audience, decide if the space is for relaxation, entertainment, or both, and match the design to your home’s style. Map microclimates—sun, shade, wind, and drainage—so you place the stage, seating, and plants. Plan functional zones: performance, seating, and circulation, using meandering paths and elevation to cue transitions. Layer planting for acoustics, choose weather-ready materials, and add shade with canopies or pergolas. When you’re ready to move forward, you’ll learn more.
Defining Purpose and Audience

Why are you building an outdoor stage in the first place? You’re defining its purpose—relaxation, entertaining, or a blend—to guide layout, plant choices, and seating arrangements. You pin down the target audience and typical event types to tailor acoustics, sightlines, and shade for comfort and engagement. You align the theme with your home’s architecture to ensure cohesive indoor-outdoor transitions and a unified design language.
Then you map functional zones—entry path, seating, performance area, and service space—to support smooth audience flow and operations. You consider practical constraints like sun exposure, microclimates, and drainage early, selecting plants, materials, and shading that sustain the stage context. This upfront clarity prevents mismatches later and keeps the design focused on how people actually experience the space for lasting comfort.
Analyzing Your Yard and Microclimates
Start by assessing your yard’s microclimates—where sun, shade, wind, and moisture vary across the space. Note sunlight and shade patterns, observe drainage, and spot any pooling near structures so you can place the stage, seating, and plantings wisely. Use this on-site intel to select plants with compatible sun, moisture, and temperature needs for each zone.
Assess Yard Microclimates
Where you place trees, structures, and paving creates microclimates—pockets of full sun, partial shade, shade, and deep shade—that affect what you can grow and how much water you’ll need. A thorough site analysis should observe sunlight patterns and shading areas throughout the day and across seasons to identify where microclimates exist, including how soil type, drainage, and existing features influence performance.
Use USDA Plant Hardiness Zone knowledge to align plant choices with the yard’s microclimates and ensure winter survivability. Document microclimates to guide targeted planting, water management, and microclimate-specific design decisions, such as selecting drought-tolerant species in hot, dry zones. Keep notes on sun exposure changes with seasons and on drainage patterns after rainfall to refine your plan. This helps you budget water wisely.
Sunlight and Shade Patterns
How does light move across your yard from sunrise to sunset, and what microclimates does it create? You’ll map full sun, partial shade, shade, and deep shade, because microclimates guide plant choices and performance. Observe sun patterns through the day and across seasons to see how light shifts across zones and affects seating, pathways, and stage sightlines. Use buildings, trees, driveways, and slopes to mark shade patches and wind blocks that influence outdoor stage design and audience comfort. Consider drainage and soil moisture in sunny versus shaded areas, where sun-exposed spots dry quickly while shaded zones hold moisture, guiding irrigation planning. Apply microclimate knowledge to select appropriate plants and materials for each zone and design transitions that maintain flow. This keeps sightlines clean and comfortable.
Moisture and Drainage
Understanding moisture and drainage starts with surveying how water moves through your yard and where it tends to pool. Analyze sun exposure to identify dry and wet pockets, then assess drainage patterns so heavy rainfall or irrigation doesn’t accumulate near your outdoor stage. Use soil type knowledge—sandy, clay, loamy—to guide both water needs and drainage improvements, since each drains differently and affects moisture retention. Map microclimates to plan plantings that require specific moisture levels, like drought-tolerant species in drier zones and moisture-loving plants in wetter pockets. Implement water-management practices such as mulch to retain soil moisture, rain barrels for irrigation, and spacing to prevent waterlogging around performance areas. This integrated view keeps your stage reliable and your landscape resilient under changing weather for years.
Establishing Sightlines and Focal Points
Plan sightlines that give the audience clear views to key performers and focal features while keeping equipment and bulky scenery out of sight. Use strategically placed sightlines to guide movement and emphasize important stage elements, such as a backdrop, sculpture, or fountain, without creating visual clutter. Elevation changes and carefully positioned lighting enhance focal points, drawing attention to the main performance area at different times of day.
- Elevate or frame focal points to invite exploration without competing with other elements.
- Define the stage area with line and boundary planning using contrasting materials and plant masses.
- Direct viewers’ attention toward the primary performance zone through thoughtful composition and placement.
Maintain consistency with your landscape palette so sightlines feel intentional rather than random across all views.
Planning Functional Zones for Performance, Seating, and Circulation
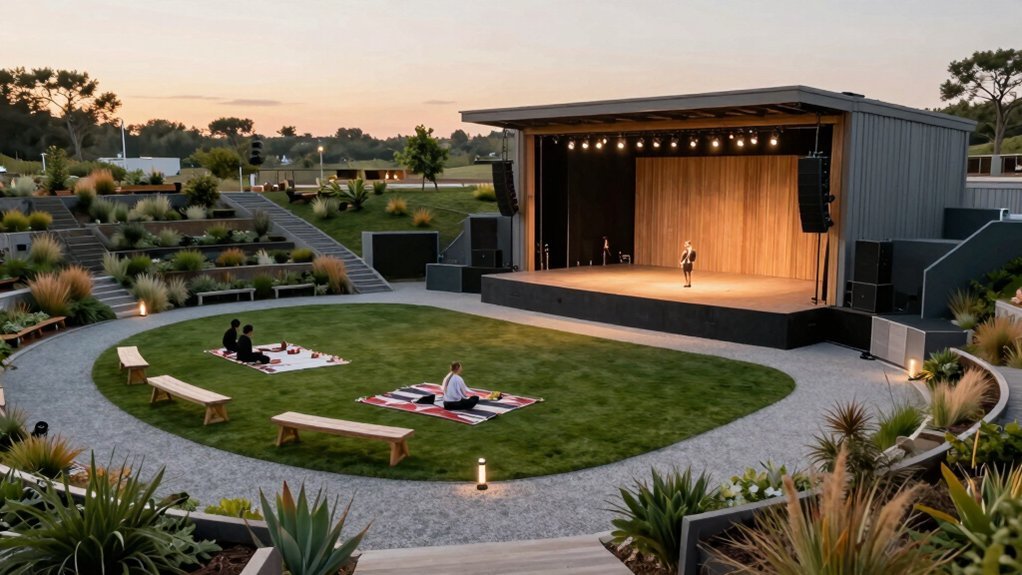
From shaping sightlines to defining usable areas, you’ll plan distinct zones for performance, seating, and circulation to guide audience experience. You’ll designate a performance stage with clear sightlines, ensuring audience seating forms an arc or rows that don’t obstruct exits. Use meandering pathways and different materials to visually separate zones while keeping cohesion, and align pathways with shade and lighting for evening events. Plan load-bearing surfaces for stage equipment, durable seating, and accessible routes that meet safety standards. Introduce transitions between zones with planting, elevation changes, and lighting to subtly segment spaces without breaking the landscape’s unity. Keep circulation unobstructed, guiding people from entry to seating to exit. Prioritize maintenance considerations, such as drainage and weather-resistant materials, so zones stay functional after rain daily.
Selecting Materials and Hardscape Transitions
How you choose materials and shape hardscape shifts sets the tone and flow of your outdoor stage. You’ll want durable options like stone, brick, and concrete, weighing maintenance needs of natural stone versus wood to ensure longevity. Visual transitions come from pairing paving materials to cue mood shifts and guide movement from sunny patios to shaded viewing zones. Meandering paths create exploration and gradual transitions, while width and alignment affect flow and accessibility. Elevation changes—slopes, steps, and terraces—add tactile interest and signal swaps between stage, audience, and backstage. Group plants with similar water needs near transitions, and use stepping stones and mulch to unify hardscape with planting for cohesive journeys.
- Durable materials reduce maintenance
- Meandering paths cue transitions
- Elevation changes enhance transitions with planting
Integrating Lighting for Ambiance and Safety
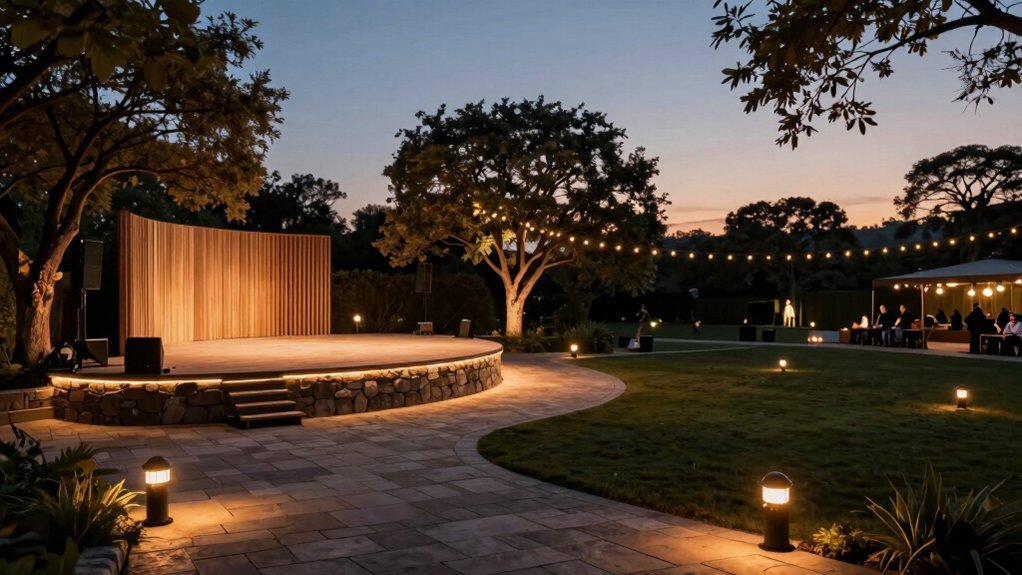
With the hardscape and planting laid out, lighting becomes the cue that reveals paths, defines outdoor rooms, and keeps guests safe after dark. You’ll use landscape lighting along pathways to guide movement and set a welcoming rhythm, and a vintage-inspired front door lantern to establish tone at entry. Place cylindrical wall lanterns on both sides of the garage doors for balanced illumination and stronger curb appeal. Remember that lighting can influence buyers’ first impressions during showings, making transitions feel inviting when spaces connect smoothly.
Use layered lighting—ambient for atmosphere, task for functional needs, and accent to highlight focal features—so dining areas, fire pits, and entryways stay usable after sunset. Plan lighting along entries to extend outdoor living potential well into the evening for guests.
Designing Outdoor Seating and Stage Options
Design outdoor seating and stage areas to create distinct, versatile zones—think a fire pit lounge, a dining/coffee nook, and a weather-protected performance space that can host a range of activities.
Choose durable, weather-resistant furnishings, like all-weather sectionals and shell chairs, and use modular layouts so you can reconfigure for different performances.
Ambient lighting along pathways ensures visibility and safety for evening events.
Position seating to optimize sightlines and acoustics, using planters and architectural features as natural barriers to calm sound and create intimate viewing areas.
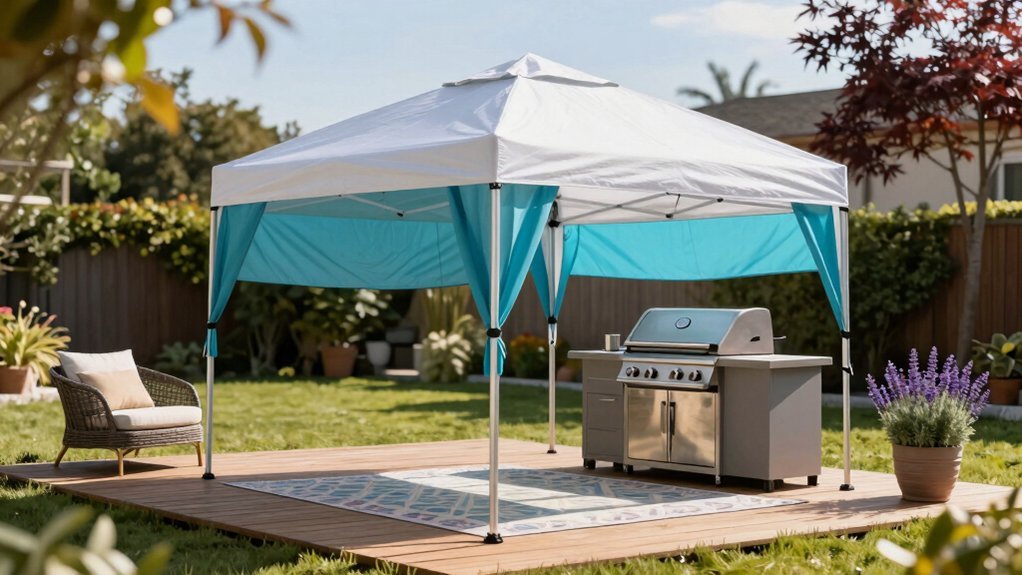
Pair shading options—umbrellas, pergolas, or temporary canopies—with a staged flow from sunny to shaded zones to extend usability.
Creating Shade, Weather Protection, and Weather Readiness
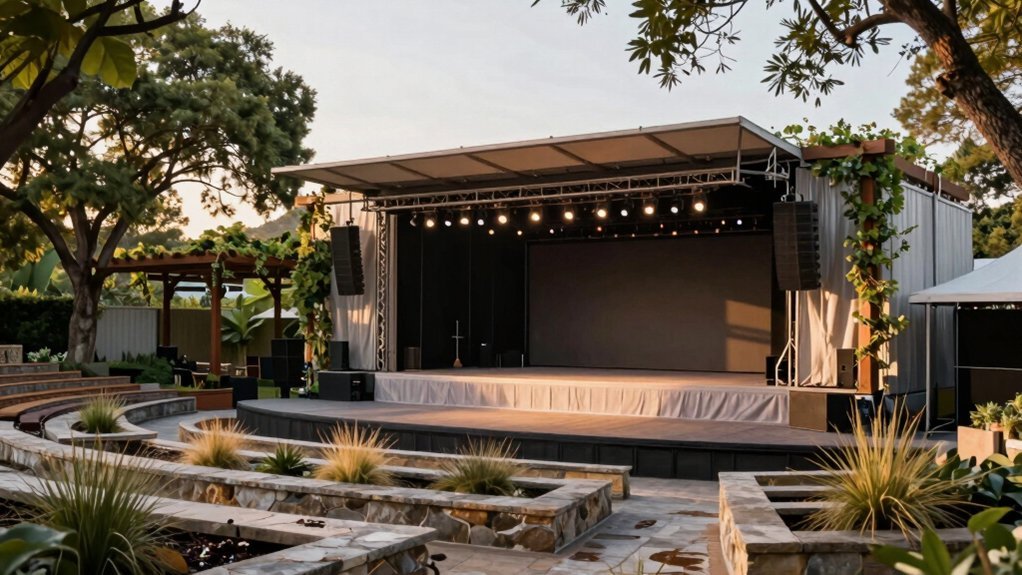
Building on the idea of flexible zones, you’ll want shade and weather protection that stays reliable through changing conditions. Use robust structures—canopies or roofs—and weather‑resistant materials to shield equipment and performers. Design for wind and environmental exposure, prioritizing durability without sacrificing access or sightlines. Shade solutions range from umbrellas to pergolas and permanent awnings with columns, extending usability for audiences and performers alike. Pair shade with weather protection so comfort and safety stay constant during shifts in sun, rain, or gusts. Plan for weather readiness as part of the design, enabling quick adaptations like modular stages and weatherproofing for gear and electricals. Ensure drainage, HVAC compatibility, and easy access to cables, plus service routes for maintenance crews during storms. That keeps performance uninterrupted throughout.
Planting for Color Texture and Acoustics
How can you boost color, texture, and acoustics at once on an outdoor stage? By layering plant heights you create depth that frames the stage while softening reflections. Use tall background evergreens or shrubs, mid-height midstory, and low groundcovers to sculpt sound diffusion and visual rhythm. Coarser textures, like large-leaf shrubs, diffuse more sound than fine grasses, while varied foliage keeps light moving and mood dynamic. Warm-season flowering plants add bright color accents during peak times and contribute lighter textures for movement and acoustic diffusion. Place denser masses at the periphery as acoustic screens, leaving open sightlines toward the audience to maintain comfort and clarity.
- Layer tall masses for depth and diffusion.
- Coarser textures diffuse more sound.
- Mix glossy, matte, and airy leaves everywhere.
Managing Pathways, Elevation, and Flow
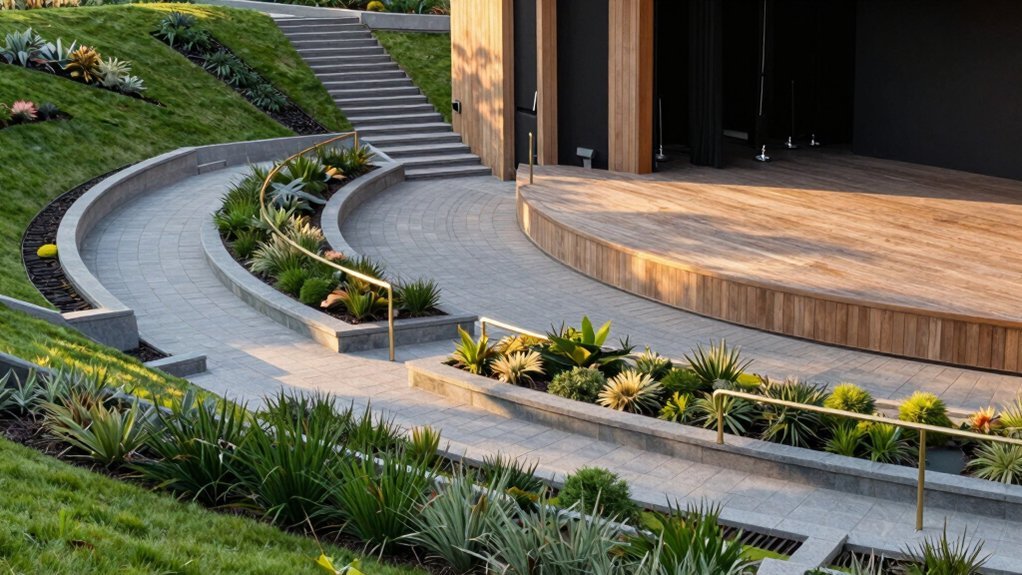
Think about how pathways guide movement and connect outdoor stages to seating and viewing areas, creating a natural flow from sunlit patios to shaded paths. Use elevation changes—slopes, steps, or terracing—to cue transitions and offer vantage points that enhance the overall experience without blocking sightlines.
Choose materials deliberately to mark shifts in mood and function, align widths and lighting for safe, accessible flow, and reinforce cohesion between spaces.
Pathways and Flow
Where you lay out pathways with large pavers and a ring of small stones, you invite exploration and define the route guests will follow. Visual and physical guidance comes from generous width, deliberate alignment, and stones that hug the edges, creating a defined corridor that invites interior exploration.
Meandering forms slow attention, signaling transitions between outdoor zones, while lighting along the path boosts safety and nighttime usability. Use material changes and varied planting to mark sunlit patios from shaded nooks, guiding foot traffic without abrupt turns.
Align steps, widths, and lighting to maintain flow from entrance to gathering areas, ensuring consistent rhythm and sightlines.
- Large pavers with stones guide paths
- Meander to spark discovery and transitions subtly
- Width and lighting maintain safe, accessible flow
Elevation and Movement
Elevation and Movement set the stage for how guests flow through the outdoor area. Elevation changes add visual and tactile interest and signal transitions between stages, terraces, and seating, guiding movement. Meandering pathways, varied paving, and ground-plane shifts create smooth transitions while subtly directing audience flow.
Terracing and stepped levels manage slopes, provide level planting areas, and carve distinct zones for performance, audience, and backstage access. Elevation differences influence microclimates and plant choices, so drainage planning protects performers and equipment. Lighting and plantings reinforce transitions across elevations, using height contrasts and shaded or bright zones to maintain clear sightlines during performances.
Consider how steps, ramps, and terraces guide sightlines for every seat and backstage access, while keeping drainage effective and maintenance simple year round.
Materials for Transitions
Materials for transitions knit together outdoor rooms through shared textures, tones, and tactility. You connect spaces with paving choices that cue mood and guide movement, while ensuring accessibility. Let pathways meander to invite exploration, adjusting width and alignment to shape flow. Elevation changes—slopes, steps, terraces—add interest, mark shifts between zones, and influence microclimates and plant picks. In transition zones, vary height, texture, and color to reinforce the shift from sun to shade or from formal to naturalistic areas. Keep a cohesive language across materials, textures, and rhythm to unify distinct outdoor rooms.
- Paving materials visually connect spaces and cue mood shifts.
- Meandering pathways control flow and accessibility.
- Elevation and plantings signal transitions and unify the design.
Uniform rhythm across materials keeps spaces legible too.
Phasing, Budgeting, and Maintenance Planning
How you phase the work, set a budget, and plan maintenance shapes every other decision. In Step 1, you clarify the client’s vision, set a realistic budget, and perform a site analysis to spot hazards, restrictions, and opportunities.
Step 2—design development—uses sketches, client feedback, and true-to-scale layouts, aided by design software with plant databases to produce professional estimates.
Step 3 centers on implementation, ordering materials on delivery schedules, building the team, and establishing clear communication protocols for contractors.
Step 4 covers final touches like edging, lighting, and testing features, with a post-project walkthrough and client sign-off.
The overarching goal? phased budgeting and maintenance planning manage expectations, prevent overruns, and ensure scalable concepts match site conditions and future needs for durable landscapes that endure well.
Frequently Asked Questions
What Is the 70/30 Rule in Gardening?
The 70/30 rule means you’ve got about 70% of your planting as hardy, low-maintenance varieties and 30% for more experimental or seasonal ones, balancing reliability with color, texture, and yearly interest for ongoing garden appeal.
How Do I Create a Landscape Layout?
You create a landscape layout by treating your yard as connected rooms, design zones for a fire pit, dining, and kitchen, map paths, set focal points, assess sun and drainage, then draft to scale carefully.
What Are the Four Common Mistakes Landscapers Make When Planting?
Four common mistakes are overplanting, ignoring microclimate needs, underestimating mature size and spacing, and skimping on maintenance planning. You crowd, stress plants, create gaps later, and end up paying more for replacements—or constant upkeep today.
Is There an App to Help Design Your Garden?
Yes, Plan-a-Garden helps you design your garden. You can drag-and-drop layouts, browse a plant database, measure to scale, estimate costs, budget, save and share designs, and pull inspiration from nurseries, gardens, and past projects online.

Leave a Reply