
To install your outdoor bar sink, run a dedicated outdoor-rated water line from indoors and plan vented drainage with weatherproof cabinetry. Choose a drop-in or undermount sink—stainless 304 grade—with single or double bowls. Install by cutting a counter opening, sealing with silicone, dropping the sink in, and connecting supply lines and drain securely. Test for leaks, seal exterior joints, and winterize. If you continue, you’ll learn how to finish, test, and maintain it over time.
Planning Your Outdoor Bar Sink Layout
Where should you start when planning your outdoor bar sink layout? Begin by locating the sink near existing water lines and drainage to simplify plumbing and minimize run lengths. Decide between attaching to house plumbing or using a hose-based setup, considering accessibility, code rules, and whether an outdoor-rated supply is needed. Position the unit in your layout to keep prep, cooking, and serving flowing, keeping ice and beverages 4–6 feet from the grill. Ensure at least 24 inches of counter depth around the sink for prep space and faucet clearance. Allowance for cabinets or countertops around the sink helps with storage, shutoffs, and drainage parts without clutter. Think about future tweaks, like adding a prep zone or a trash station, while keeping clear circulation.
Selecting the Right Sink Type
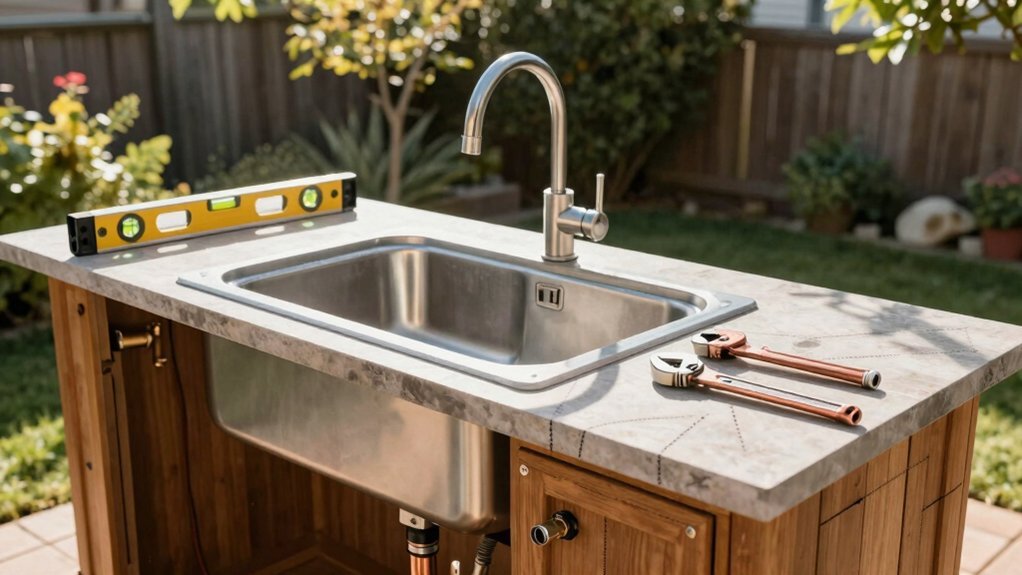
How do you pick the right outdoor sink for your bar? Start with installation style: drop-in sinks are easier to install from above with a visible rim, while undermount sinks attach from below for a seamless countertop look. If you run an outdoor beverage setup, a beverage center sink is worth considering for integrated space for mixers, condiments, and glassware.
Go with stainless steel, preferably 304 grade, for durability, easy cleaning, and corrosion resistance in outdoor environments. If you multitask, a double bowl sink helps with washing and rinsing, but it takes more space than a single bowl.
Copper and bronze sinks look striking, yet they require regular cleaning and may patina over time, influencing appearance. Choose what fits your layout and climate best.
Sourcing Weather-Resistant Cabinetry and Countertops

Now that you’ve picked the right sink, you need weather-resistant cabinetry and countertops that stand up to sun, rain, and temperature swings. Choose outdoor-rated cabinetry—powder-coated aluminum, stainless steel, or marine-grade plywood with resin-based finishes—to resist moisture and UV. Opt for either frameless or framed designs, but ensure concealed weather seals and gaskets at doors and drawers to prevent water intrusion.
For countertops, select weather-ready options like quartz with UV stability, granite, or solid-surface composites designed for outdoor exposure. Check that cabinetry includes sealed, adjustable feet or crawlspace clearance to allow ventilation and drainage beneath the units. Finally, verify hardware is 304 or 316 stainless steel to resist corrosion from humidity and salt air. This ensures durability without compromising access or curb appeal in settings.
Routing Water Supply: Connecting to the House
Typically, you’ll run a dedicated outdoor-rated water line from inside the house to the sink location, using PEX or Poly pipe for durability and cost, with shutoff valves installed inside the house.
Option 1 is to route through the cabinet base or behind exterior siding if concrete or slab blocks direct routing. For hot water, run a separate hot line from the house or install a point‑of‑use heater; many setups rely on cold water only to simplify code compliance. Verify local plumbing codes and obtain required permits; have connections inspected by a licensed plumber to ensure safety and code compliance. Plan routing to minimize visible piping and protect lines from freezing; consider trenching or concealment in cabinetry where feasible. Keep access for future serviceability.
Designing a Drainage System and Venting

Where should you connect the outdoor sink drainage? You connect it to the home’s sanitary system or a dedicated drainage outlet, ensuring a slope of at least 1/4 inch per foot to prevent siphoning. Use PVC for exterior runs because it resists weather, and install an air admittance valve where a traditional vent stack isn’t available. Install a P-trap below the sink to block sewer gases and maintain the trap seal, making sure the drain line from the sink drops and stays accessible for cleaning.
If you tie into house, cut a wye fitting through the wall to carry the drain outside, routing behind cabinet to keep it hidden and protected. Seal all connections with PVC cement and Teflon tape, then test for leaks.
Installing the Sink: Step-by-Step Prep
First, gather the sink, faucet, PVC drain pipes, fittings, Teflon tape, silicone caulk, a wrench, and water supply lines so you have everything on hand before you start.
Measure the countertop, cut the opening with a template, then run a continuous bead of silicone caulk around the cut-out to seal against leakage.
Drop the sink into the cut-out, press firmly to set, and verify the rim sits flush with the countertop.
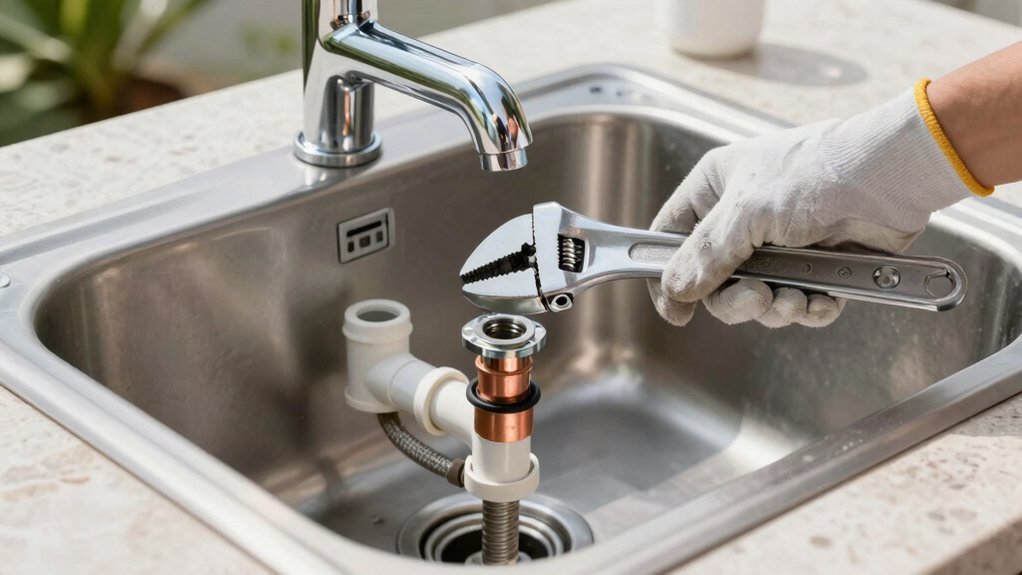
Assemble the drain, attach PVC drain lines to an outlet, and glue joints with PVC cement for a watertight seal.
Turn off the home water supply, attach hot and cold (or cold-only) supply lines to the faucet, seal connections with Teflon tape, and test for leaks.
Do final checks and tidy the area.
Plumbing Connections: Faucets, Disposals, and Drains
Whether you’re going with a drop-in or undermount outdoor sink, your faucet, disposal, and drain connections set the stage for a leak-free setup. Outdoor bar sinks can use standard 3.5-inch kitchen drains if compatible, but many setups use 1.5- or 3.5-inch drains per unit and codes. If you’re using a garbage disposal, ensure the disposal drain matches your sink’s drain size and connect it to home wastewater system; verify compatibility with outdoor sink model.
For faucet connections, run hot and cold supply lines to the faucet with Teflon tape for a watertight seal, though many outdoor installations are cold-water-only. Drainage must flow away from the home, with a P-trap and venting as required by code. Plan faucet mounting and trim before countertop fabrication period.
Ensuring Proper Venting, Codes, and Permits
Do you know what it takes to vent an outdoor sink properly and stay compliant with local codes?
Most codes require venting to the home’s sanitary sewer, not a graywater drain, and permits for new lines or drainage work.
Most codes require venting to the home’s sanitary sewer, not graywater, with permits for new drainage work.
Install an air-admittance valve (AAV) or proper vent above the P-trap to prevent siphoning and keep dishwasher or sink drainage moving.
Drainage must slope at least 1/4 inch per foot toward the correct outlet to avoid standing water and sewer gas.
When you attach to the home, use a trap on the drain and tie into a vented line; if you’re installing a stand-alone unit, follow local codes for non-potable or compliant graywater.
Permit and inspection rules vary by jurisdiction, so check with the AHJ.
Winterizing and Weatherproofing Your Outdoor Sink

Before freezing temperatures arrive, drain the water lines, disconnect hoses, and open the outdoor faucet to purge residual water from the supply lines. Use electric heat tape on exposed water lines and insulate pipes to prevent freezing in unheated or exposed areas. Empty and store P-traps, or fill them with RV antifreeze if winterizing, to prevent siphoning and cracks. Cover the entire outdoor sink installation with a weatherproof, vented cover to protect from snow, ice, and debris. Photograph plumbing connections before winter storage to simplify reassembly in spring and ensure all components are accounted for. Keep batteries charged if your setup uses any sensor or valve controls, and check seals for wear after storms. Revisit the storage plan annually to maintain performance and reliability.
Testing for Leaks and Final Finishes
Begin with a leak-detection check, watching all joints as you pressurize the system and look for drips. Then perform the pressure test steps to confirm smooth drainage and tight fittings, noting any leaks. Finally, consult the finish materials guide, clean excess caulk, and apply a weatherproof cover to protect the sink when it’s not in use.
Leak Detection Methods
How can you reliably detect leaks after installing your outdoor bar sink? Begin by turning on the shutoff valves and inspecting joints and fittings for moisture. Use a soapy-water solution on all threaded connections and faucet mounts; bubbles signal slow leaks that you must tighten or reseal. Check the P-trap and drainage outlet for proper slope and ensure no leaks under load when water is running. Inspect the sink mounting area and caulk seams with a weather-resistant gasket or silicone to prevent water intrusion and ice formation. Finally, conduct a thorough leak test with both hot and cold water for several minutes to confirm stability across all supply lines and faucets. Address any issues promptly to protect cabinetry and outdoor surfaces from damage long-term.
Pressure Test Steps
Why risk leaks later when you can catch them now? After you seal the system, fill your outdoor bar sink with water to 60–80 psi (or the manufacturer’s recommended pressure) to test for leaks along joints and fittings. Inspect supply lines, shutoff valves, P-traps, and drainage connections under pressure, looking for drips, seepage, or loose connections within 10 minutes of pressurization. If you find any leaks, tighten fittings or replace damaged components, then re-pressurize and re-test until the system holds pressure without loss. For outdoor sinks, verify the drain line stays sealed under pressure and that flood-prone areas are protected from backflow during testing. Finish by caulking exterior joints, securing mounting hardware, and performing a pour-and-skim test to confirm water flow to the drain.
Finish Materials Guide
After you finish installing the outdoor bar sink, test for leaks by running hot and cold water for 5–10 minutes and inspect all joints for drips or moisture behind the cabinets. Use a moisture meter or a thin dye test along seams and around caulk to confirm there are no hidden leaks in the finish or subcounter.
Choose a finish material rated for outdoor use, such as weatherproof epoxy or quartz with UV protection, to resist sun fading and moisture intrusion. Apply a flexible, paintable sealant at all countertop-to-wall joints to accommodate expansion and contraction without cracking.
For metal finishes, verify corrosion resistance (304 or higher stainless steel, or powder-coated aluminum) and avoid coatings that can peel in freeze-thaw cycles. Keep it visually cohesive.
Frequently Asked Questions
Is It Easy to Install an Outdoor Sink?
Yes, it can be easy if you plan, choose a simple drop-in basin, and follow code-friendly steps; otherwise, you’ll run into leaks, permits, and weatherproofing challenges that complicate every cut and connection for you today.
How Much to Install a Bar Sink?
You’ll spend roughly $1,000 to $4,000 total for installing an outdoor bar sink, depending on size, materials, and whether plumbing, electrical, and drainage need professional work; a mid-range setup usually costs $1,400 to $3,000 today.
Where Does an Outdoor Sink Drain To?
It drains to your home’s sanitary system or septic. If it’s far from a drain line, it uses a catch basin and grinder pump to sewer, and when connected, directs the outlet away from foundation.
What Holds an Undermount Sink in Place?
Clips, brackets, and silicone sealant hold an undermount sink in place, anchoring it beneath your counter with mounting hardware and a precise cut-out; you maintain a flush edge, preventing leaks and runoff for lasting performance.


Leave a Reply