Transform your backyard into an adventure zone with these DIY obstacle course ideas: tire runs for jumping sequences, blanket tunnels for crawling challenges, PVC pipe hurdles for agility training, simple climbing walls with colorful holds, water elements like slip-n-slides, target toss stations using laundry baskets, and animal movement stations with themed activities. Each element develops different physical skills while keeping kids engaged and active. Discover how these simple materials can create endless obstacle combinations for all ages.
Simple Tire Runs and Balance Beams
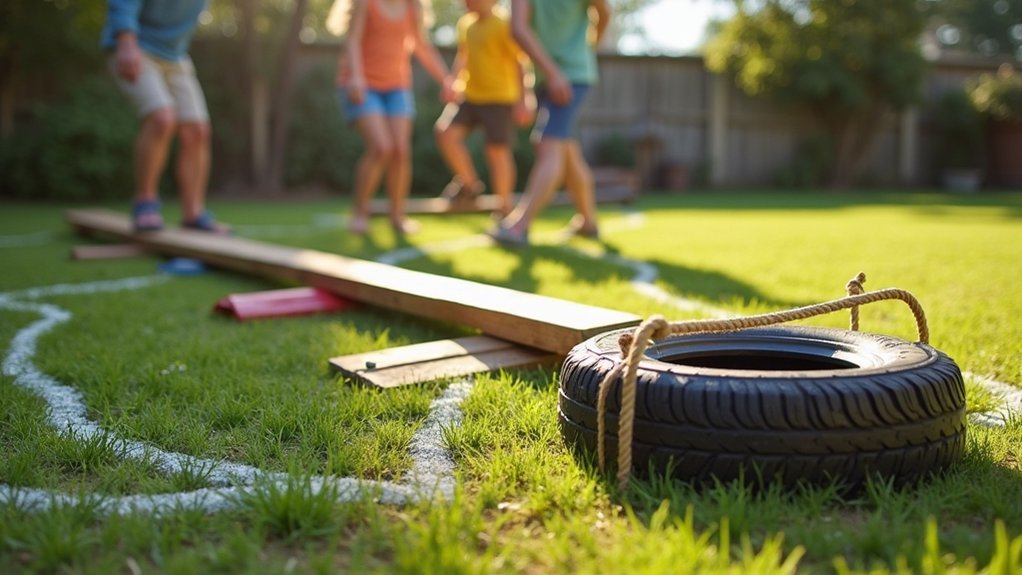
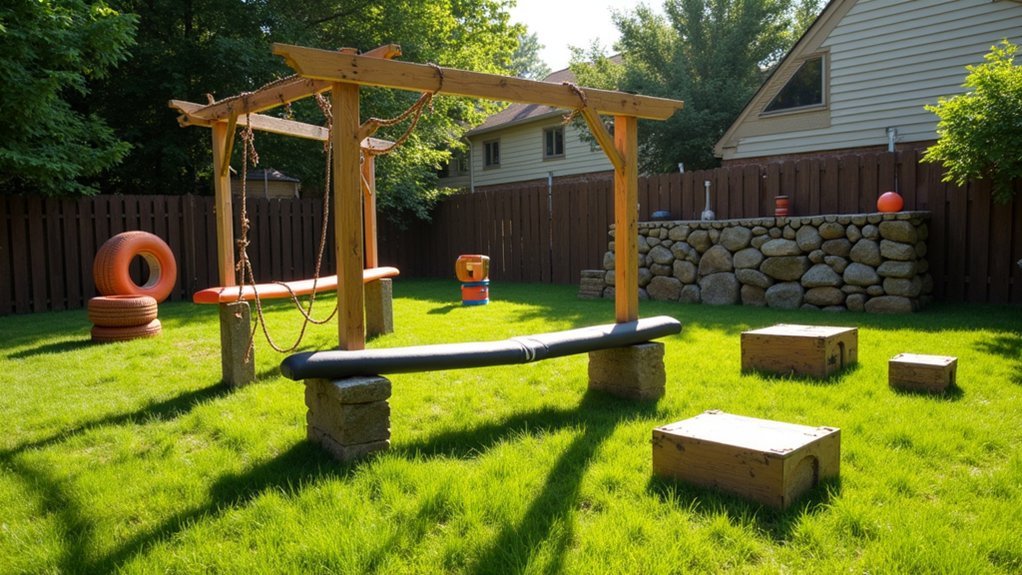
Why start with complex equipment when the best obstacle course elements are often the simplest? Tire runs create an engaging challenge by arranging old tires or hula hoops on the ground for your children to jump through. You’ll enhance their coordination by gradually adjusting the spacing between tires, forcing them to adapt their rhythm and timing. The textured surface and sound of tires also provide valuable sensory input that improves focus and body awareness.
Pair this with a DIY balance beam by simply laying a narrow wooden plank on the ground. Your kids will develop stability as they carefully place each foot along the beam. For safety, surround both elements with cushioning materials like exercise mats or soft grass to protect against inevitable tumbles while they master these fundamental movement skills.
Crawl-Through Tunnels and Under-Over Challenges
After mastering basic movements, your obstacle course can expand with elements that challenge your child’s full-body coordination. Create tunnels by draping blankets over rope tied between two sturdy posts, or use aligned boxes or bent pool noodles for younger children. Position soft foam mats at entrances and exits to cushion any falls.
Enhance your child’s coordination skills with customized tunnels that transform ordinary blankets into extraordinary developmental pathways.
For maximum developmental benefits, combine crawling sections with under-over elements in sequence:
- Create a “sensory journey” with textured mats at tunnel entrances and hanging ribbons that must be pushed through while crawling
- Set up varying height hurdles after tunnel exits that require quick transitions from crawling to stepping or jumping
- Install obstacles at different distances inside tunnels to build spatial awareness and problem-solving skills
PVC Pipe Hurdles and Agility Ladders
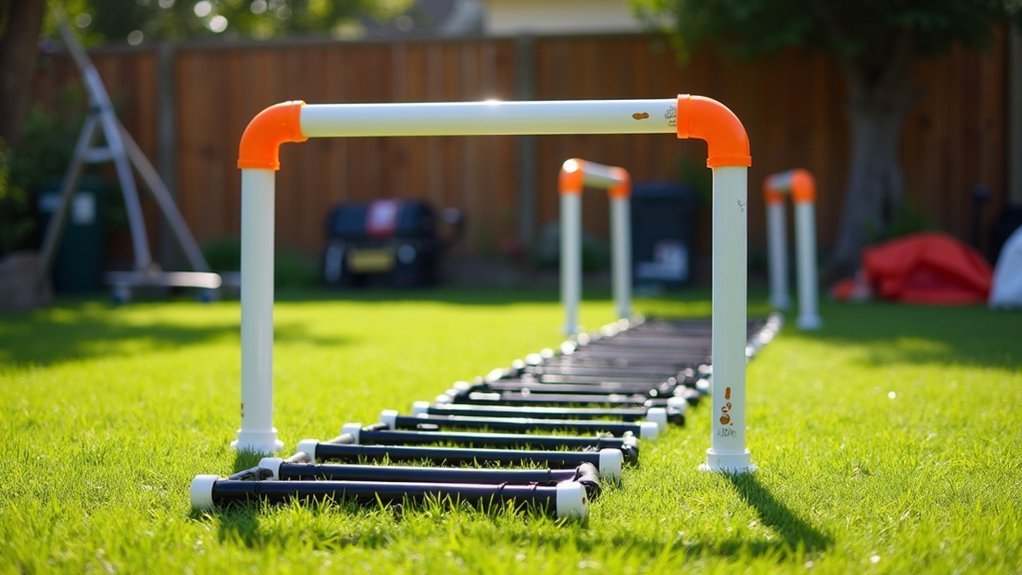
You’ll find PVC pipes are perfect for creating adjustable hurdles that can be raised or lowered to match any skill level. Assemble your agility ladder by connecting PVC sections with 90-degree elbows and securing with single socket tees for a durable training tool that improves footwork and coordination.
Both hurdles and ladders can be quickly disassembled for storage or reconfigured using Kee Klamp fittings to vary your backyard obstacle course challenge.
PVC Pipe Hurdle Basics
How versatile is PVC pipe for backyard obstacle courses? It’s the perfect material for building adjustable hurdles that grow with your child’s abilities. You can create different height options by cutting pipes to various lengths and using adjustable fittings to secure them to base supports. For safety, top your hurdles with pool noodles or foam blocks that’ll give way if someone trips.
- White PVC frames standing at graduated heights across your lawn, creating a progressive challenge from 6″ for beginners to 18″ for more advanced jumpers
- Bright orange pool noodles resting atop each hurdle frame, providing visual targets and cushioned safety
- Kids racing through the course, arms pumping and knees lifting high as they clear each obstacle with increasing confidence
Ladder Assembly Tips
Creating effective PVC agility ladders requires strategic planning before you start connecting pipes. Design your ladder with 90-degree elbows and single socket tees to make adjustable rungs that you’ll easily reconfigure for different training needs.
For stability, add flange mounts or base supports to prevent wobbling during high-intensity drills. You can position your ladder flat on the ground or prop it up with supports depending on your training goals.
| Configuration | Best For | Assembly Tip |
|---|---|---|
| Flat Ground | Footwork precision | Use 1″ diameter pipe for durability |
| Elevated | Knee lift drills | Add 30-60° angle tees for support |
| Adjustable Height | Progressive training | Install removable pins for quick changes |
| Modular Design | Multiple drill types | Create sections that connect/disconnect |
Remember to size your components for easy transport—they should fit in standard storage bins or your car trunk for quick backyard setup.
Climbing Walls and Monkey Bar Stations
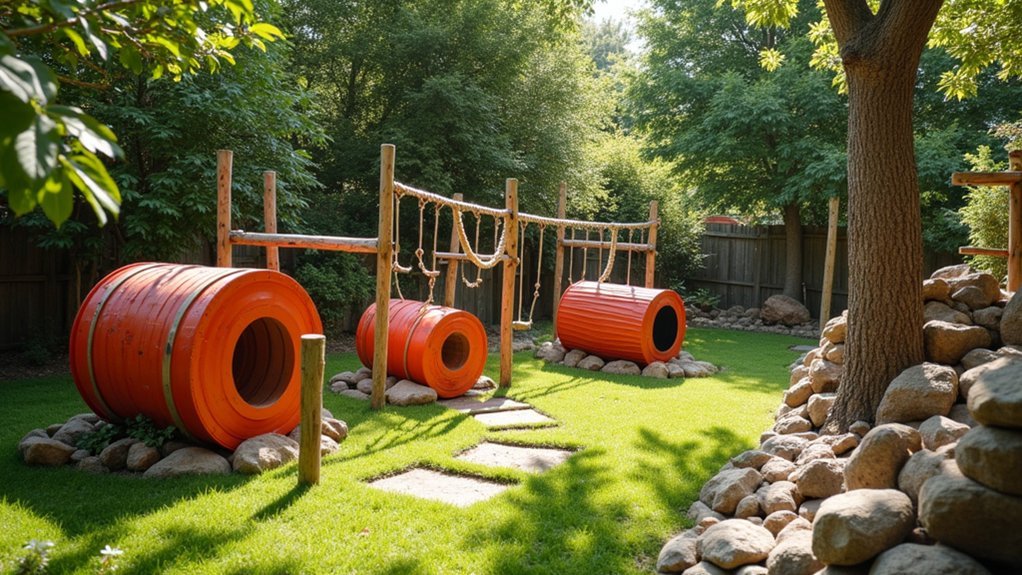
Adventure awaits with backyard climbing walls and monkey bars that transform ordinary play into strength-building challenges. You’ll boost grip strength, core stability, and upper-body coordination while creating an exciting activity center. Use Kee Klamp fittings like Flange and Single Socket Tee components to build sturdy, modular setups that grow with your family.
For freestanding monkey bars, add angled supports for stability and longer spans. Indoor parkour-style installations can utilize Adjustable Angle Base Flanges and Standard Railing Flanges for permanent obstacle runs.
- Imagine colorful climbing holds creating paths of varying difficulty on a slanted wall
- Picture children swinging hand-over-hand across galvanized pipes, building confidence with each bar
- Envision safety mats positioned strategically beneath structures for supervised, worry-free play
Water and Sensory Obstacle Elements

While climbing structures build upper-body strength, water elements add a refreshing dimension to your backyard challenge course. You’ll find that integrating simple water features like slip-and-slides or sprinkler sections creates exciting challenges while cooling participants during hot weather.
Consider setting up portable inflatable pools with floating platforms to cross, or create hoop challenges that require swimming or wading through. Always prioritize safety with proper supervision around any water feature, and establish designated safe water areas to minimize slip hazards.
For accessibility, install textured pathways leading to and from water obstacles and design wider tunnels that accommodate diverse users. The grand integration of traditional obstacles with water components keeps your course varied and engaging, especially when you combine dry land challenges with refreshing aquatic elements.
DIY Target Toss and Finishing Line Setups
Transform your obstacle course with easy DIY target toss stations using laundry baskets positioned at various heights and distances for challenging throwing practice. You’ll improve participants’ hand-eye coordination while keeping them engaged as they toss bean bags or soft balls into these improvised targets. Cap off your course with a motivational sprint-worthy finale where runners dash through a simple finish line, giving them that satisfying race-to-the-end experience that makes completing the course feel like a real achievement.
Laundry Basket Challenges
Ever wondered how to create an exciting finale for your backyard obstacle course? Laundry basket tosses provide the perfect combination of skill and excitement to cap off your DIY adventure. Set up baskets at varying distances and heights, then challenge participants to land bean bags or soft balls inside after completing the main obstacles.
- Position colorful baskets on steps, chairs, or hanging from tree branches to create multiple difficulty levels
- Mark throwing lines with chalk or rope at different distances to accommodate various age groups
- Add point values to each basket—harder targets earn more points—creating a competitive scoring system
You can easily adapt this challenge for indoor or outdoor use, making it perfect for any weather. Pair the final toss with a sprint to the finish line for an exhilarating conclusion to your homemade course.
Sprint-Worthy Finales
How do you create a memorable conclusion to your backyard obstacle course? Add a Finish Line Dash that transforms the finale into an exciting sprint. Set up start and finish markers to give participants a clear goal while boosting their cardiovascular workout.
For added challenge, incorporate a DIY Target Toss using laundry baskets at various distances and heights. Participants can throw bean bags or soft balls to test their hand-eye coordination before crossing the finish line.
Enhance your finale with decorative elements or small rewards at the end to motivate participants. Pairing a sprint with a final obstacle encourages quick transitions and better timing skills.
Easily adapt these finales for different age groups by adjusting sprint distances, basket heights, or target numbers to maintain both safety and an appropriate challenge level.
Animal Movement Stations and Theme-Based Obstacles
While traditional obstacle courses focus on climbing and jumping, animal movement stations offer a creative alternative that combines physical challenges with imaginative play. Set up stations with simple materials like rope boundaries, hula hoops, and colorful animal signs that instruct children which movement to perform. This approach develops coordination while keeping kids engaged through fun, varied movements.
- A bear crawl section with paw prints on the ground, where children move on all fours developing shoulder and core strength
- Bunny hop zones marked with carrot-shaped signs and small hurdles requiring explosive leg power
- Snake slither paths outlined with rope “trails” that encourage full-body coordination and flexibility
You can easily adjust difficulty levels by modifying movements, making this setup perfect for mixed-age groups and inclusive play environments.
Frequently Asked Questions
How Much Space Is Required for a Complete Obstacle Course?
You’ll need at least 20×30 feet for a basic course, but 30×50 feet gives you more options. If you’re planning something elaborate, aim for 50×100 feet to include diverse challenges.
What Safety Surfacing Is Recommended for Fall Zones?
You’ll want rubber mulch, pea gravel, sand, or specialized playground mulch for fall zones. They absorb impact effectively. Always ensure a depth of 6-12 inches depending on equipment height. Don’t skimp on this safety feature.
How Do You Adjust Difficulty Levels for Different Age Groups?
Adjust height, distance, and complexity for different ages. You’ll want lower, closer obstacles for young kids and more challenging setups for teens. Add optional routes or removable difficulty elements for mixed-age participation.
Can Obstacle Courses Be Built on Sloped Yards?
Yes, you can absolutely build obstacle courses on sloped yards. Use the natural incline to create challenging uphill challenges and thrilling downhill segments. Just guarantee proper anchoring and incorporate leveled platforms where needed for safety.
What Maintenance Is Needed During Winter Months?
You’ll need to cover wooden obstacles, store ropes and fabrics indoors, check for ice damage regularly, and apply protective coatings to metal elements. Don’t forget to clear snow from structures to prevent warping.


Leave a Reply