Installing natural gas patio heaters yourself can save you $400-$600 if you have an existing gas line, or up to $1,350 if a new line would be required. DIY installation gives you control over placement for optimal heat distribution across your outdoor space. You’ll need basic plumbing tools, gas-rated components, and safety equipment to complete the project. Follow proper safety protocols and you’ll enjoy efficient, cost-effective outdoor heating for years to come.
Cost Savings of DIY Natural Gas Heater Installation
While professional installers charge a premium for their services, installing a natural gas patio heater yourself can substantially reduce your upfront costs. You’ll save between $400-$600 if you already have a gas line, and up to $1,350 if you’d otherwise need a new line installed.
Natural gas heaters offer long-term savings too, with lower fuel costs than propane alternatives. A standard 40,000 BTU unit efficiently heats about 314 square feet without inflating your energy bills.
The most significant savings come when you have existing gas lines to tap into. By reusing this infrastructure, you’ll minimize expenses while still enjoying the comfort of outdoor heating. Just remember that gas line connections and electrical work for mounted models should be handled by licensed professionals to ensure safety.
Tools and Materials Needed for Self-Installation
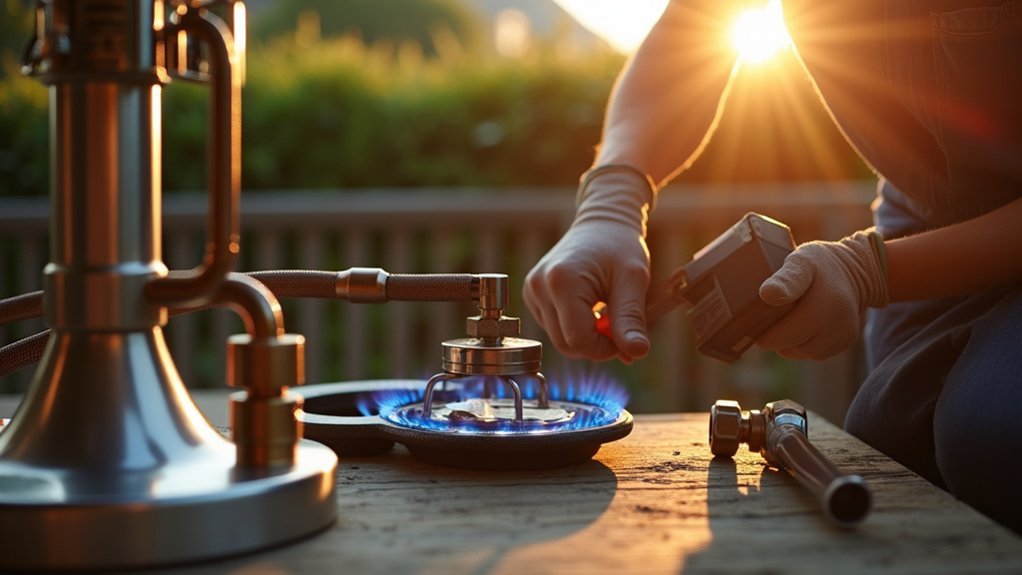
Tackling a natural gas patio heater installation requires having the right tools and materials on hand before you begin. You’ll need standard plumbing tools like pipe wrenches and thread seal tape, along with specific gas-fitting components including approved outdoor gas lines, shut-off valves, and pressure regulators matched to your heater’s BTU rating. Don’t overlook essential safety equipment such as leak detector solution and fire-safe mounting hardware, which are pivotal for ensuring your installation meets proper safety standards.
Essential Tools List
What tools do you need before attempting to install your natural gas patio heater? You’ll need basic plumbing tools along with specialized items for gas line work. Gather adjustable wrenches, pipe wrenches, a manometer or pressure gauge, and a gas-rated leak detector to ensure proper installation.
For materials, you’ll need the heater unit itself, mounting hardware appropriate for your wall or ceiling, gas flexible connector or hard pipe, threaded fittings, and pipe sealant. Don’t forget a dedicated shutoff valve for safety. If your unit requires electricity, prepare electrical supplies too.
Always have personal protective equipment on hand – gloves and eye protection are essential when working with gas. Remember, if a new gas line is required, you’ll need to hire a licensed professional.
Gas Connection Materials
Selecting the right gas connection materials is essential for a safe and effective natural gas heater installation. You’ll need gas-rated flexible hoses specifically designed for outdoor use and natural gas applications. These should connect to proper brass or stainless steel fittings that resist corrosion in outdoor environments.
Don’t compromise on the gas shutoff valve—choose a quarter-turn ball valve rated for natural gas. Apply yellow PTFE thread sealant (never regular plumber’s tape) on all threaded connections to ensure gas-tight seals. For permanent installations, black iron pipe provides durability, while corrugated stainless steel tubing offers flexibility for complex routing.
Remember that all components must comply with local building codes and be rated for your area’s gas pressure. These materials work together to create a secure system that prevents dangerous leaks.
Safety Equipment Requirements
Why risk your safety when installing a natural gas patio heater? Proper safety equipment isn’t optional—it’s essential. You’ll need gas leak detectors to identify dangerous escapes and flame failure devices that automatically shut off gas flow if the flame extinguishes.
For outdoor installations, CO detectors provide crucial protection against carbon monoxide buildup in partially enclosed spaces. Fire-resistant sealing materials must be used around all penetrations and connections.
Remember, after completing installation, you must perform both pressure testing and leak checks following manufacturer guidelines. Use leak-detection solution on every connection point. Most local codes require final inspection by a certified gas technician before first use.
Never attempt gas line connections without proper tools and safety equipment—these connections legally require licensed professionals who understand proper clearances to combustibles.
Understanding Gas Line Requirements and Safety
While you might feel tempted to handle the gas line installation for your patio heater, most jurisdictions require a licensed professional to connect or install gas lines due to serious safety risks.
You’ll need to ensure proper clearances from combustibles (typically 2-3 feet from walls and 6-8 feet from ceilings) and adequate ventilation to prevent carbon monoxide buildup.
Having a professional inspect your installation is essential for confirming proper gas pressure, leak-free connections, and compliance with local building codes.
Gas Line Safety Requirements
When it comes to natural gas heater installation, safety must be your top priority. Despite the article title, you shouldn’t attempt gas line work yourself. Licensed professionals—plumbers, gas specialists, or HVAC technicians—must handle all gas line installations and modifications to ensure proper connections and code compliance.
| Professional | Responsibility | Why Required |
|---|---|---|
| Gas Specialist | Line installation | Prevents leaks |
| Electrician | Power wiring | Safe operation |
| Inspector | Code verification | Legal compliance |
Wall-mounted heaters require both gas and electrical connections, often necessitating multiple professionals. If you already have a natural gas line, it can be utilized for your heater. Otherwise, expect to pay $120-$1,350 for new gas line installation depending on complexity. Remember that proper clearances and secure mounting are essential to prevent fire hazards.
Clearance and Ventilation Standards
How much space does your natural gas patio heater need to operate safely? At minimum, maintain 3 feet of clearance on all sides and additional space above for any overhead obstructions. This clearance isn’t just a suggestion—it’s essential for preventing fire hazards and ensuring proper airflow.
Your heater must be placed in well-ventilated outdoor areas only. Never install gas heaters in enclosed or semi-enclosed spaces where gas could potentially build up. Proper ventilation ensures complete combustion and prevents dangerous gas accumulation.
For wall or ceiling-mounted units, you’ll need both adequate gas supply and electrical connections, while strictly adhering to local code clearances from combustible materials. Before first use, always conduct a thorough leak check using the approved soapy water method on all connections and fittings.
Professional Inspection Essentials
Before beginning a natural gas patio heater installation, you’ll need professional inspection to ensure everything meets safety standards. Licensed plumbers, gas specialists, or HVAC technicians must verify gas line availability, proper clearances, and safe integration with your outdoor space.
These professionals will conduct an on-site assessment to determine appropriate clearances to combustible materials and confirm adequate ventilation for safe operation. If you don’t have an existing gas line, they’ll need to install one before your heater can be deployed.
Don’t skip regular professional inspections—they’re crucial for detecting leaks, worn connections, and ensuring your system maintains UL/CSA certification compliance. While you might handle some aspects of installation yourself, gas line connections and electrical wiring for wall or ceiling-mounted units require certified professionals to avoid dangerous complications and maintain warranty validity.
Step-by-Step Installation Process
Installing a natural gas patio heater yourself requires careful planning and adherence to safety protocols. While portable heaters don’t require electrical connections, wall or ceiling-mounted units need both gas and electrical supplies, potentially requiring licensed wiring.
For a successful installation:
- Assess your space requirements first—a standard gas patio heater covers approximately 314 square feet with 40,000 BTUs of heat output
- Determine if you can utilize existing gas lines or need new installation (costs range from $120-$1,350 nationally)
- Confirm proper clearances to combustibles before mounting permanent fixtures
- Coordinate with professionals for final connections and testing—despite DIY installation, gas line work should be handled by licensed plumbers or HVAC technicians
Never attempt gas line modifications without proper training and permits.
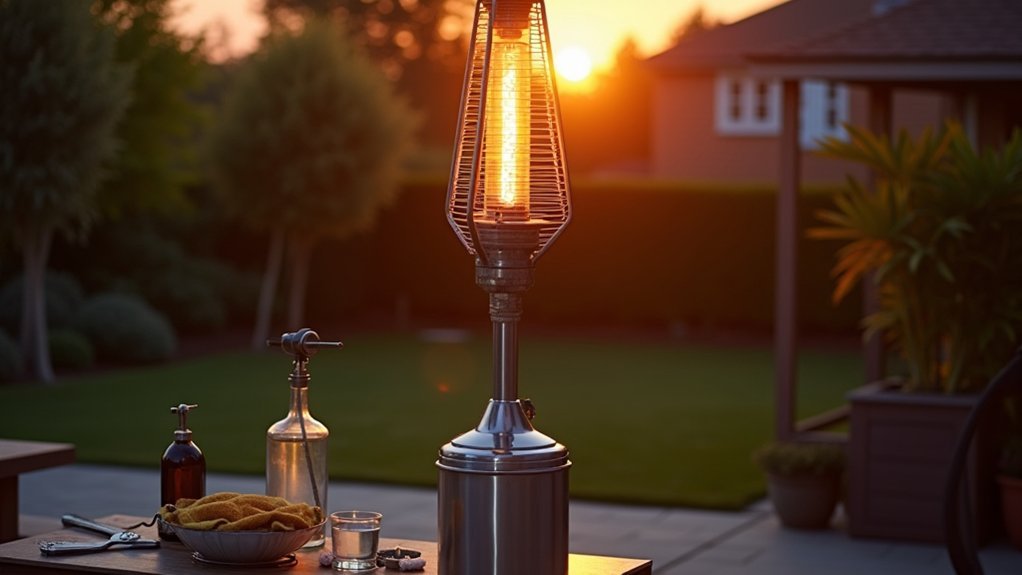
Proper Placement for Maximum Heat Distribution
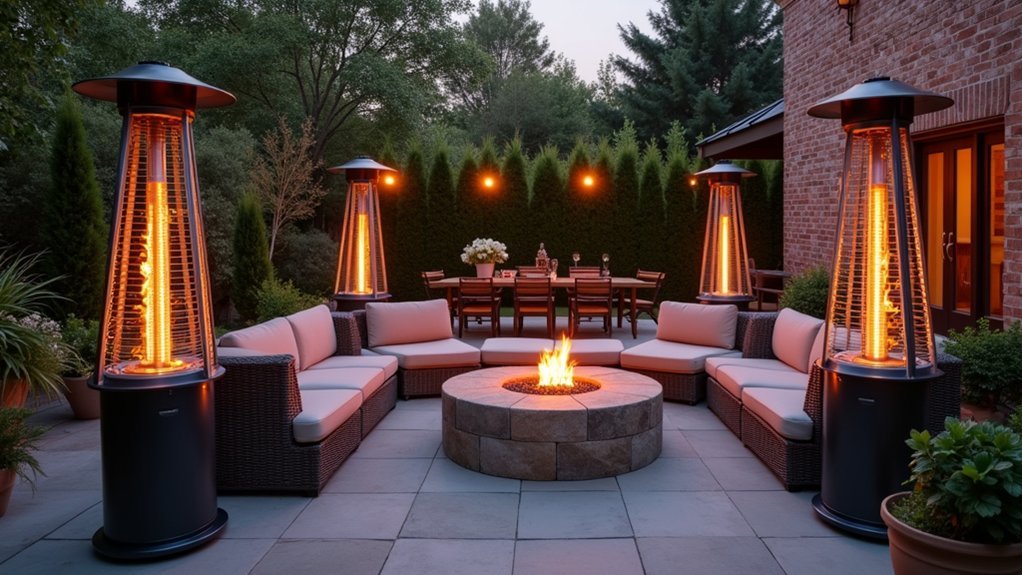
Strategic placement of your natural gas patio heater can dramatically impact its heating effectiveness and energy efficiency. Always position freestanding units on flat, stable surfaces with three feet of clearance all around. Direct the radiant output toward your seating area, not toward walls or flammable materials.
For wall or ceiling-mounted heaters, follow manufacturer height and angle specifications to maximize coverage. When using multiple units, create overlapping heat fields to eliminate cold spots and ensure uniform warmth throughout your outdoor space.
Don’t forget to factor in wind patterns when positioning your heaters. Cross-breezes can significantly diminish heating performance by carrying warmth away from guests. By thoughtfully arranging your heaters with these principles in mind, you’ll create a consistently comfortable outdoor environment while minimizing wasted energy.
Connecting to Existing Gas Lines Safely
While connecting your natural gas patio heater to existing gas lines may seem tempting as a DIY project, you’ll need professional help to ensure proper gas pipe sizing, compliance with local codes, and safe installation. You must use specialized tools like pipe wrenches, leak detection solution, and pressure testing equipment to properly connect gas lines and prevent dangerous leaks. Regular inspections of all gas connections should be performed by qualified technicians to maintain safety, check for wear, and ensure continued compliance with regulations.
Connection Safety Requirements
When connecting your natural gas patio heater to existing gas lines, safety must be your top priority. Despite the DIY appeal, this critical connection requires a licensed professional who ensures proper gas routing and code compliance. They’ll evaluate clearances from combustible materials and determine if your specific heater model requires additional fittings or line modifications.
- Licensed professionals conduct mandatory pressure tests to verify system integrity
- Proper connection prevents dangerous gas leaks that could lead to fire or explosion
- Professionals ensure electrical connections meet local code requirements for dual-powered units
- Regular inspection schedules can be established during professional installation
Remember that cutting corners on gas line connections creates serious safety hazards. The small investment in professional installation protects your property and family while providing peace of mind that your system meets all safety standards.
Proper Tools Needed
What tools should you have on hand before attempting to connect your natural gas patio heater? For safety and proper installation, you’ll need an adjustable wrench, pipe wrench, leak detection solution, pipe thread compound, and a pressure gauge to test gas levels. A voltage tester is essential if you’re installing wall or ceiling-mounted units that require electrical connections.
Regular Inspection Routines
How frequently should you check your natural gas patio heater to guarantee safety? Before each use, verify all gas connections for leaks, corrosion, and secure fittings. An annual professional inspection by a licensed gas technician is essential for maintaining safe operation of your existing gas lines.
- Listen for hissing sounds near connections—this indicates a potential leak requiring immediate attention
- Implement a visual inspection routine focusing on burner ports to ensure they’re free from debris and obstructions
- Test all safety features including automatic shut-off valves and tilt switches before operation
- When connecting to existing gas lines, always use approved adapters and follow local building codes—never attempt modifications yourself
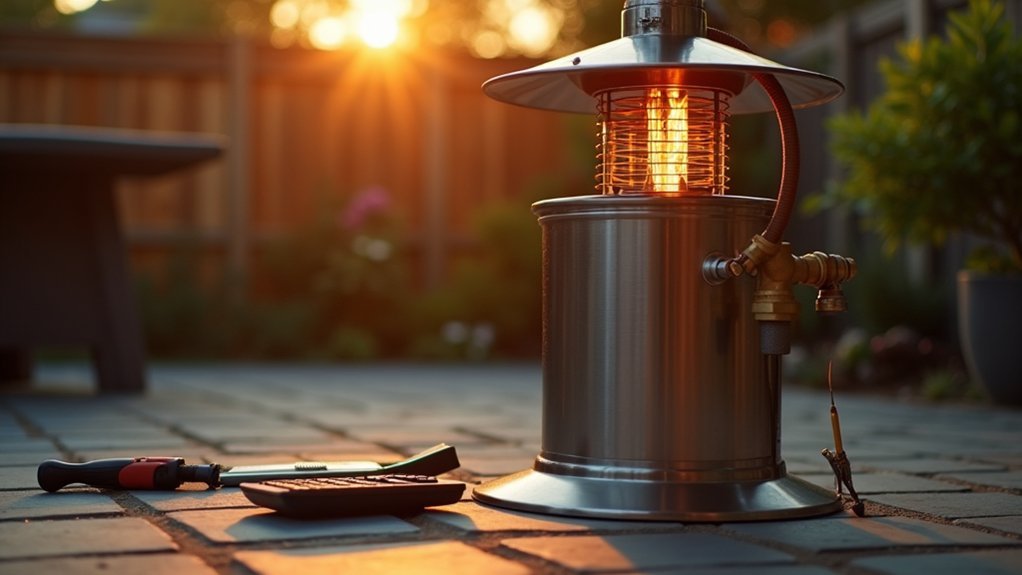
Testing Your Installation for Leaks and Performance
Once you’ve completed your natural gas patio heater installation, thorough testing becomes essential for ensuring both safety and optimal performance.
Start by checking for gas leaks using a simple soapy water solution applied to all connections—bubbles indicate leaks that need immediate attention.
Verify your system pressurizes properly by ensuring the gas valve opens smoothly and the burner ignites without delay.
When observing the flame, look for a steady blue color with minimal yellow tipping, which confirms efficient combustion.
Maintain safety by providing at least three feet of clearance around your heater and keeping it away from flammable materials.
If your unit requires electrical connections for ignition, ensure they’re GFCI-protected and installed by a licensed professional.
Local Permits and Code Compliance
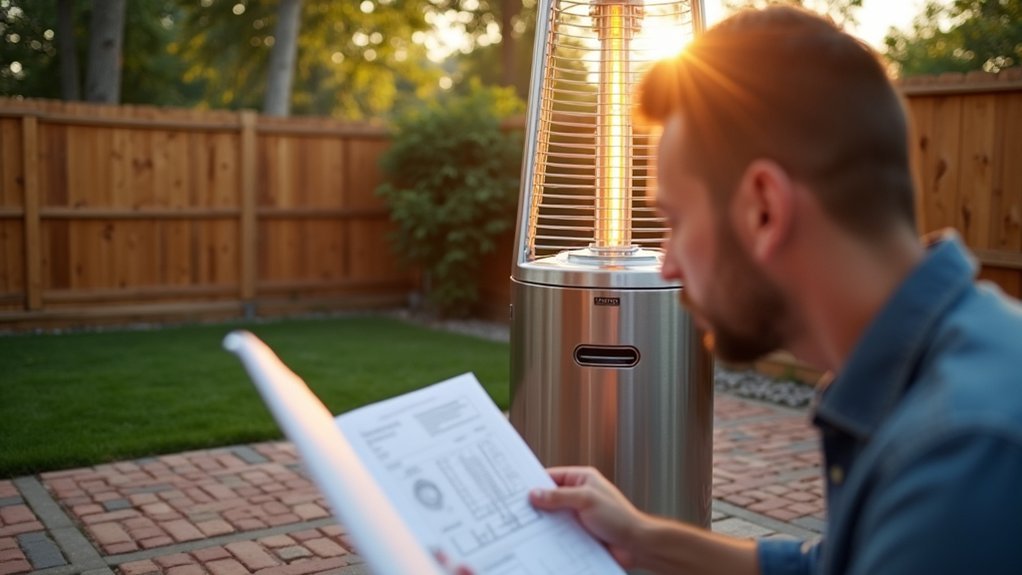
Why do so many DIY enthusiasts overlook the critical legal requirements when installing natural gas patio heaters? While you might be eager to create your outdoor comfort zone, Mississauga’s municipal regulations require specific permits for natural gas installations, especially wall-mounted or overhead units.
Most importantly, code compliance isn’t just bureaucratic red tape—it’s for your safety:
- Licensed professionals (plumbers, gas fitters, or HVAC technicians) are legally required to handle gas line connections
- Post-installation inspections verify your system meets fire safety standards and proper clearances
- Wall-mounted units often require additional electrical permits and licensed electrical work
- Permit fees and inspection schedules vary, so contact Sentral HVAC or local building authorities before purchasing equipment
Skipping these requirements risks fines, insurance problems, and dangerous installation flaws.
Troubleshooting Common Installation Problems
Even with careful planning, DIY natural gas patio heater installations frequently encounter several predictable challenges that can frustrate homeowners and compromise safety.
Gas pressure issues often manifest as weak flames or failure to ignite. Check your gas line sizing against the heater’s BTU requirements, as undersized pipes restrict flow to high-output 40,000 BTU units.
Improper clearances represent another common issue, particularly with wall or ceiling-mounted units. Ensure you’re maintaining manufacturer-specified distances from combustibles and overhead structures.
If you encounter electrical problems with ignition systems, verify you’ve correctly wired the unit to the proper voltage. Remember that weather-resistant connections are essential for outdoor installations.
Gas leaks remain the most dangerous potential problem. Always test connections with soapy water solution after installation, and don’t hesitate to call a licensed professional if you detect any odors or bubbling during testing.
Long-Term Maintenance Tips for Self-Installed Heaters
Maintaining your self-installed natural gas patio heater properly isn’t just about extending its lifespan—it’s a critical safety measure that protects your investment and your family. Develop a routine inspection habit, checking all gas connections before each use and immediately addressing any loose fittings. Always turn off the gas supply and let the heater cool completely before cleaning exterior surfaces.
Regular safety checks of your gas patio heater safeguard both your investment and your loved ones.
- Schedule annual professional inspections with licensed technicians who can spot potential issues you might miss
- Protect your heater from the elements with a quality weather-resistant cover when not in use
- Store your heater in a dry, protected area during extended periods of disuse
- Respect internal components—leave complex repairs to certified professionals rather than attempting DIY fixes
Frequently Asked Questions
Are Gas Patio Heaters Worth It?
Yes, they’re worth it if you’ll use your patio regularly. You’ll get reliable, powerful heat that’s cheaper to operate than electric or propane alternatives over time.
How Much to Install a Natural Gas Heater?
You’ll spend $400-$600 for installation if a gas line exists, or $520-$1,950 total with new line installation. Costs vary based on your heater type and BTU requirements.
How Long Will a Patio Heater Run on a 20 Lb Propane Tank?
Your 20 lb propane tank will run a standard 40,000 BTU patio heater for 10-20 hours. You’ll get about 10 hours at full power or longer if you’re using lower settings.
Are Patio Heaters a Special Installation?
Yes, patio heaters often require special installation, especially those using natural gas, which need licensed professionals for gas line connections and proper safety clearances.


Leave a Reply