
To test your outdoor cooking thermometer’s accuracy, use an ice bath test first. Fill a glass with ice, add water, stir, then insert the thermometer probe without touching the sides. It should read 32°F after 30 seconds. For additional verification, test in boiling water adjusted for your elevation. Dial thermometers can be recalibrated by adjusting the nut underneath, while digital models usually need replacement if off by more than 5°F. Proper verification ensures perfect cooking results every time.
Why Accurate Temperature Readings Matter for Outdoor Cooking
Why gamble with your barbecue results when a properly calibrated thermometer can guarantee success? Precise temperature monitoring forms the foundation of both food safety and culinary excellence when cooking outdoors.
Accurate readings prevent the dual dangers of undercooking (which leaves harmful pathogens alive) and overcooking (which results in dry, tough, or burnt meat). When you’re battling variable outdoor conditions, your thermometer becomes even more essential – wind, direct sunlight, and the radiant heat from your grill can all mislead uncalibrated instruments.
Without reliable temperature data, you’re cooking blind. That perfect medium-rare steak or safely cooked chicken thigh isn’t a matter of luck or timing – it’s about knowing the exact internal temperature of your food throughout the cooking process.
Understanding Thermometer Types: Dial vs. Digital for BBQ and Grilling
The tools you select for temperature monitoring can make or break your outdoor cooking experience. Dial thermometers use mechanical needles that require calibration by adjusting the nut beneath the dial. After placing them in ice water for 1-2 minutes, you’ll need to twist this nut until the needle points to 32°F.
Digital thermometers offer instant readings through sensors but typically don’t allow for manual calibration. Instead of adjusting the device itself, you’ll need to mentally add or subtract degrees from your target cooking temperatures to compensate for any inaccuracies.
For optimal results with either type, test in ice water to establish a 32°F baseline. When possible, verify in boiling water too. Digital accuracy depends on battery health and firmware, while dial thermometers need regular mechanical adjustments to maintain precision.
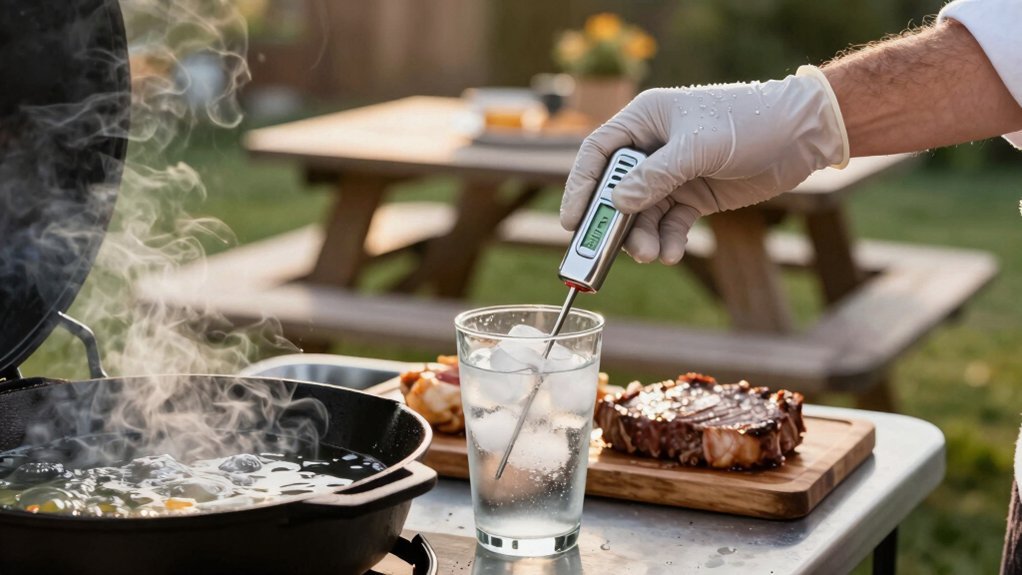
The Ice Bath Test: A Simple Accuracy Check for Your Grill Thermometer
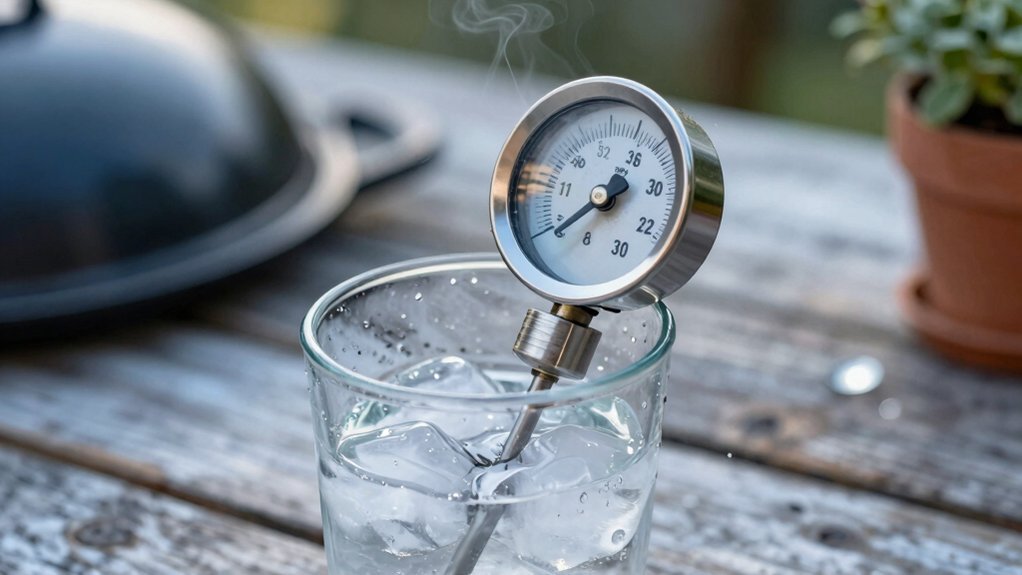
Testing your grill thermometer’s accuracy doesn’t require fancy equipment or professional calibration services—just a simple ice bath at home. Fill a tall glass with ice, then add water until the ice pieces have small air gaps between them, creating a stable 32°F reference environment.
Insert your thermometer probe about 2 inches into the center of the mixture, taking care not to touch the sides of the glass or the ice directly. Gently stir and wait approximately 30 seconds. Your reading should be exactly 32°F—any deviation indicates your thermometer needs calibration or replacement.
For best results, use pre-chilled ice from your refrigerator’s ice maker and test multiple thermometers in the same bath to identify any outliers and confirm consistency.
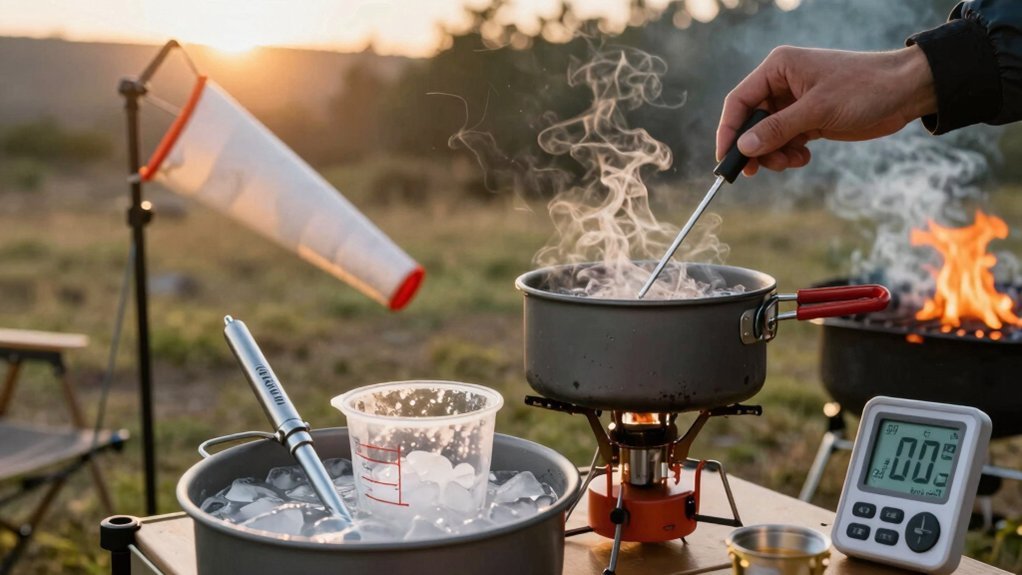
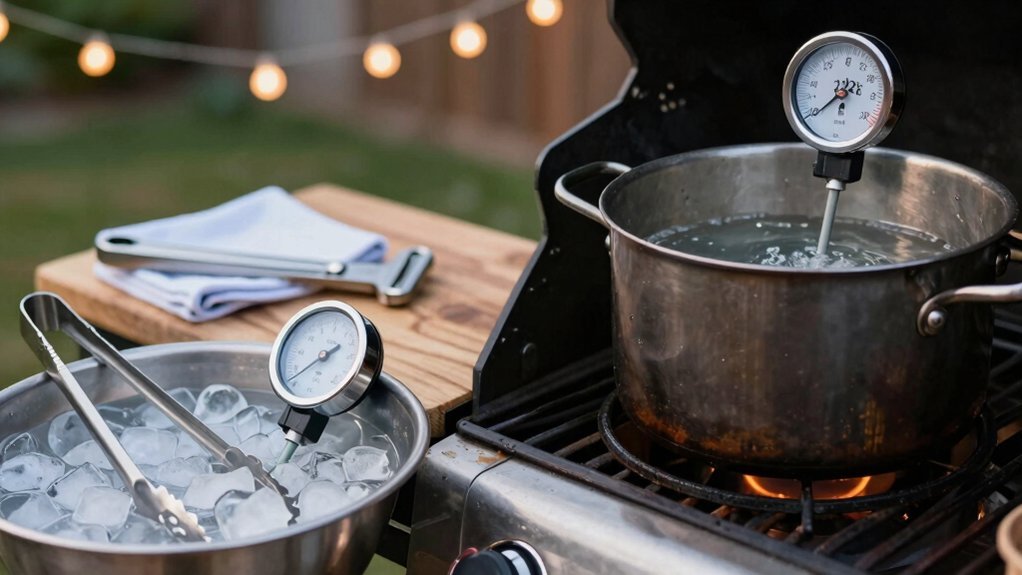
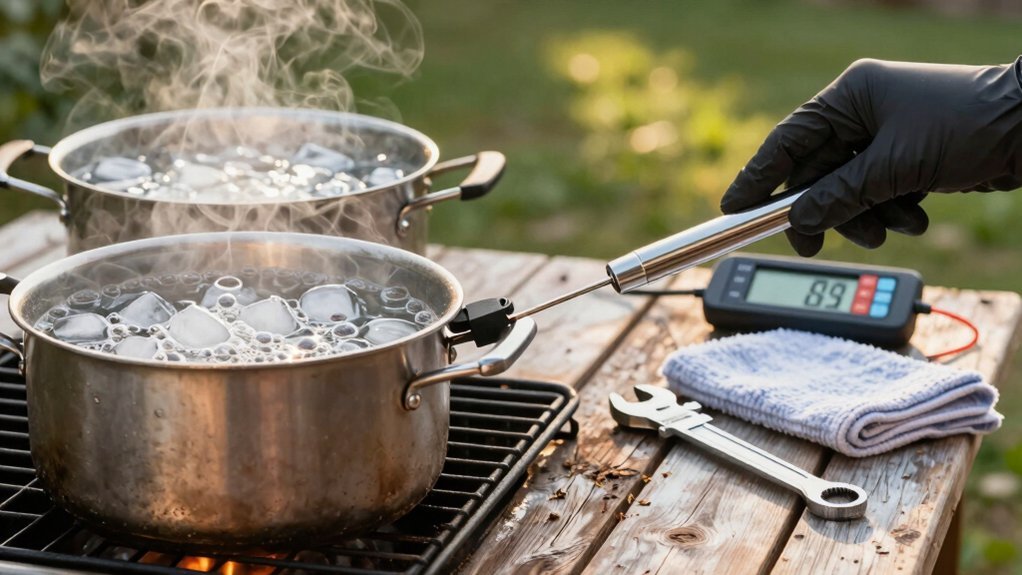
Using the Boiling Water Method to Verify Thermometer Precision
When testing your outdoor thermometer with boiling water, you’ll need to adjust for your location’s elevation since water boils at different temperatures depending on altitude. Your thermometer should read within 0.5-2°F of your local boiling point, which you can find using a boiling point calculator based on your specific elevation. This method specifically tests your thermometer’s accuracy at high temperatures, complementing the ice bath test to guarantee precision across the full temperature range you’ll encounter during outdoor cooking.
Adjusting For Elevation
Why does altitude matter when testing your thermometer with boiling water? The simple answer is that water boils at different temperatures depending on your elevation. At sea level, water boils at 212°F (100°C), but as you climb higher, the boiling point drops.
To ensure accurate testing:
- Use a local Boiling Point Calculator to determine the exact boiling temperature at your elevation
- Remember that higher elevations mean lower boiling points (approximately 1°F lower for every 500 feet of elevation)
- Compare your thermometer reading to your location’s specific boiling point, not the standard 212°F
- If your reading differs by more than the manufacturer’s stated tolerance (typically ±0.5°F for quality models), your thermometer needs attention
- Document your findings so you know how much to adjust future readings
Temperature Range Testing
Now that you understand how elevation impacts your thermometer readings, let’s examine the actual testing process. Use distilled water in a deep pot at a rolling boil—not so vigorous that it splashes your thermometer. Insert the probe about 2 inches into the water, avoiding contact with the pot’s bottom and sides. Stir gently for 10 seconds before taking your reading.
Your thermometer should read within ±0.5°F of your local boiling point. While sea level boiling occurs at 212°F, you’ll need to calculate the correct value for your elevation using a Boiling Point Calculator. Keep in mind that factors like hard water can raise the boiling point by 1-2°F, and pot shape may affect readings slightly. If your thermometer shows significant deviation, it’s time to recalibrate.
Common Causes of Inaccurate Readings in Outdoor Environments
Your outdoor cooking thermometer’s accuracy can be compromised by weather extremes like direct sunlight, strong winds, and temperature fluctuations that interfere with sensor performance.
Material interference occurs when dust, moisture, or improper mounting prevents proper contact between the sensor and what you’re measuring.
Weak batteries often cause erratic readings and slow response times, particularly in cold weather when battery performance naturally declines.
Weather Extremes
When cooking outdoors, the elements can play havoc with your temperature readings. Weather extremes particularly challenge your thermometer’s accuracy, creating conditions that can mislead even the most careful cook.
- Sudden rain or cloud cover can rapidly change your thermometer’s reading before the actual ambient temperature has adjusted
- Direct sunlight exposure can artificially elevate readings by several degrees as the sensor absorbs radiant heat
- Strong winds accelerate heat transfer from your thermometer, potentially causing lower-than-actual readings
- High humidity affects some thermometer types, especially analog dials that respond to pressure changes
- Elevation changes impact readings as air pressure varies, requiring recalibration if you’re cooking at different altitudes
Cross-checking your thermometer against a reference standard after weather changes ensures you’re not making cooking decisions based on misleading information.
Material Interference
Beyond weather conditions, the physical environment around your thermometer creates another layer of accuracy challenges. Materials surrounding your probe can dramatically affect its readings, leading to false temperature data during your cook.
| Interference Type | Effect on Readings |
|---|---|
| Reflective Surfaces | Bounce heat onto sensor causing artificially high readings |
| Probe Placement | Gaps around insertion points allow ambient air to affect sensor |
| Surface Contamination | Grease and dirt on display or probe interfere with calibration |
| Mounting Materials | Metal brackets can conduct heat to thermometer housing |
To test for material interference, try repositioning your thermometer away from metal surfaces and direct heat reflections. Clean your probe thoroughly between uses, and ensure it’s properly inserted with no air gaps. When testing accuracy, always consider what materials might be affecting your readings.
Battery Performance Issues
Many outdoor cooking enthusiasts overlook how battery performance dramatically affects thermometer accuracy. When your batteries lose voltage, your readings may become slow or inaccurate, showing temperatures far different from actual cooking conditions.
Common battery-related problems you’ll encounter:
- Erratic temperature readings that drift or fluctuate during cooking
- Slow response times when moving between hot and cold zones
- Corroded battery contacts causing intermittent connections
- Weakened performance in extreme outdoor temperatures
- Inconsistent readings that don’t match control tests
To restore accuracy, replace with fresh, high-quality batteries and clean the contacts thoroughly. Verify your thermometer’s performance with simple calibration tests like an ice bath or boiling water adjusted for your elevation. Developing a regular battery check routine ensures your cooking temperatures remain reliable throughout your outdoor cooking sessions.
How to Calibrate Different Types of Outdoor Cooking Thermometers
Properly calibrating your outdoor cooking thermometer ensures accurate temperature readings that can make or break your barbecue session. For dial thermometers, prepare an ice-water bath, insert the probe for 30 seconds, then turn the adjustment nut until it reads 32°F. Recheck in the same bath to confirm stability before use.
Digital models typically can’t be manually calibrated—instead, verify accuracy by checking if they read 32°F in an ice-water bath. If readings are off, you’ll need to adjust your cooking targets accordingly.
When testing any thermometer, ensure the probe is fully submerged in the ice water but not touching the container or ice chunks. If your model can’t be calibrated at all, follow manufacturer guidelines rather than attempting mechanical adjustments that might damage the unit.
Temperature Variance: What’s Acceptable for Different Cooking Methods
Understanding acceptable temperature variance is essential when using outdoor cooking thermometers, as different cooking methods require varying levels of precision. High-quality thermometers typically offer accuracy within ±0.5°F to ±2°F depending on your cooking method and tool quality.
- For instant-read thermometers, expect accuracy within ±1-2°F of your target when tested against ice baths (32°F) and local boiling points
- When testing with boiling water, aim for readings within ±0.5-2°F of your local boiling point (varies with elevation)
- Always account for carryover cooking by adjusting your target temperature down by 5-10°F
- Infrared thermometers work best for surface temperatures, not for testing doneness
- Cross-check readings between different thermometers for maximum confidence in your temperature measurements
When to Replace vs. When to Recalibrate Your Thermometer
Knowing when to recalibrate versus replace your outdoor cooking thermometer can save you both frustration and money in the long run.
If your thermometer reads more than 5 degrees off in an ice bath test, replacement is typically your best option.
Dial thermometers can usually be recalibrated by adjusting the calibration nut until it reads 32°F in ice water.
However, most digital models can’t be user-calibrated and should be replaced if inaccurate.
Use the tolerance test in both ice water and boiling water to make your decision—if readings fall outside the ±0.5–2°F range specified by your model, act accordingly.
For thermometers showing consistent bias but still under warranty, contact the manufacturer rather than attempting DIY fixes.
Best Practices for Thermometer Maintenance in Outdoor Conditions
Harsh outdoor elements can quickly compromise your cooking thermometer’s accuracy if you don’t maintain it properly. Regular care ensures reliable readings every time you fire up the grill or smoker. Keep your thermometer performing at its best with these essential maintenance practices:
- Inspect regularly for dirt, moisture damage, and physical wear from sun and rain exposure
- Calibrate using ice water and boiling water tests every 6 months and after any drops
- House your thermometer in a protective, shaded enclosure to prevent sun-induced reading errors
- Position sensors away from direct flames, radiant heat, and metal surfaces to avoid false readings
- Test multiple locations on larger cooking equipment as temperature zones can vary significantly
Recommended Thermometer Brands for Reliable Outdoor Cooking Results
When selecting a thermometer for outdoor cooking, reliability becomes the dividing line between perfectly done meats and disappointing results. The Thermoworks Thermapen ONE stands out as a top choice, offering accuracy within ±0.5°F of your local boiling point. For those preferring dial-style options, the Tel-Tru BQ300 BBQ Thermometer delivers consistent readings within ±2°F.
Look for models that either allow manual calibration or come with manufacturer-provided validation instructions. Digital thermometers typically require verification rather than adjustment, while dial thermometers can be calibrated using the nut under the head. Whichever brand you choose, verify its accuracy using both ice water (32°F) and boiling water tests to ensure reliable performance across various ambient conditions.
Frequently Asked Questions
How to Tell if a Cooking Thermometer Is Accurate?
Test your thermometer in ice water (should read 32°F) and in boiling water (should match local boiling point). You can recalibrate dial thermometers using the adjustment nut if needed.
How Do I Know if My Outdoor Thermometer Is Accurate?
Test your outdoor thermometer in ice water (should read 32°F) and boiling water (212°F at sea level). Check manufacturer’s guidelines as some digital models aren’t user-adjustable. Adjust cooking targets accordingly.
How to Test if a Thermometer Is Accurate?
Test your thermometer in ice water (should read 32°F) and boiling water (should match local boiling point). Adjust as needed or note the difference for future cooking temperature calculations.
How Do I Calibrate a Cooking Thermometer?
Place your thermometer in ice water, ensuring the tip doesn’t touch sides. Wait 30 seconds. If it doesn’t read 32°F, adjust using the calibration nut or follow manufacturer’s instructions.


Leave a Reply