
Temporary privacy fencing transforms your party space with minimal effort. Start by assessing sightlines and choosing portable materials like vinyl panels ($10-$30 per linear foot) or DIY screens made from pallets and fabric. Secure them with weighted bases on concrete or deeper stakes in sandy soil. Add string lights or greenery for decoration and ambience. Layer elements at different heights for complete coverage while maintaining an inviting atmosphere. The right setup balances quick installation with effective seclusion.
Understanding Your Privacy Needs for Outdoor Gatherings
Why settle for an exposed backyard when hosting your next gathering? Before installing temporary privacy fencing, you’ll need to determine exactly what level of seclusion you’re trying to achieve. Consider whether you need to block views from neighboring yards, shield your party from street visibility, or create intimate zones within your outdoor space.
Evaluate your property’s specific requirements for screening, noise reduction, and visual barriers. This assessment will guide your decisions on fence height, material density, and placement. Remember to check local permit requirements and HOA regulations that might restrict fence height or style before making plans. Privacy fences offer strong solutions, but only when they’re tailored to your particular gathering needs and comply with community guidelines.
Quick-Setup Fencing Materials for Party Spaces
Once you’ve assessed your privacy needs, it’s time to explore materials that offer quick solutions for your event space. Portable vinyl fencing sections stand alone and expand easily, costing approximately $10-$30 per linear foot.
These freestanding panels set up in minutes—simply place feet at regular intervals and use corner braces to create 90-degree angles around your party area. For enhanced privacy, attach shade cloth or privacy screens to the panels, particularly along exposed sides.
When installing on hard surfaces like concrete or pavement, secure posts with base plates and appropriate anchors. Keep your design flexible by planning entry points and ensuring panels are level. Connect sections securely with clamps or ties, allowing for quick reconfiguration as needed during your event.
DIY Temporary Privacy Screens for Backyard Events
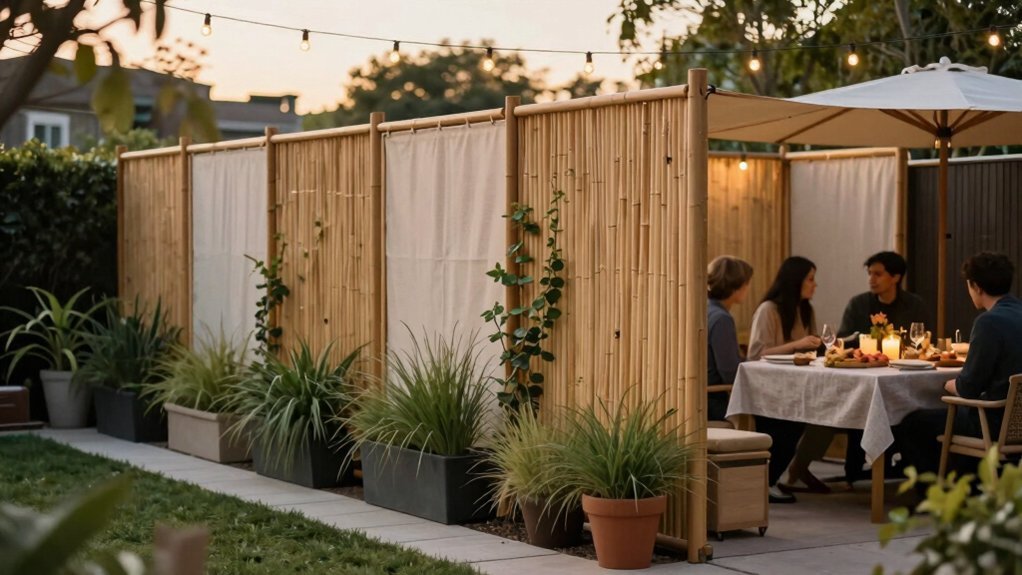
Creating DIY temporary privacy screens offers an affordable, customizable solution for your backyard event’s privacy needs. Consider using 6-foot pallets or modular panels to establish a secluded backdrop that transforms your outdoor space.
Weather-resistant materials like vinyl-coated fabric or shade cloth stretched between posts provide immediate visual privacy without permanent installation. Secure these screens to lightweight posts using zip ties or clamps, placing them on stable bases to avoid drilling while allowing for repositioning.
For optimal coverage, plan for 30-40 feet of total screening length to create a 10-15 foot wide enclosure. This maintains privacy while ensuring proper airflow. Add a festive touch by incorporating string lights or fabric banners, which you’ll easily remove once your guests depart.
Strategic Placement Tips for Maximum Seclusion
To achieve maximum seclusion at your outdoor party, first assess your yard for exposure points from neighbors’ windows and street views before positioning your privacy screens. Layer your fencing elements strategically with taller panels at entry points and corners of your main gathering area while maintaining lower sections where natural barriers already exist. Map out your guests’ likely movement patterns to ensure privacy screens don’t impede flow but still shield key areas like seating zones and food stations.
Identify Exposure Areas
Where should your temporary privacy fencing go first? Create a simple map of your outdoor space and mark entry points, sightlines from neighboring windows, and shared boundaries that expose your event. Pay special attention to areas visible from adjacent properties or public spaces.
Position taller privacy panels along the most visible boundaries, maintaining a consistent height that blocks line-of-sight while allowing air circulation. Consider wind patterns by angling screens to deflect prevailing breezes away from seating areas without creating wind tunnels.
For maximum seclusion, cluster multiple lightweight sections into longer runs with corner braces at 90-degree angles to eliminate gaps. Incorporate decorative elements like potted plants, trellises, or vertical slats in high-exposure zones to enhance privacy while keeping your setup looking festive and temporary.
Layer Screen Elements
How do you achieve genuine seclusion at your outdoor party? The secret lies in strategic layering—creating depth with multiple screening elements rather than relying on a single barrier. Start by placing wind-breaks and solid panels at perimeter edges, then fill interior gaps with mesh or decorative screens to disrupt direct line-of-sight.
- Combine different opacities (solid panels behind translucent screens) to create a sophisticated visual barrier that maintains airflow
- Stack screening materials at staggered heights—6-foot outer frames with 4-foot inner elements—to block sightlines while preserving an open feel
- Position service and storage zones behind upper-layer screens, keeping your main entertaining areas completely private from neighboring viewpoints
This layered approach gradually increases coverage from 0% to nearly 100% where needed, ensuring your guests enjoy complete privacy without feeling enclosed.
Consider Guest Movement
Strategic guest movement shapes the effectiveness of even the most well-designed privacy screens. Position your panels to create wall-facing orientations that block sightlines from the main party area while maintaining at least one clear entry/exit path for guests.
For maximum seclusion, place taller sections along perimeter edges near neighbor views or street traffic. This preserves foot traffic flow inside your party space while enhancing privacy. Consider creating L-shaped or curved configurations around seating clusters to naturally funnel movement toward entrances and discourage lingering in exposed areas.
Shield conversations by positioning screens behind dining or lounge setups without blocking ventilation. When planning your layout, align panel gaps and gate placements with high-traffic destinations like bathrooms, bars, and photo areas to minimize cross-traffic through your most private zones.
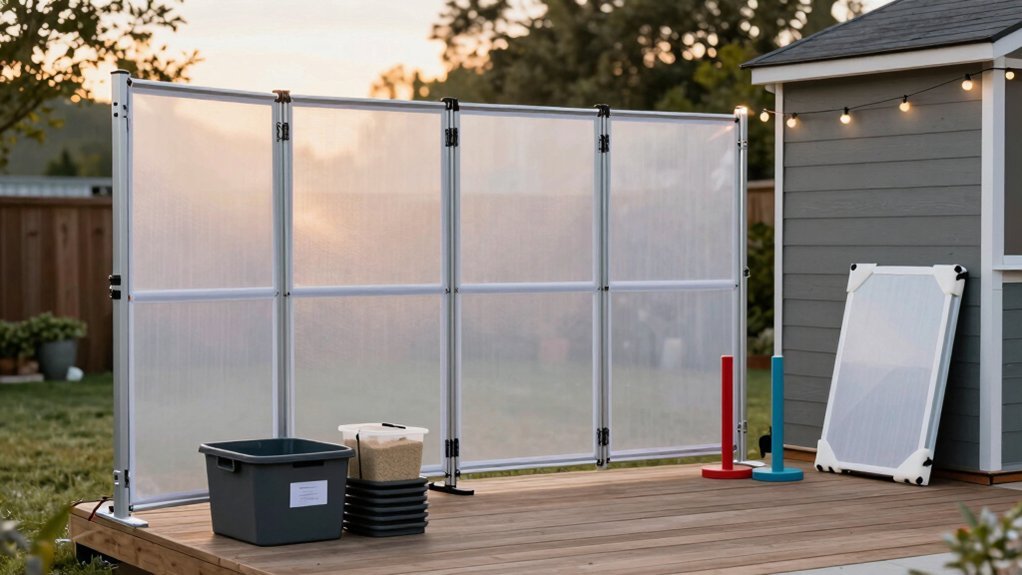
Weather-Resistant Options for Outdoor Privacy
When planning an outdoor event, you’ll need to contemplate how your privacy fencing will stand up to the elements. Vinyl fencing offers excellent weather resistance at $10-30 per linear foot, providing both durability and style options while requiring proper in-ground posts for stability.
Weather-resistant vinyl fencing combines durability with aesthetic appeal, making it an ideal choice for outdoor event privacy solutions.
For quick solutions, consider these weather-resistant alternatives:
- Galvanized steel temporary panels that combine portability with storm resistance for hassle-free setup and removal
- Shade cloth or privacy screens that attach to existing structures, enhancing weather protection without extensive installation
- Plastic garden netting for budget-friendly, lightweight coverage that works well in mild conditions but may struggle in high winds
When selecting materials, evaluate wind exposure, UV radiation, and drainage needs to prevent damage and ensure your privacy solution lasts throughout your event.
Decorative Elements to Enhance Party Privacy Barriers
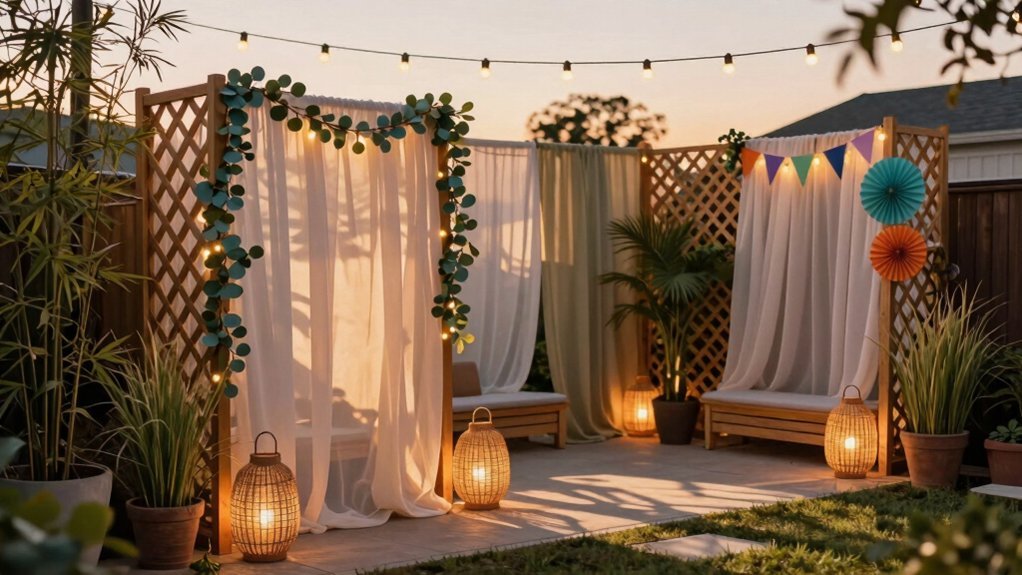
Why settle for plain privacy barriers when you can transform them into stunning design elements that enhance your party’s atmosphere? Decorative privacy screens with weatherproof prints offer both functionality and style while blocking unwanted sightlines.
Create magical evening ambiance by attaching string lights or lanterns along the fence’s top edge. Soften the barrier’s appearance with greenery panels—either faux ivy or living plant lattices—that increase privacy while adding natural beauty.
Customize your party theme instantly with removable fabric banners that complement your color scheme without damaging the structure. For additional visual interest and opacity, position tall planters or vertical trellises with climbing plants at strategic intervals along your privacy fence. These decorative elements work together to create an inviting, private space that’s as beautiful as it’s functional.
Budget-Friendly Privacy Solutions for One-Time Events
While aesthetic enhancements create memorable party spaces, creating privacy doesn’t need to drain your event budget. For one-time gatherings, consider renting portable vinyl or chain-link fencing at $10-$30 per linear foot, offering quick setup without permanent installation.
Lightweight options provide excellent cost-saving alternatives:
- Repurpose wooden pallets as connected fence panels, using hinges or zip ties to create freestanding sections anchored with stakes
- Install inexpensive plastic garden netting or mesh panels, secured to temporary posts for immediate privacy
- Add shade cloth or privacy screens to existing structures, enhancing seclusion without long-term commitment
Before guests arrive, mark your layout boundaries, considering wind exposure and entry points, then conduct a final stability check to ensure your temporary privacy solution remains secure throughout your event.
Storage and Reusability Considerations
How effectively you store your temporary privacy fencing directly impacts its reusability and long-term value. Choose modular components like vinyl or chain-link panels with portable bases that can be easily disassembled without damage. These materials withstand multiple deployments with minimal maintenance.
After your event, clean panels thoroughly, secure all clamps and fasteners in labeled containers, and ensure components remain dry to prevent rust or warping. Stack panels flat or nested, and use protective covers to shield them from UV damage and dust accumulation.
Before reinstalling for your next gathering, inspect for wear like loose connections or bent sections. Replace any compromised parts immediately. A thorough assessment ensures quick, safe reassembly, maximizing your investment and minimizing last-minute hassles for future parties.
Securing Temporary Fencing in Various Landscapes
To secure temporary party fencing in sandy soil, you’ll need to drive stakes deeper than usual and consider adding sandbags at the base of posts for extra stability.
When working with concrete surfaces, attach base plates to your fence posts and secure them with concrete anchors or weighted stands that won’t damage the surface.
Both these techniques allow you to create a stable privacy barrier that can be completely removed after your event without leaving permanent marks on the landscape.
Sandy Soil Solutions
Setting up temporary fencing in sandy soil presents unique challenges that require specialized anchoring approaches. You’ll need to adapt your installation techniques to counter the excellent drainage but poor stability that sandy substrates offer.
When installing in sandy areas, opt for wide-based support systems instead of traditional stakes. Sand-filled bases or weighted plates distribute pressure more effectively, preventing your privacy fence from tipping over during your event.
- Place a thin layer of compacted gravel beneath fence bases to create a more stable foundation
- Position stakes at shallower depths with wider spacing to accommodate sand movement
- Check connections and stability regularly, as wind and shifting sand can loosen clamps quickly
Adding ground mats beneath key support points further reduces sinking and helps maintain your fence alignment throughout your gathering.
Concrete Surface Techniques
The challenge of securing temporary privacy fencing on concrete surfaces demands specialized techniques that differ markedly from soil-based installations. You’ll need to use base plates or heavy-duty anchors specifically designed for concrete mounting.
Select wedge anchors or expansion bolts that match your fence posts, ensuring they’re rated for outdoor use. For enhanced stability, combine base plates with adjustable feet and secure panels with hold-down straps to prevent wind uplift.
Before installation, thoroughly clean and dry the concrete surface. Consider adding rubber buffers between base plates and concrete to prevent damage. For easy setup and removal, invest in quick-release clamps and reusable base plates designed for concrete applications.
These approaches ensure your temporary party privacy fence remains securely in place throughout your event without damaging the underlying surface.
Frequently Asked Questions
What Is the Cheapest Way to Make a Temporary Fence?
You’ll find plastic garden netting with T-posts is your cheapest option. Repurposed pallets secured with hinges or ties also create budget-friendly temporary barriers with minimal investment.
What Is the Cheapest Way to Build a Privacy Fence?
The cheapest privacy fence uses garden mesh or fabric with spaced posts. You’ll save money by repurposing pallets or using shade cloth attached to PVC frames. Avoid costly materials like vinyl.
How to Temporarily Prop up a Fence?
Use portable fence panels with weighted bases. Secure them with sandbags, bricks or concrete blocks. You’ll need zip ties or clamps to connect sections and prevent shifting from wind.
How to Block Neighbors’ View Without a Fence?
Use privacy screens on portable bases, hang outdoor fabric on temporary frames, or arrange potted plants strategically. You’ll create instant visual barriers without permanent installation or digging anything into the ground.


Leave a Reply