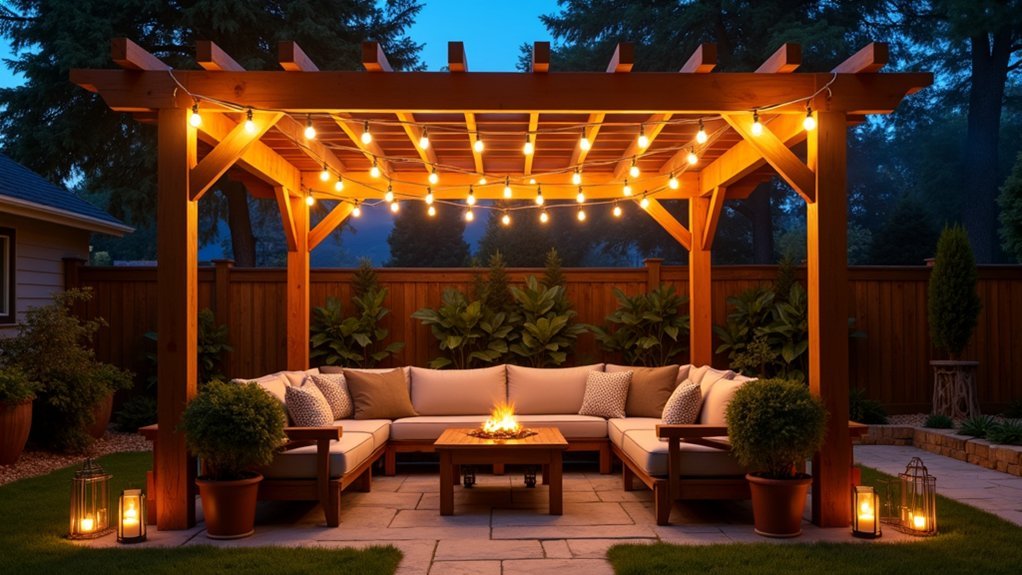
You can transform your pergola with seven proven string light installation patterns: the classic zigzag for maximum coverage, canopy-style draping from a center point, perimeter wrapping around the frame, parallel lines for modern minimalism, layered lighting at multiple heights, spiral wraps around posts and beams, or chandelier-inspired clusters for dramatic focal points. Each approach creates a distinct ambiance, and the right choice depends on your pergola’s size, style, and how you’ll use the space.
Classic Zigzag Pattern for Maximum Coverage
When you want to illuminate every corner of your pergola without leaving dark spots, the classic zigzag pattern delivers unmatched coverage.
Start by securing your first anchor point at one corner post, then stretch the lights diagonally across to the opposite beam.
Begin at one corner post and stretch your lights diagonally to the opposite beam for maximum visual impact.
Continue this back-and-forth pattern until you’ve covered the entire structure.
You’ll need to measure your pergola’s dimensions before purchasing lights.
Calculate the diagonal distance between mounting points and multiply by the number of passes you’re planning.
This guarantees you won’t run short mid-installation.
Space each zigzag row approximately 18 to 24 inches apart for prime light distribution.
Use cup hooks or screw-in eye hooks at each turning point to keep tension consistent.
This pattern works especially well for rectangular pergolas with exposed rafters.
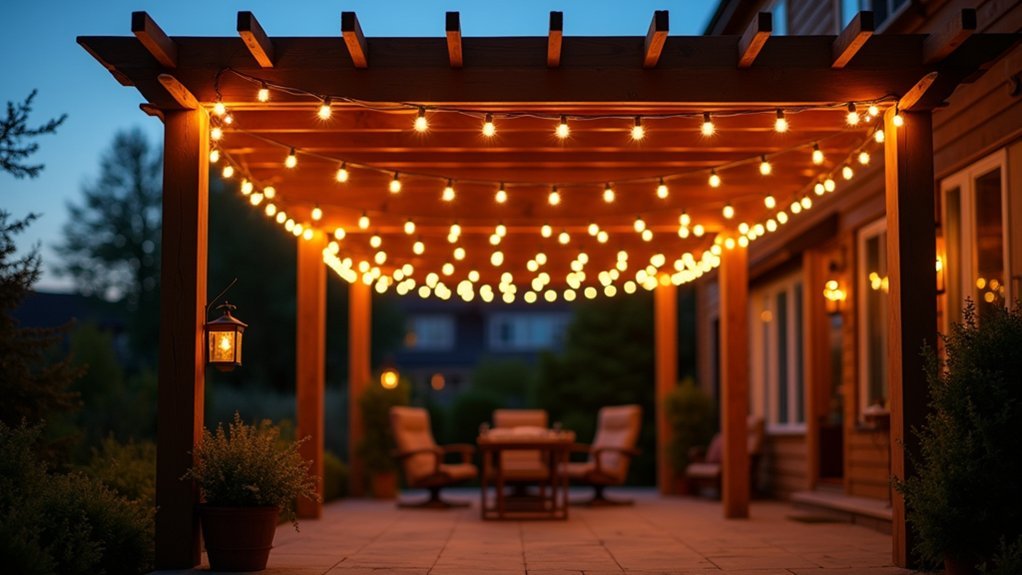
Canopy Style Draping From Center Point
Although the zigzag pattern offers excellent coverage, the canopy style creates a stunning focal point that draws every eye upward.
You’ll start by installing a central hook or ring at your pergola’s center point, then drape strings outward to each corner and midpoint along the frame’s edges.
To achieve this look, you’ll need to measure from your center point to each anchor location. Attach your lights at the center, then fan them outward like spokes on a wheel.
This technique works best with longer string lengths and creates a tent-like effect that feels intimate and elegant.
You can enhance the canopy by adding a decorative lantern or pendant at the center point where all strings converge, amplifying that eye-catching focal effect.
Perimeter Wrap Around the Pergola Frame
For a cleaner, more structured aesthetic, wrapping string lights around your pergola’s perimeter offers a polished alternative to the dramatic canopy approach. You’ll create a defined glow that highlights your pergola’s architectural lines without overwhelming the space.
Start at one corner post and wind lights tightly around each beam, maintaining consistent spacing throughout. Secure connections at corners using zip ties or light clips to prevent sagging.
| Element | Recommended Spacing | Light Count |
|---|---|---|
| Corner Posts | 2-3 inches apart | 15-20 per post |
| Top Beams | 3-4 inches apart | 25-30 per beam |
| Cross Rafters | 4-6 inches apart | 10-15 per rafter |
This method works exceptionally well for smaller pergolas where canopy draping might feel cluttered.
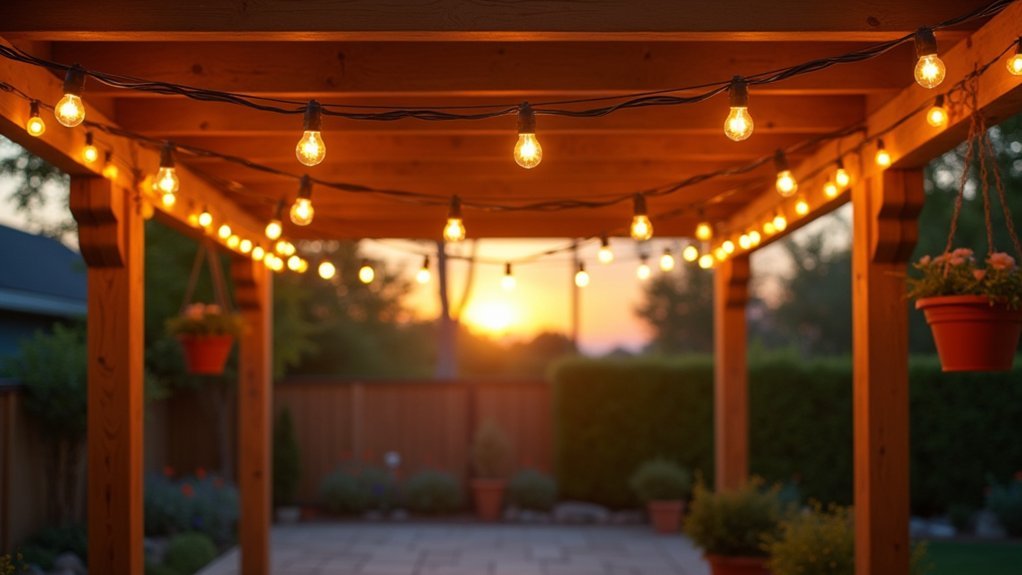
Parallel Lines for a Modern Minimalist Look
For a clean, contemporary aesthetic, you’ll want to run your string lights in parallel lines across your pergola’s width or length.
Start by determining your ideal spacing distance—typically 12 to 18 inches apart creates visual balance without overwhelming the space.
You’ll need sturdy mounting hardware like guide wires or eye hooks to keep lines taut, and sleek Edison-style or globe bulbs will complement the modern look you’re creating.
Choosing Optimal Spacing Distance
When you’re aiming for a modern minimalist aesthetic, the spacing between your parallel light strands makes all the difference.
For most pergolas, you’ll want to position your strands 12 to 18 inches apart. This creates clean, defined lines without overwhelming the space.
Consider your pergola’s width when determining spacing. Narrow structures benefit from wider gaps of 18 to 24 inches, preventing a cluttered appearance.
Larger pergolas can handle tighter 10 to 12-inch spacing for a more dramatic effect.
Test your layout before permanently installing. Temporarily hang the lights and step back to evaluate the visual impact from your primary viewing angle.
Adjust as needed until you achieve that sleek, intentional look. Remember, fewer well-placed strands often create more impact than overcrowded installations.
Secure Mounting Hardware Options
Selecting the right mounting hardware guarantees your parallel string lights stay taut and level throughout the seasons. You’ll want to invest in stainless steel cup hooks or screw-in eye hooks rated for outdoor use. These resist rust and maintain their grip even in harsh weather conditions.
For wooden pergolas, use hooks with at least one-inch threading to make certain a secure hold. If you’re working with vinyl or aluminum structures, opt for adhesive-backed cable mounts or specialized clips designed for those materials.
Consider adding turnbuckles at one end of each light strand. They’ll let you adjust tension easily and keep lines perfectly straight over time. You can also install guide wires between posts first, then attach your lights with zip ties for extra stability.
Selecting Sleek Bulb Styles
The right bulb style can make or break your modern minimalist aesthetic. You’ll want to choose bulbs with clean lines and simple shapes that complement your pergola’s architecture without overwhelming it.
Edison-style bulbs with clear glass and visible filaments create an industrial-modern vibe that’s currently trending. For a sleeker approach, opt for frosted globe bulbs in warm white tones. They’ll diffuse light evenly while maintaining that understated elegance you’re after.
Consider bulb size carefully. Smaller G40 bulbs work well for intimate spaces, while larger G50 options make a bolder statement on expansive pergolas. Stick to one bulb style throughout your installation to maintain visual cohesion. You can also explore tubular or capsule-shaped LED bulbs for an ultra-contemporary finish that pairs perfectly with parallel line arrangements.
Layered Lighting With Multiple String Heights
When you’re ready to take your pergola lighting beyond basic installations, layering strings at multiple heights creates stunning visual depth that transforms your outdoor space.
You’ll want to vary your placement strategically, hanging some strands closer to the pergola’s rafters while dropping others lower to define different zones. Mixing bulb sizes across these layers—larger globes up high with smaller accent bulbs below—adds dimension and keeps the eye moving through the space.
Varying Height Placement Tips
Layered string light installations create depth and visual interest that single-height arrangements simply can’t match. You’ll want to plan your heights strategically before hanging any lights.
| Height Level | Distance from Ground | Best Use |
|---|---|---|
| Upper | 9-10 feet | Ambient canopy glow |
| Middle | 7-8 feet | Primary illumination |
| Lower | 5-6 feet | Accent and task lighting |
| Mixed diagonal | 6-9 feet | Dynamic movement |
| Perimeter | 8-9 feet | Border definition |
Start by securing your highest strand along the pergola’s top beams. Next, add middle-height lights by attaching hooks to posts at varying intervals. Keep at least 18 inches between layers to prevent tangling and guarantee each level remains distinct. You can adjust spacing based on your pergola’s dimensions and desired brightness intensity.
Creating Visual Depth Effect
Because your eyes naturally perceive objects at different distances as having varying brightness levels, you can exploit this principle to make your pergola space feel larger and more dimensional.
Install your primary string lights at the standard height across the main beams, then add a secondary layer six to twelve inches lower in select areas.
Position your lower strings toward the pergola’s center while keeping higher strings along the perimeter. This arrangement draws the eye inward and creates the illusion of expanded space. You can enhance this effect by using slightly dimmer bulbs on your lower layer, mimicking how distant lights appear softer.
For maximum impact, incorporate a third layer draped loosely between structural posts at seated eye level, framing your gathering area with warm, inviting light.
Mixing Bulb Sizes Strategically
Stepping up your layered lighting design means going beyond height variation to incorporate different bulb sizes across your string light arrangement. You’ll create visual interest by positioning larger bulbs on your lowest strings where they’ll draw the eye, while smaller bulbs overhead produce a delicate starfield effect.
Try pairing 3-inch globe bulbs at eye level with 1.5-inch bulbs strung higher across your pergola’s rafters. This combination establishes depth and prevents your lighting from appearing flat or monotonous.
You can also cluster medium-sized bulbs at focal points—above seating areas or dining tables—while using smaller bulbs to fill peripheral zones. The size contrast guides attention naturally and creates distinct lighting zones within your outdoor space without requiring separate fixtures or complicated wiring schemes.
Spiral Wrap Around Pergola Posts and Beams
Wrapping string lights in a spiral pattern around your pergola’s posts and beams creates a stunning visual effect that draws the eye upward and adds depth to your outdoor space. You’ll want to maintain consistent spacing between each wrap—typically 3 to 4 inches—for a polished look.
Start at the base of each post and work your way up, securing lights with small clips or zip ties. Continue the pattern along horizontal beams for cohesive design.
Why spiral wrapping transforms your pergola:
- Creates an enchanting, magical atmosphere for evening gatherings
- Makes your pergola feel like an intimate retreat from daily stress
- Highlights architectural details you’ve worked hard to build
- Provides warm, inviting illumination that welcomes guests home
Chandelier-Inspired Cluster Design for Focal Points
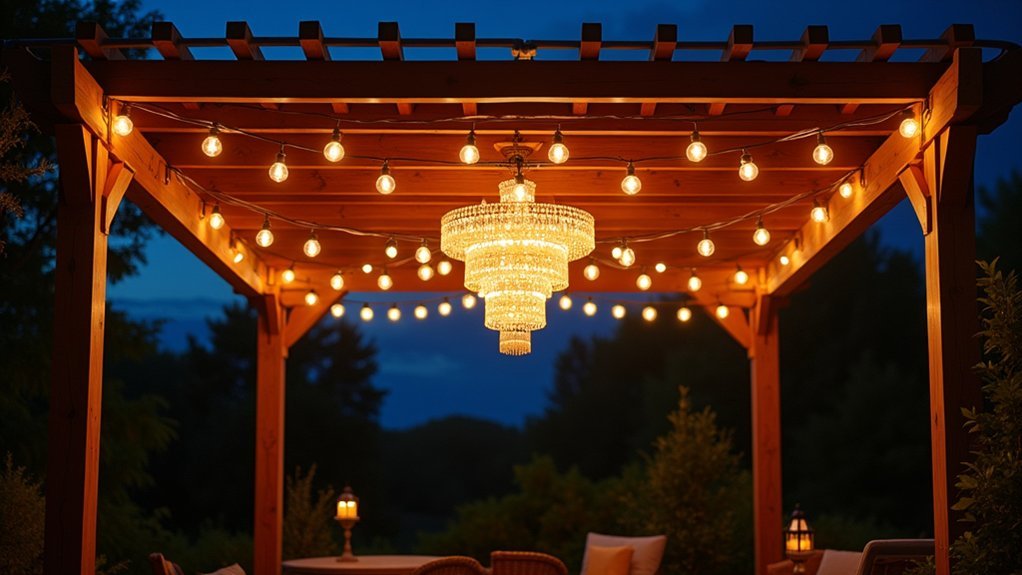
Clustering string lights at strategic points beneath your pergola mimics the elegance of a traditional chandelier without the hefty price tag. You’ll create this effect by gathering multiple strands at central locations and letting them cascade downward at varying lengths. Choose intersection points where beams cross for natural anchor spots.
Start by installing a sturdy hook or decorative bracket at your chosen focal point. Loop several light strands through, allowing them to drape organically. You can bundle lights tightly for a dramatic orb effect or spread them loosely for an airy appearance.
This design works exceptionally well above dining tables or seating areas where you want concentrated illumination. Consider using dimmable bulbs so you can adjust the ambiance from bright dinner lighting to soft evening glow.
Frequently Asked Questions
How Many String Lights Do I Need for My Pergola Size?
You’ll need to measure your pergola’s perimeter and any zigzag patterns you’re planning. Divide the total length by your string light strand length. Most pergolas require 2-4 strands of 25-50 foot lights.
Can String Lights Stay Outside in Rain and Snow?
You can leave outdoor-rated string lights outside in rain and snow if they’re IP44 or higher rated. Check your lights’ packaging for weatherproof ratings, and always use GFCI-protected outlets for safety.
What Type of Bulbs Work Best for Outdoor Pergola Lighting?
You’ll get the best results with LED bulbs for your pergola. They’re energy-efficient, long-lasting, and handle temperature changes well. Choose warm white (2700K-3000K) for cozy ambiance or Edison-style LEDs for vintage charm.
How Do I Safely Connect Multiple String Light Strands Together?
You’ll want to use manufacturer-approved connector plugs and never exceed the maximum strand limit (typically 3-4 strands). Always check wattage ratings, guarantee connections stay dry, and use outdoor-rated extension cords when needed.
What Hooks or Clips Should I Use to Hang Pergola Lights?
You’ll want to use screw-in cup hooks, cable clips, or adhesive light clips for hanging your pergola lights. For heavier strands, consider guide wire with S-hooks to prevent sagging and guarantee secure installation.


Leave a Reply