
A strong deck foundation starts with understanding your local building codes and obtaining the right permits before breaking ground. You’ll need to assess your soil conditions, dig footings at least six inches below the frost line, and choose materials rated for ground contact. Don’t overlook proper drainage—gravel beneath footings and grading soil away from your foundation prevents water damage. The tips below cover everything from load calculations to long-term maintenance strategies.
Understanding Local Building Codes and Permit Requirements
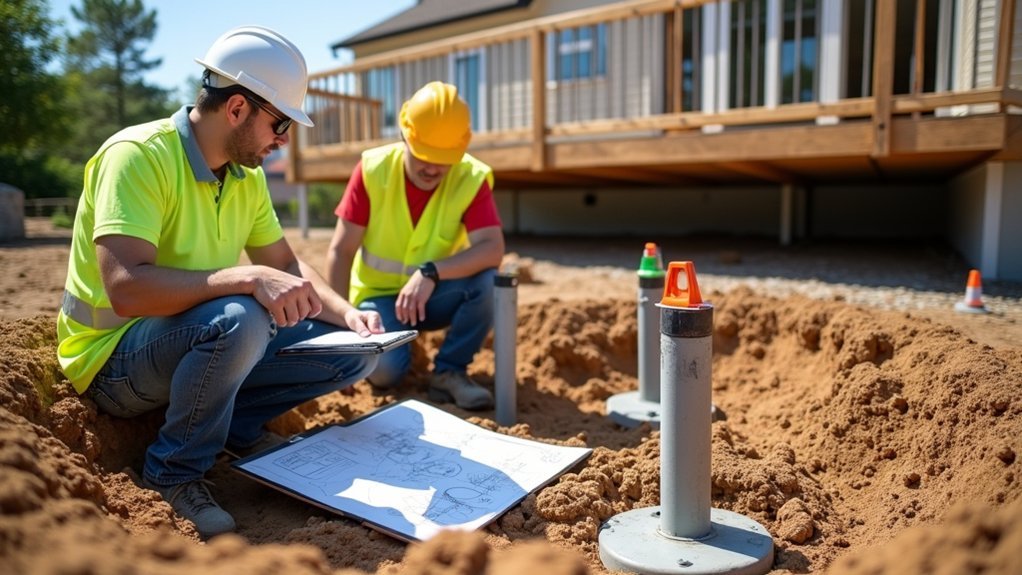
Before you dig a single post hole or pour any concrete, you’ll need to research your local building codes and permit requirements. These regulations vary markedly between municipalities and determine everything from footing depth to post spacing and beam sizing.
Visit your local building department or check their website to obtain the specific requirements for your area. You’ll likely need to submit a site plan showing your deck’s location relative to property lines and existing structures. Most jurisdictions require inspections at various construction stages.
Don’t skip this step. Building without proper permits can result in fines, forced demolition, or complications when selling your home. Insurance companies may also deny claims for unpermitted structures. The permit process guarantees your deck meets safety standards and protects your investment long-term.
Choosing the Right Footer Type for Your Soil Conditions
Before you pour a single footer, you’ll want to test your soil to understand its composition and load-bearing capacity.
Different soil types—from stable sandy loam to challenging clay or loose fill—require specific footer solutions to prevent settling and structural failure.
Your soil conditions will determine whether you need standard concrete footers, bell-shaped footings, or helical piers to support your deck properly.
Soil Testing Before Building
Understanding your soil composition marks the essential first step before selecting footer types for your deck project.
You’ll want to conduct a simple percolation test by digging a hole, filling it with water, and timing how quickly it drains. Fast drainage indicates sandy soil, while slow drainage suggests clay-heavy ground.
You should also perform a jar test by mixing soil with water in a clear container. After settling, you’ll see distinct layers revealing your soil’s sand, silt, and clay ratios. This information directly impacts your footer depth and width requirements.
Contact your local building department for frost line depths and load-bearing recommendations specific to your area. Many jurisdictions require professional soil analysis for larger deck projects, ensuring your foundation meets code requirements and supports your structure safely.
Footer Options by Type
Once you’ve nailed down your soil type, you can match it with the right footer design for maximum stability.
Sandy or loose soils require wider footers to distribute weight across a larger area.
Clay soils need footers that extend below the frost line to prevent heaving during freeze-thaw cycles.
For stable, well-compacted soil, standard concrete pier footers work effectively. You’ll pour concrete directly into cylindrical forms set at the proper depth.
If you’re dealing with unstable or wet conditions, consider helical piers that screw deep into the ground until they reach load-bearing strata.
Bell-bottom footers offer excellent support in areas with moderate soil challenges. They spread the load at the base while using less concrete than full-width alternatives.
Always consult local building codes before selecting your footer type.
Calculating Proper Footing Depth Below Frost Line
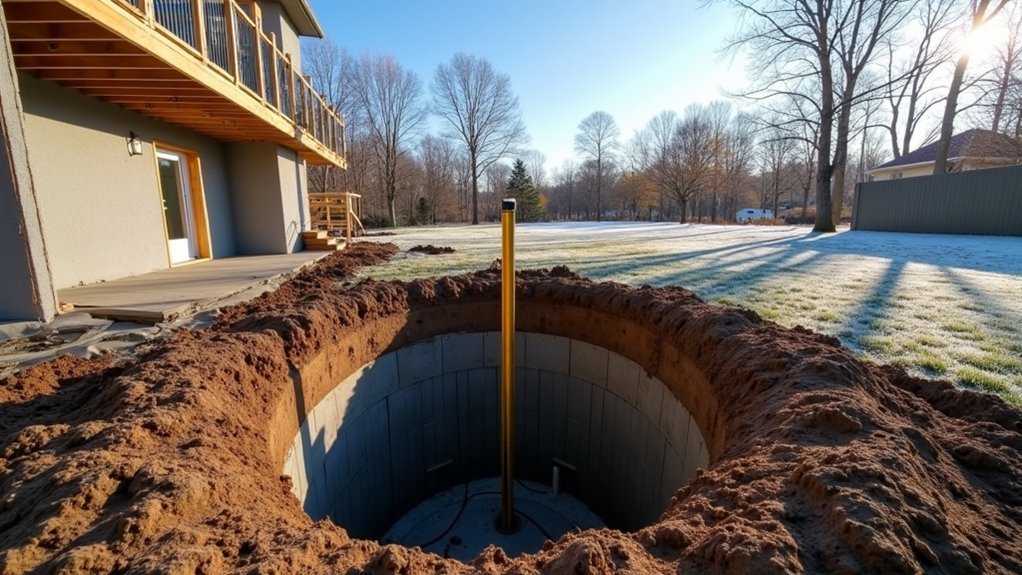
When you’re determining the correct footing depth for your deck, you’ll need to dig below your local frost line to prevent heaving and structural damage. Your local building department can provide the exact frost line depth for your area, which ranges from zero inches in southern states to over 70 inches in northern regions.
Add at least 6 inches below the frost line for your footing base. For example, if your frost line sits at 36 inches, dig to 42 inches minimum. This extra depth guarantees frozen ground won’t push your footings upward during freeze-thaw cycles.
Check your local building codes, as many jurisdictions require specific depths regardless of frost line calculations. Always verify requirements before pouring concrete to avoid costly corrections later.
Selecting Appropriate Post Materials for Longevity
Once you’ve determined the proper footing depth, you’ll need to choose post materials that will stand up to decades of exposure and structural demands.
You can select from pressure-treated wood options, steel post alternatives, or weigh concrete versus composite posts based on your budget and environmental conditions.
Each material offers distinct advantages for durability, maintenance requirements, and load-bearing capacity that will directly impact your deck’s lifespan.
Pressure-Treated Wood Options
Choosing the right pressure-treated wood for your deck posts can make the difference between a foundation that lasts decades and one that fails prematurely.
You’ll find pressure-treated lumber rated by its retention level, measured in pounds per cubic foot (pcf). For deck posts with ground contact, select wood rated at 0.40 pcf or higher. Posts buried in concrete or direct soil contact require 0.60 pcf treatment for maximum protection against rot and insects.
Southern yellow pine accepts treatment deeply and offers excellent structural strength.
Douglas fir provides superior load-bearing capacity but doesn’t absorb preservatives as thoroughly.
Look for lumber stamped “UC4A” or “UC4B” for ground contact applications. Don’t use above-ground rated wood for posts—it won’t withstand moisture exposure and will deteriorate rapidly.
Steel Post Alternatives
Steel posts stand up to the elements far better than wood, offering deck builders a low-maintenance foundation option that won’t rot, warp, or attract termites.
You’ll find steel posts deliver exceptional strength-to-weight ratios, making them ideal for elevated decks or areas with challenging soil conditions. They’re also fire-resistant, which adds safety value in dry climates.
| Steel Type | Best Use | Lifespan |
|---|---|---|
| Galvanized | Standard decks | 50+ years |
| Powder-coated | Coastal areas | 40+ years |
| Stainless | High-moisture zones | 75+ years |
When you’re installing steel posts, make sure proper drainage around the base to prevent water pooling. You’ll want to use compatible hardware to avoid galvanic corrosion where different metals meet. Consider consulting local codes, as steel posts may require specific engineering calculations.
Concrete Versus Composite Posts
Deciding between concrete and composite posts comes down to your deck’s specific demands and your tolerance for trade-offs.
Concrete posts deliver unmatched compression strength and resist shifting in heavy soil conditions.
You’ll find they’re ideal for large decks supporting significant loads.
Composite posts offer distinct advantages you shouldn’t overlook.
They won’t rot, split, or attract termites like traditional wood alternatives.
You’ll spend less time on maintenance and replacement over your deck’s lifespan.
Consider your climate carefully.
Concrete handles freeze-thaw cycles well but can crack without proper drainage.
Composite materials resist moisture damage but may expand slightly in extreme heat.
Your budget matters too.
Concrete costs less upfront, while composite posts justify their higher price through durability.
Match your choice to local building codes before purchasing materials.
Determining Load-Bearing Capacity for Your Deck Size
Calculating your deck’s load-bearing requirements starts with understanding the total weight the structure must support. You’ll need to account for dead loads (the deck itself) and live loads (people, furniture, and snow). Most residential decks require 50 pounds per square foot for live loads and 10-15 pounds for dead loads.
To determine your specific needs, consider these critical factors:
- Deck square footage – multiply length by width to establish your base calculation
- Expected occupancy – hot tubs or large gatherings demand higher capacity
- Climate conditions – snow loads vary markedly by region
- Soil composition – clay, sand, and rock affect footing requirements differently
- Local building codes – regulations often exceed minimum standards
You should consult a structural engineer for complex designs or elevated platforms exceeding standard specifications.
Installing Concrete Piers Versus Poured Footings
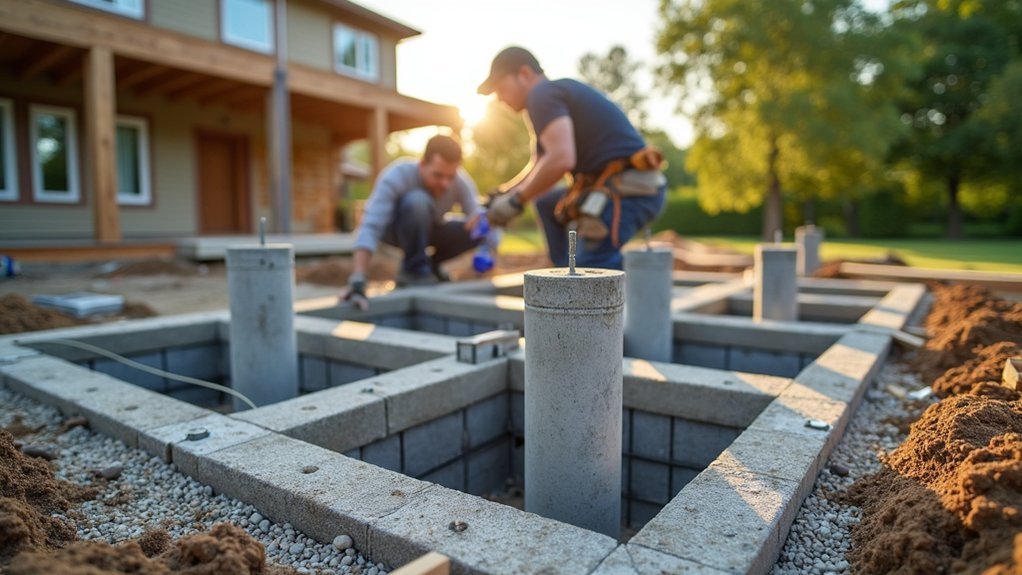
When you’re ready to establish your deck’s foundation, you’ll need to choose between precast concrete piers and poured footings—each method offers distinct advantages depending on your project’s scope and site conditions.
Your deck’s foundation choice depends on project scope and site conditions—precast piers and poured footings each offer distinct advantages.
Precast piers save time since they’re ready to use immediately. You simply dig your hole, add gravel for drainage, and set the pier in place. They work best for smaller decks and regions with stable soil.
Poured footings require more labor but provide superior strength for larger structures. You’ll dig below your local frost line, build forms, pour concrete, and wait several days for curing. This method anchors deep into the ground, offering maximum resistance against frost heave and shifting soil.
Consider your climate, deck size, and local building codes before deciding which approach suits your project.
Ensuring Proper Drainage Around Foundation Elements
Because water pooling around your deck’s foundation can cause concrete to crack and wood posts to rot, you’ll want to address drainage before any structural problems develop.
Start by grading the soil away from your foundation elements at a slope of at least 1 inch per foot. This directs water away naturally.
Consider these essential drainage strategies:
- Install French drains around piers in low-lying areas
- Add 4-6 inches of gravel beneath and around concrete footings
- Use post bases that elevate wood above standing water
- Create swales to redirect surface runoff
- Apply waterproof sealant to exposed concrete surfaces
You should also inspect your drainage system seasonally. Clear debris from channels and verify that water flows away from your deck’s foundation after heavy rain.
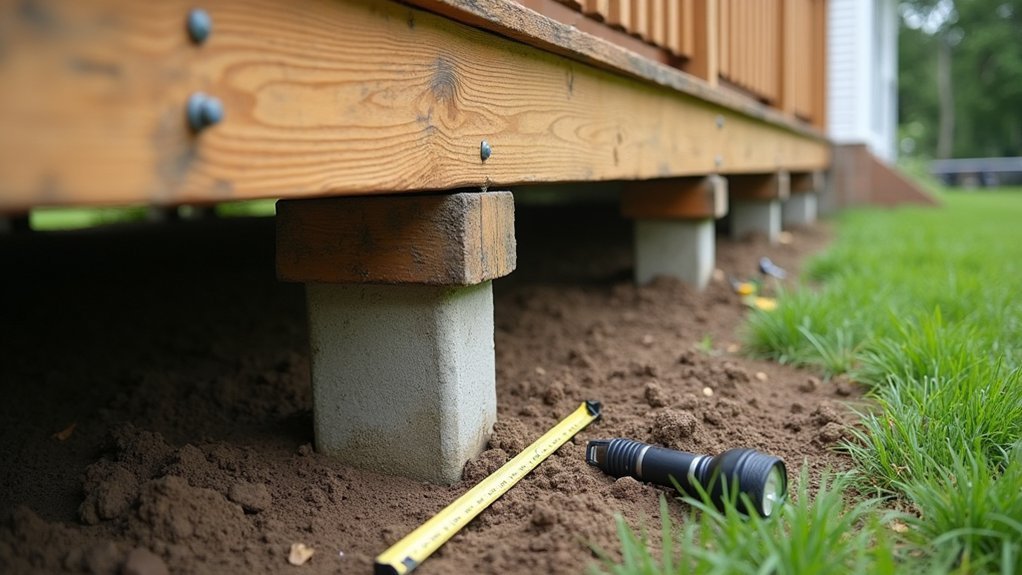
Spacing Posts Correctly for Maximum Structural Support

Proper post spacing forms the backbone of your deck’s structural integrity, so you’ll need to get this right before construction begins.
Most residential decks require posts spaced between 6 and 8 feet apart, though your specific requirements depend on beam size, joist span, and anticipated load.
You should consult local building codes, as they dictate maximum spacing distances for your area. Heavier loads from hot tubs, outdoor kitchens, or large gatherings demand closer post placement.
When calculating spacing, account for both dead loads (the deck’s weight) and live loads (people and furniture).
Mark your post locations precisely using string lines and stakes. Double-check measurements diagonally to ensure square corners.
Installing posts too far apart creates bounce and sag, while excessive posts waste materials and labor.
Anchoring Ledger Boards Securely to Your Home
When you’re anchoring a ledger board to your home, proper lag bolt placement determines whether your deck stays firmly attached for decades or pulls away dangerously.
You’ll need to drive lag bolts through the ledger, the house’s rim joist, and into solid framing while maintaining consistent spacing patterns.
Equally critical is installing flashing correctly above and behind the ledger to prevent water infiltration that can rot both the board and your home’s structure.
Proper Lag Bolt Placement
Securing your ledger board to your home’s rim joist is one of the most critical steps in deck construction, and lag bolts serve as the primary fasteners for this connection.
You’ll want to follow these essential placement guidelines:
- Space lag bolts 16 inches on center in a staggered zigzag pattern
- Position bolts at least 2 inches from the top and bottom edges of the ledger
- Keep bolts 5 inches minimum from board ends to prevent splitting
- Use 1/2-inch diameter lag bolts with washers for prime hold
- Drill pilot holes slightly smaller than the bolt shank
You should always verify your local building codes, as requirements vary by region.
Don’t overtighten the bolts—this can crush the wood fibers and weaken the connection over time.
Flashing Installation Techniques
Although lag bolts create the mechanical connection between your ledger board and rim joist, it’s the flashing that prevents water infiltration—the leading cause of deck collapses and structural rot.
Install self-adhering membrane flashing first, applying it directly to the house sheathing before positioning your ledger. Extend the membrane at least three inches above where the ledger’s top edge will sit.
Once you’ve secured the ledger board, install metal drip-edge flashing along the top. Tuck this flashing behind your home’s siding and angle it outward over the ledger to direct water away from the connection point.
Don’t skip the membrane between the ledger and rim joist. This barrier prevents moisture from becoming trapped against the wood.
Seal all lag bolt holes with silicone caulk before insertion to eliminate potential water entry points.
Inspecting and Maintaining Your Deck Foundation Over Time
Regularly checking your deck foundation helps you catch small problems before they become expensive repairs. You should inspect your foundation at least twice yearly, ideally in spring and fall when weather changes reveal hidden damage.
Catching deck foundation problems early saves money—inspect twice yearly when seasonal changes expose hidden damage.
During inspections, look for these critical warning signs:
- Cracks or splits in concrete footings or wooden posts
- Signs of water pooling near the foundation base
- Rust or corrosion on metal connectors and hardware
- Soil erosion that exposes or destabilizes footings
- Wood rot or insect damage on support posts
When you spot issues, address them promptly. Seal small cracks with appropriate fillers, replace damaged hardware, and regrade soil to direct water away from your foundation.
Keep vegetation trimmed back to improve airflow and reduce moisture retention around structural components.
Frequently Asked Questions
How Much Does a Typical Deck Foundation Installation Cost?
You’ll typically spend between $1,500 and $8,000 for deck foundation installation, depending on your deck’s size and foundation type. Concrete piers cost less, while full concrete footings increase your overall investment substantially.
Can I Build a Deck Foundation Myself Without Professional Help?
You can build a deck foundation yourself if you’re handy and understand local building codes. You’ll need proper tools, knowledge of soil conditions, and permits. However, complex projects benefit from professional expertise.
How Long Does Concrete Need to Cure Before Installing Posts?
You should wait at least 48 to 72 hours before installing posts, though full curing takes about 28 days. Don’t rush this step—proper curing guarantees your concrete footings won’t crack under pressure.
What Tools Do I Need to Dig Footer Holes?
You’ll need a post hole digger or clamshell digger for manual digging. For faster work, rent a power auger. Also grab a measuring tape, level, stakes, and string to mark your locations accurately.
Do I Need a Structural Engineer for My Deck Foundation?
You typically don’t need a structural engineer for standard deck foundations. However, you’ll want one if you’re building on slopes, unstable soil, or elevated decks over 8 feet high. Check your local building codes first.

Leave a Reply