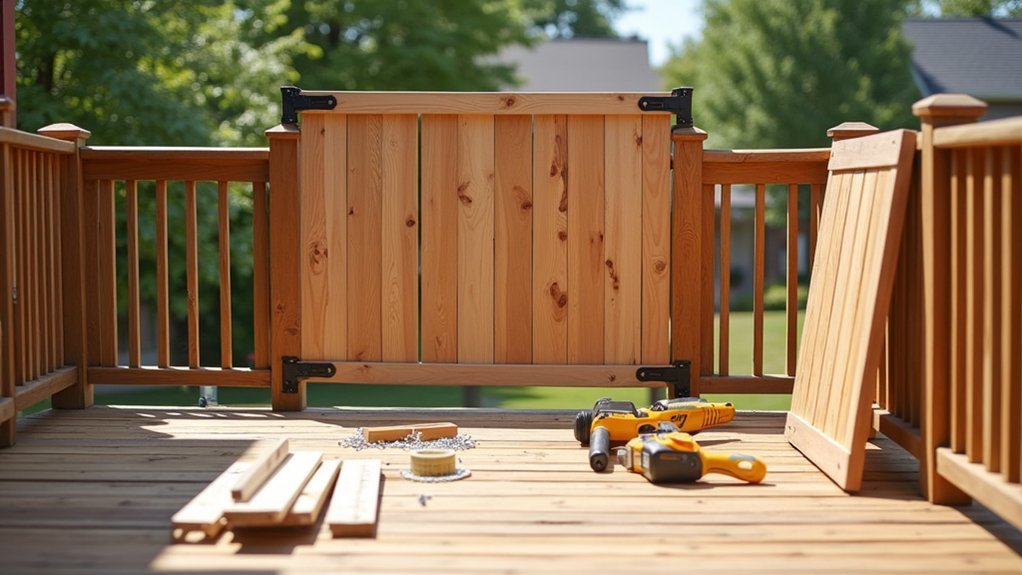
To install deck privacy screens, you’ll need a drill, level, mounting brackets, and rust-resistant hardware. Start by measuring your space and checking posts for damage. Pre-drill pilot holes to prevent splitting, then attach brackets every 24–36 inches using stainless steel screws. Lift panels into position, secure them while leaving small gaps for expansion, and finish with UV-resistant sealant. The steps below walk you through each stage from preparation to weatherproofing.
Gathering Your Tools and Materials

Before you start installing your deck privacy screen, you’ll need to gather the right tools and materials for the job. Having everything on hand prevents frustrating trips to the hardware store mid-project.
Preparation is the foundation of a smooth installation—gather your tools and materials before you begin.
For tools, you’ll need a drill with appropriate bits, a level, measuring tape, pencil, and a saw if cutting is required.
Grab safety glasses and work gloves for protection.
Your materials list includes the privacy screen panels or fabric, mounting brackets or posts, screws or fasteners rated for outdoor use, and concrete mix if you’re setting posts.
Choose stainless steel or galvanized hardware to prevent rust.
Check your deck’s condition before purchasing.
Measure the area accurately and buy slightly more material than calculated to account for mistakes or adjustments.
Measuring Your Deck Space for Privacy Screens
Once you’ve gathered your tools, accurate measurements become your next priority for a successful installation.
Start by measuring the length of the area where you’ll mount your privacy screen. Use a steel tape measure for precision and record each dimension immediately.
Measure the height from the deck floor to where you want the screen to end. Consider whether you need full coverage or partial screening. Check for any obstacles like railings, posts, or electrical outlets that might affect placement.
Take multiple measurements at different points along your planned installation area, as deck surfaces aren’t always perfectly level. Note any gaps between posts or existing structures. Calculate the total square footage you’ll need to cover, then add 10% extra material to account for cutting and adjustments during installation.
Choosing the Right Privacy Screen Style

When selecting a privacy screen, you’ll want to contemplate the various material options available, including wood, metal, fabric, and composite materials.
Each material offers distinct advantages with respect to durability, maintenance requirements, and visual appeal.
You should choose a style that complements your existing deck aesthetic while meeting your privacy and budget needs.
Material Options Available
Several material options exist for deck privacy screens, each offering distinct advantages with respect to durability, aesthetics, and maintenance requirements. You’ll want to evaluate each option based on your climate, budget, and design preferences.
Consider these popular materials:
- Wood – Offers natural beauty and customization but requires regular staining or sealing
- Composite – Resists rot and insects while providing low maintenance
- Metal – Delivers modern appeal with aluminum or steel options that withstand harsh weather
- Bamboo – Creates tropical ambiance and grows sustainably, though it needs protection from moisture
- Fabric – Provides affordable, removable solutions ideal for renters or seasonal use
You should also factor in your local climate conditions. Coastal areas demand corrosion-resistant materials, while humid regions benefit from moisture-resistant options.
Matching Your Deck Aesthetic
Because your privacy screen serves as a visual extension of your deck, selecting a style that complements your existing design creates a cohesive outdoor space. Consider your deck’s material, color palette, and architectural style before choosing a screen.
If you’ve built a natural wood deck, bamboo or cedar screens maintain that organic warmth. Composite decking pairs well with modern metal frames or sleek horizontal slat designs. For traditional homes, lattice patterns offer classic appeal while providing adequate coverage.
Match your screen’s finish to existing elements like railings, furniture, or trim colors. You’ll want to evaluate the screen’s opacity level too—dense panels create bold statements, while slatted options add texture without overwhelming smaller spaces.
Don’t forget to factor in how sunlight will interact with your chosen material throughout the day.
Preparing the Deck Surface and Posts
Start by clearing your deck of all furniture, planters, and decorations to create an unobstructed workspace. Sweep away debris, leaves, and dirt that could interfere with your installation. Inspect your deck posts for structural integrity, checking for rot, cracks, or loose connections.
Before mounting your privacy screen, make certain your posts can handle the additional wind load. You’ll need to:
- Tighten any loose post bolts or screws
- Replace damaged or rotting posts completely
- Sand rough surfaces where brackets will attach
- Mark mounting heights with a level and pencil
- Pre-drill pilot holes to prevent wood splitting
Clean the mounting areas with a damp cloth to remove sawdust. If you’re attaching screens to existing railings, verify they’re securely fastened to the deck frame.
Mounting Hardware and Bracket Installation
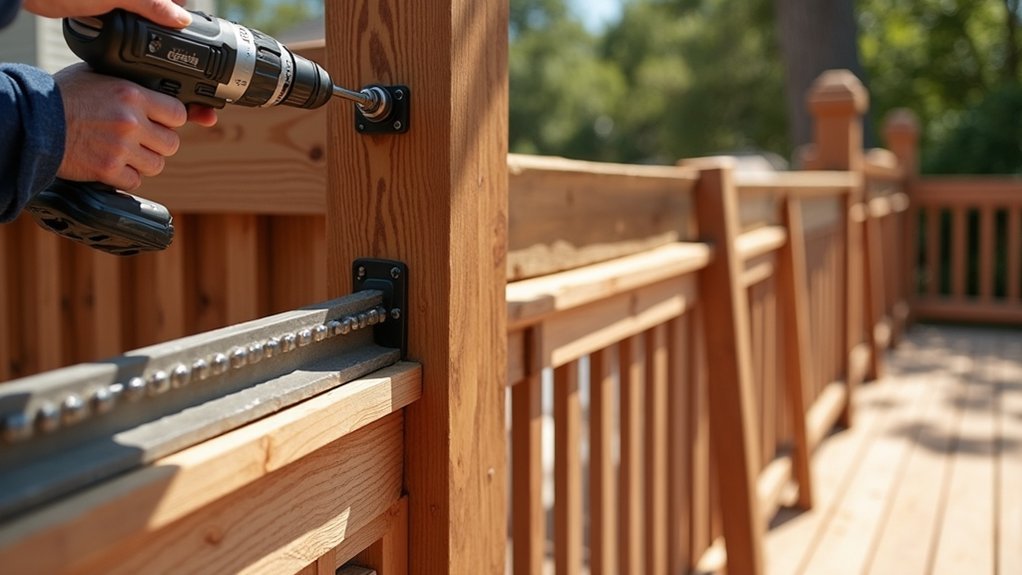
With your posts inspected and mounting points marked, you’re ready to install the hardware that’ll secure your privacy screen.
Start by drilling pilot holes at each marked location to prevent wood splitting and make certain accurate screw placement.
Attach your mounting brackets using stainless steel or galvanized screws rated for outdoor use. Position each bracket level, checking with a spirit level before fully tightening.
Space brackets 24 to 36 inches apart for adequate support.
For heavier screens, use lag bolts instead of standard screws. Pre-drill holes slightly smaller than the bolt diameter, then drive them in with a socket wrench.
Add washers to distribute pressure and prevent bracket warping.
Test each bracket’s stability by applying firm pressure before proceeding to screen attachment.
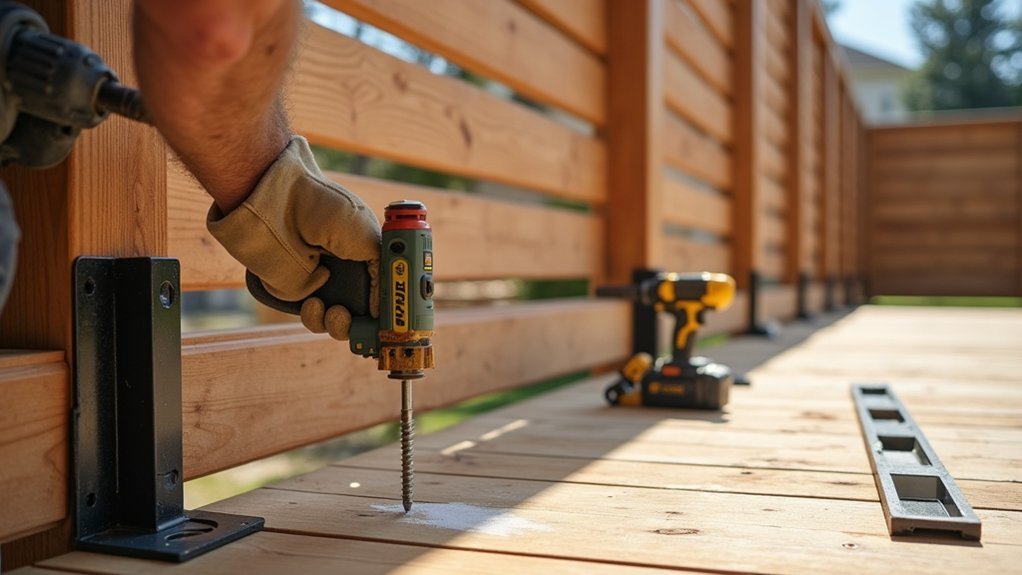
Attaching the Privacy Screen Panels
Lift your first privacy screen panel into position and align it with the installed brackets. Have a helper steady the panel while you secure the attachment points. Start with the top brackets first, then work your way down to make certain proper alignment.
When fastening panels, follow these essential steps:
- Insert mounting screws through the bracket holes into the panel frame
- Tighten screws until snug, but avoid overtightening to prevent cracking
- Check for level after securing each attachment point
- Leave a small gap between adjacent panels for expansion
- Use rubber washers between metal brackets and panel frames to reduce vibration
Continue installing remaining panels in sequence, maintaining consistent spacing throughout. Double-check that each panel sits flush against its brackets before moving to the next section.
Securing and Reinforcing Your Screen Structure
Once you’ve attached your privacy screen panels, you’ll need to make sure the entire structure can withstand daily use and harsh weather conditions.
Start by anchoring your posts securely to the deck frame or concrete footings, then add cross bracing between posts to prevent lateral movement.
You should also calculate wind load requirements for your area, as privacy screens act like sails and can place significant stress on connections during storms.
Anchoring Posts Properly
After you’ve positioned your privacy screen posts, securing them with proper anchoring guarantees your structure withstands wind, weight, and daily use. The anchoring method you choose depends on your deck’s construction and local building codes.
Consider these proven anchoring techniques:
- Post base brackets bolt directly to deck joists for maximum stability
- Through-bolts penetrate the deck surface and connect to underlying framing
- Lag screws work well for lighter screens attached to existing railings
- Concrete anchors secure posts when mounting to adjacent patios or footings
- Simpson Strong-Tie connectors offer engineered solutions rated for specific load capacities
You’ll want to pre-drill all holes to prevent wood splitting. Tighten fasteners firmly, but don’t overtorque them.
Check each post for plumb before final tightening, then verify stability by applying lateral pressure.
Adding Cross Bracing
Cross bracing transforms your anchored posts into a rigid, unified structure that won’t rack or sway when wind hits your privacy screen. You’ll install diagonal supports between posts, creating triangulated frames that resist lateral forces far better than vertical posts alone.
Cut your bracing lumber at 45-degree angles where it meets the posts. Position the first brace running from the bottom of one post to the top of the adjacent post, then add a second brace in the opposite direction to form an X pattern. Secure each connection point with two carriage bolts or heavy-duty structural screws.
For screens taller than six feet, add horizontal blocking at the midpoint between posts. This prevents the braces from flexing and distributes wind load evenly across your entire structure.
Wind Load Considerations
While cross bracing handles everyday stability, wind load presents a different challenge that can overwhelm even well-built privacy screens. You’ll need to calculate the force your screen will face based on local wind speeds and your screen’s surface area.
Solid privacy screens catch more wind than slatted designs. Consider these factors when reinforcing against wind:
- Anchor posts with concrete footings at least 24 inches deep
- Use 6×6 posts instead of 4×4 for screens over 6 feet tall
- Install metal post anchors rated for lateral loads
- Add diagonal bracing from posts to the deck frame
- Choose permeable screen materials that allow airflow
You should also check local building codes, as many jurisdictions require engineering approval for screens exceeding specific height thresholds.
Adding Finishing Touches and Weatherproofing
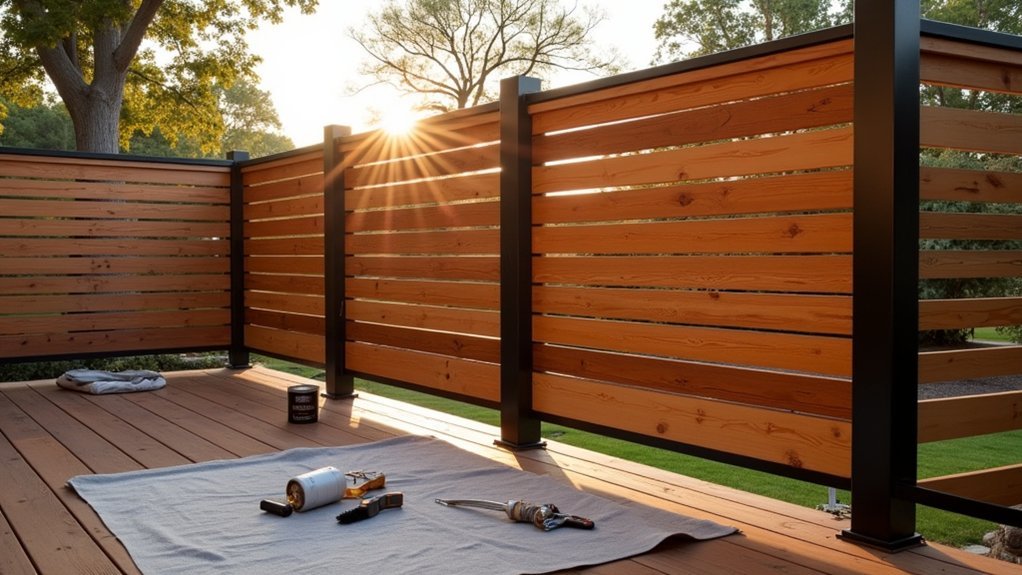
Once you’ve secured your privacy screen panels in place, it’s time to protect your investment and give it a polished look.
Apply a UV-resistant sealant to wooden screens to prevent fading and moisture damage. For metal frames, use rust-inhibiting spray paint on any exposed edges or scratches.
Install decorative post caps to cover hardware and create a refined appearance.
Add trim pieces along edges where panels meet posts to hide gaps and prevent water infiltration.
Check all fasteners and tighten any that have loosened during installation. Apply silicone caulk around mounting brackets where they contact posts to block moisture entry points.
Finally, attach felt pads or rubber bumpers to areas where panels might rub against structures during wind movement, preventing wear and reducing noise.
Frequently Asked Questions
Do I Need a Permit to Install a Privacy Screen on My Deck?
You typically don’t need a permit for freestanding privacy screens, but you should check your local building codes and HOA rules. If you’re attaching the screen permanently or it exceeds height limits, you’ll likely need approval.
How Tall Can My Deck Privacy Screen Legally Be in Residential Areas?
You’ll typically find residential privacy screen limits range from 6 to 8 feet tall, but your local zoning laws determine the exact height. Check with your city’s building department before installing to avoid costly violations.
Will a Privacy Screen Affect My Home’s Resale Value?
A well-designed privacy screen can boost your home’s resale value by enhancing outdoor living space appeal. You’ll attract buyers who prioritize privacy and usable deck areas, making your property more competitive in the market.
How Long Do Deck Privacy Screens Typically Last Before Needing Replacement?
You can expect your deck privacy screen to last 5-15 years, depending on the material. Wood screens need replacement sooner, while composite and metal options typically outlast them with proper maintenance.
Can Privacy Screens Withstand Strong Winds and Severe Weather Conditions?
You’ll find that quality privacy screens handle strong winds well when you secure them properly. Choose reinforced or mesh options for windy areas, and you’ll avoid damage during severe weather conditions.
Leave a Reply