
You’ll choose the right post attachment method for stability by using through-bolts with nuts and washers, drilling holes to match bolt diameters, and coating the bolts with zinc for treated lumber. Plan weight distribution across multiple balusters, and ensure loads are shared with blocking contact. Prefer through-bolts and corrosion-resistant hardware, and leave drainage gaps to accommodate cedar’s movement. Finally, verify alignment and clearances as you install, so a safer rail system follows—more practical tips await.
Selecting the Right Post Attachment Method for Stability
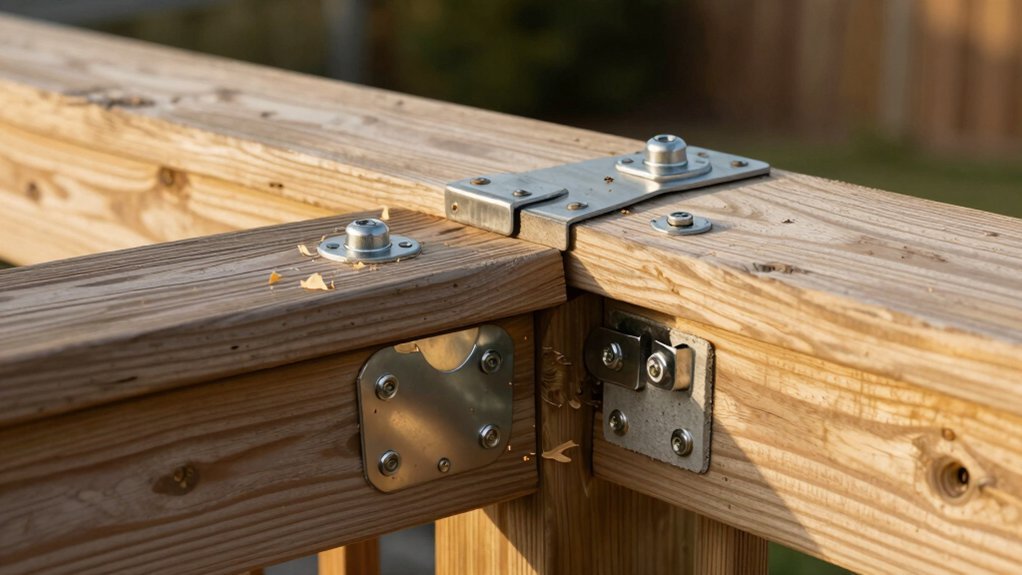
Are you choosing a post-attachment method that will keep deck railings solid for years to come? You should use through-bolts with nuts and large washers instead of lag bolts for a tight, stable connection. Drill bolt holes exactly to match bolt diameter, and apply two coats of zinc on through-bolts to resist treated-lumber corrosion.
For fascia-covered assemblies, install fascia first, drill holes for railing post bolts, followed by decking and rail components to ensure alignment.
When attaching posts to the side of a deck, use hardware attached to side of floor joist rather than end-threading into end grain joists for stronger support. Place through-bolts at center of 4×4 post and near top and bottom edges of the supporting joists to maximize transfer of loads.
Planning Weight Distribution Across Balusters and Rails
Plan how loads move through the railing by distributing weight across multiple balusters and rails. You share loads so bending is avoided, not leaving it to a single baluster. For optimal stability, ensure the combined load from the railing, attachments, and any attached table or component is spread across at least three or more balusters. Don’t rely on butt joints alone; reinforce with blocking and multi-point contact to transfer loads evenly to the deck framing. When planning, calculate expected dynamic loads, people leaning, kids’ weight, and verify the railing system can transfer those forces through multiple balusters to the posts. Use staggered, spaced railing sections so each section carries a portion of load, aiming for no more than 72 inches between load transfer points.
Using Through-Bolts and Corrosion-Resistant Hardware
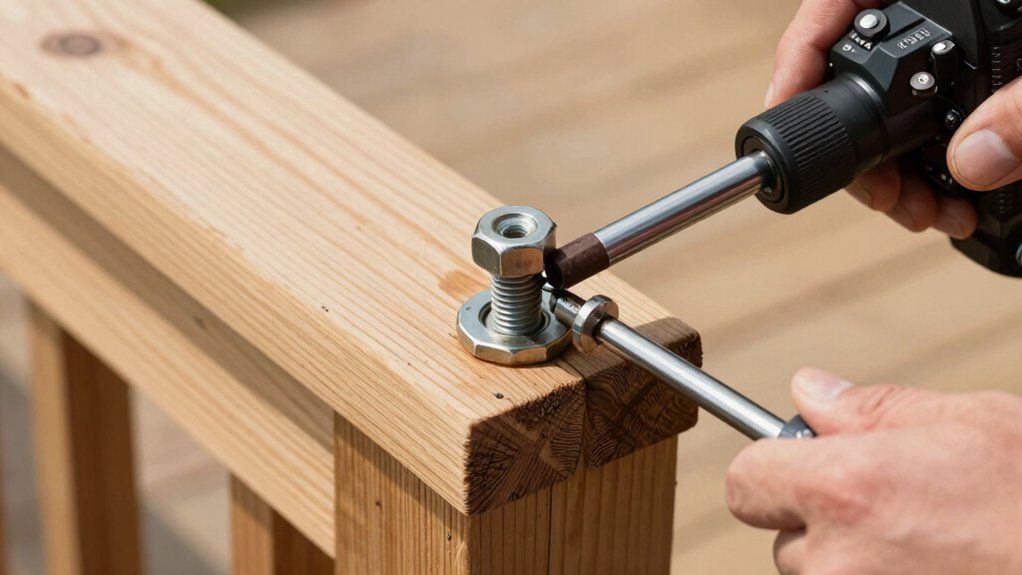
Why settle for side-attached hardware when through-bolts deliver a stronger, continuous connection that transfers loads directly into the framing? Use through-bolts to attach posts to framing rather than lag bolts, ensuring a tight connection with nuts and large washers. Drill holes to match the bolt diameter precisely, then run the through-bolts all the way through for a secure, continuous connection. Apply two coats of zinc on through-bolts to protect against corrosion when used with treated lumber. When you’re working near deck components, prefer through-bolt connections over side-attached hardware for improved load transfer and stability. For fascia-covered assemblies, install fascia first, then drill bolt holes and install through-bolts before decking and railing components. Follow these steps for durable, maintenance-free, long-lasting railing attachments you can trust.
Accounting for Expansion, Contraction, and Drainage in Cedar
When temperatures swing, cedar expands and contracts, so you need gaps at joints to accommodate movement without binding. You should leave a slight axial clearance between cedar boards in end-to-end runs to allow seasonal expansion, and install components with a small drainage clearance to prevent water pooling and saturation. Use moisture-friendly fasteners and avoid tight-to-end grain fits to reduce cracking from dimensional changes. Direct water away with a continuous drainage path, such as a back-cut or hidden drainage groove, so rot doesn’t creep in. Additionally, route a continuous drainage path and cut back to reveal a clean, unobstructed channel for water. This reduces saturation and warping significantly.
- Gaps at joints to handle movement
- Drainage clearance at rails and ledges
- Moisture-friendly fasteners and end-grain clearance
Verifying Alignment, Clearances, and Spacing During Installation
Are you ready to verify alignment, clearances, and spacing during installation to keep rail attachments solid and code-compliant?
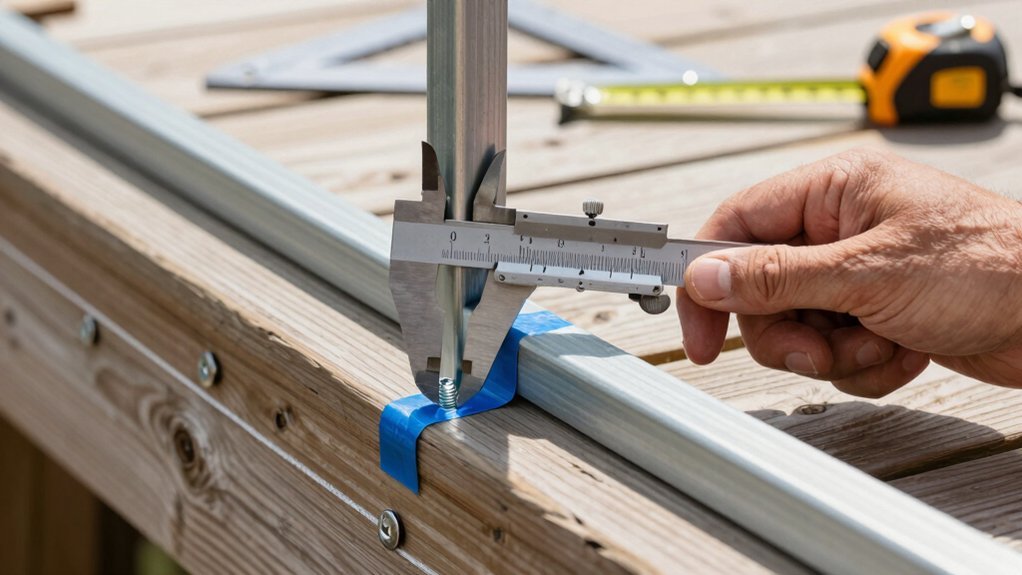
First, mark post centers and aim for even spacing with no more than 6 feet between posts to maintain consistent alignment for rail bar attachments. Transfer exact post positions to the inner face of joists and rim joists using a framing square to ensure parallel lines and proper clearance. Verify plumb by using a post level, tack the post with a temporary screw, then recheck before securing with through-bolts at the center and top/bottom edges. Ensure front rim and side joists align with blocking behind posts, so guardrail brackets and bolts have solid, flush support. Confirm all clearance gaps around sleeves, trim rings, and caps, keeping house-to-post sleeve distance within 2–4 inches.
| Spacing | Alignment | Clearance |
|---|---|---|
| <=6 ft | Parallel | 2-4 in |
| Centered | Plumb | Flush |
| Blocking | Solid | Gaps |
Frequently Asked Questions
What Is the 4 Ball Rule for Railing?
The 4 ball rule means your railing needs at least four contact points around each post so loads are shared, preventing rotation, loosening, or failure under typical deck use. This keeps it sturdy and compliant.
How to Attach Railings to Deck Posts?
Attach railing to deck posts with through-bolts, nuts, and washers; drill holes to match bolt size, insert bolts, torque nuts. Add blocking as needed, keep posts plumb, and use corrosion-resistant fasteners for a code-compliant connection.
What Is the Trend in Deck Railings 2025?
In 2025, your deck railings trend toward minimalist lines with hidden hardware and 4×4 posts inside framing, while composites or PVC with aluminum balusters rise; warm woods stay, plus cable or glass infill and lighting.
How to Keep Deck Railing From Sagging?
To keep it from sagging, use through-bolts with nuts and washers, keep posts plumb and spaced, install blocking between joists and behind posts, secure with two 3-inch screws, and maintain height and clearance for stability.


Leave a Reply