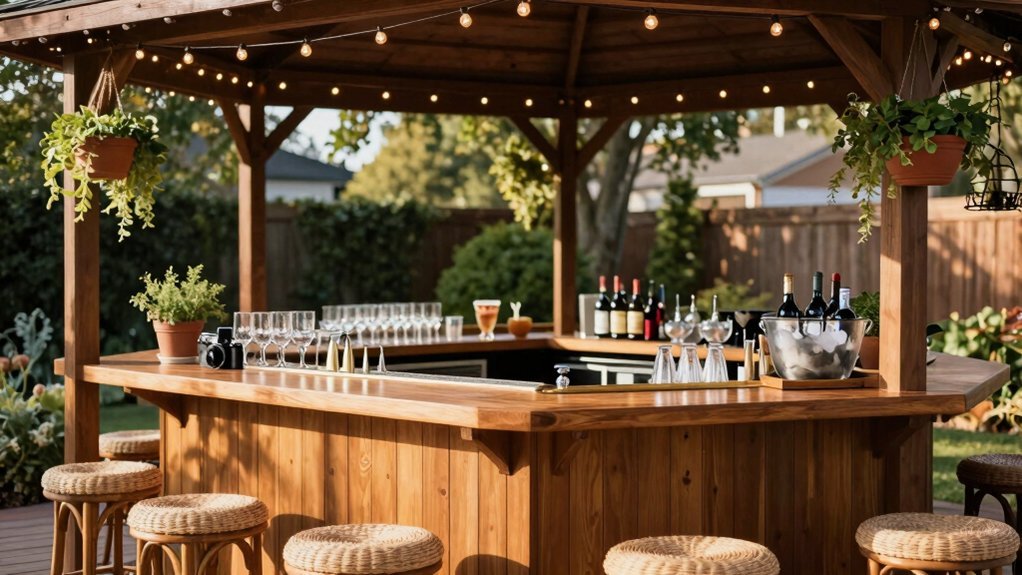
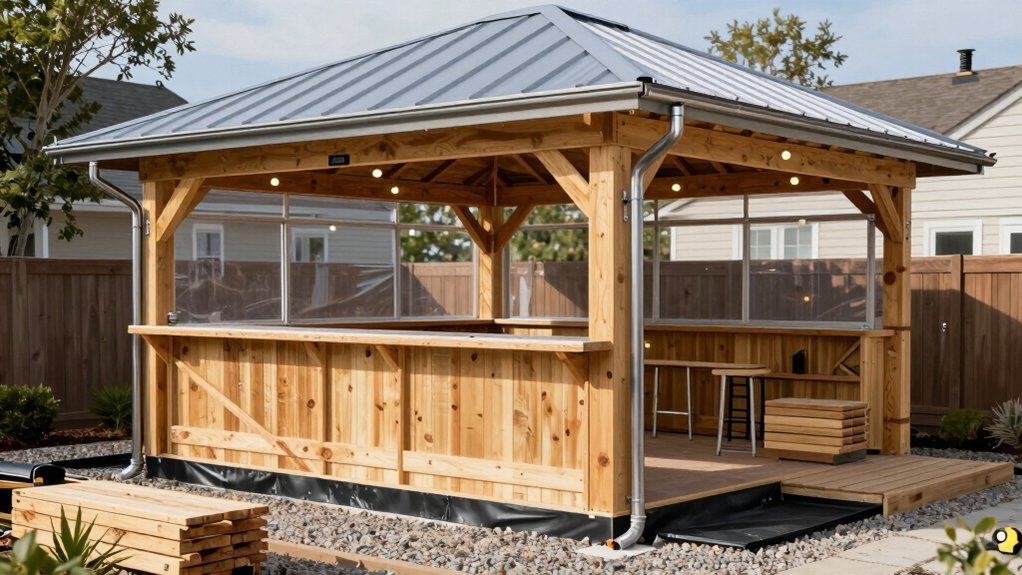
Plan a gazebo bar with a flow: position a centerpiece that anchors the space, and design a bar counter as the focal point with storage nearby. Create a triangle of bartender, guests, and prep area, and use high ceilings to guide sightlines to seating and landscape. Pick weather-resistant finishes, seal, gutters, and drainage. Include accessible height (34 inches) and a 36-inch clearance. Add outlets and a maintenance log. If you keep going, you’ll unlock details.
Planning Your Gazebo Bar Layout
Where should your gazebo-bar centerpiece sit to optimize flow and sightlines? Place it where it anchors the space without blocking entrances or views.
Position the dedicated bar counter as the focal point, with built-in storage and refrigeration nearby but out of the main walking path.
Align seating and service zones to create a natural triangle between bartender, guests, and prep area, so conversations stay comfortable and traffic stays smooth.
Use high ceilings and open columns to guide eye lines outward toward seating clusters and the surrounding landscape.
Keep cable and lighting runs accessible for maintenance, while ensuring the lighting enhances the centerpiece without glare.
Design the layout to adapt to gatherings, with flexible counters, portable seating, and clear sightlines to the core action throughout.
Choosing Weather-Resistant Materials
To build a gazebo bar that lasts, pick weather-resistant materials for every touchpoint, from the surface to the framing. Use treated lumber, stone, or concrete for both surface and framing to withstand rain and sun. Choose countertops with non-porous tops—granite, concrete, or engineered stone—to resist stains and weather. Apply moisture protection like sealed wood and exterior finishes, and ensure proper drainage to prevent rot. Choose outdoor-rated hardware, galvanized or stainless, to resist rust. Plan shading or a roof to extend usability and shield materials.
| Surface and framing: treated lumber, stone, concrete | Weather-resistant touchpoints |
|---|---|
| Countertops: granite, concrete, engineered stone | Non-porous and stain-proof |
| Protection: sealed wood, exterior finishes, drainage | Prevents rot and mildew |
| Hardware and shade: galvanized or stainless; roof or awning | Extends usability and life |
Designing a Durable Bar Counter
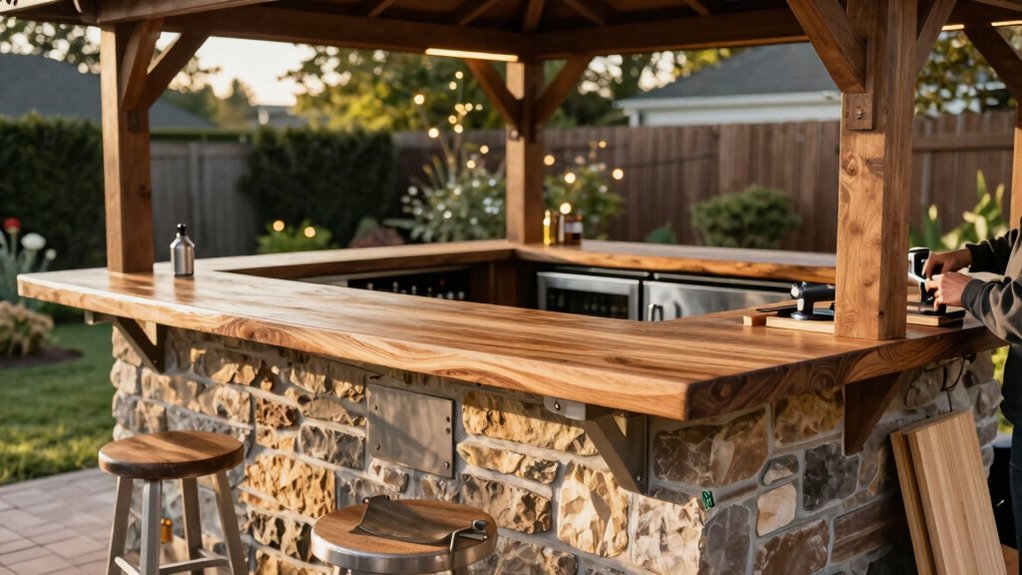
Start with a sturdy, weather-ready base by using treated lumber or concrete blocks for the counter framing, then choose a waterproof top such as granite, concrete, or sealed wood to keep water out and cleaning simple.
Aim for a counter height that suits your space and workflow—about 36 inches for standard counters and 42 inches for bar-height options—so seating and bartending feel natural. Choose a smooth, waterproof top with a durable finish and seal edges to prevent moisture ingress. Plan for durable electrical needs by weatherproofing outlets, using outdoor-rated appliances, and routing cords away from high-traffic areas to keep cleaners and guests safe. Keep a tidy under-counter gap for cleaning access and air circulation. Choose straight, uncluttered edges for easy wipe-downs And lasting durability.
Integrating Storage and Refrigeration
How can you design your gazebo bar so storage and cooling are always within reach without clutter? Choose weather-resistant counter materials and integrate storage to keep essentials accessible during service. Include refrigeration options like a mini fridge or cooler within the bar island to maintain beverages and perishable garnishes. Design under-counter cabinets, shelves, and dedicated drawers for barware, glassware, and cleaning supplies to streamline workflow. Plan electrical needs to support refrigeration, lighting, and outlets, with weatherproof covers and GFCI protection for outdoors. Position the refrigeration area adjacent to the sink and prep zones to minimize movement and speed service. Use weatherproof hardware and finishings so drawers glide smoothly, lids seal, and cleanup stays quick between rounds. Keep zones clearly labeled to avoid cluttered workflows.
Electric and Lighting Considerations
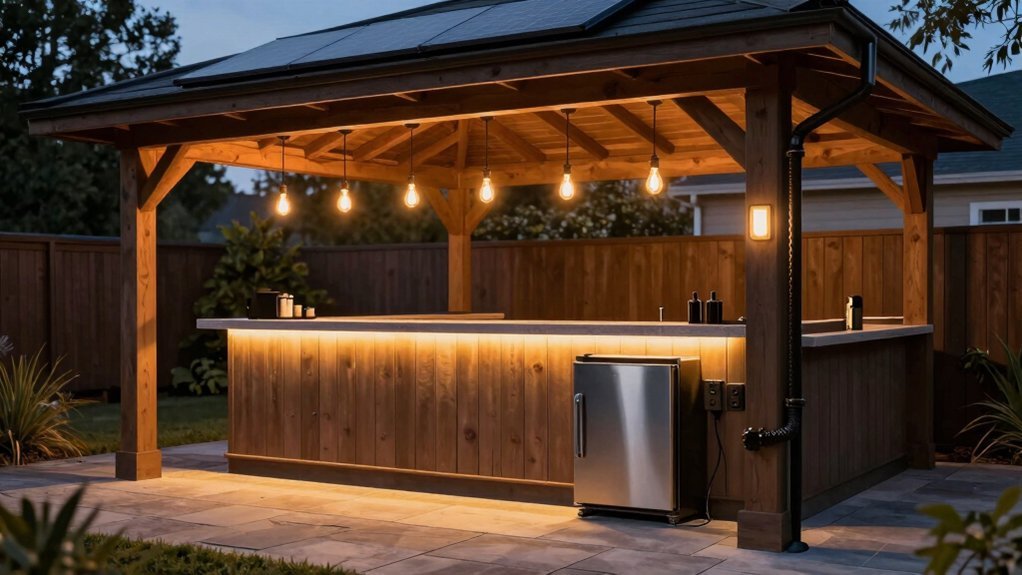
Map out outdoor lighting plans that power you with weatherproof fixtures and outdoor-rated cables, so every zone — bar counter, seating, and storage — gets safe, reliable illumination.
Use LED dimmables and under-counter lighting, with separate switches or smart controls to tailor brightness and zones.
Install weatherproof outlets, GFCI protection, and consider a solar or battery backup for outages to keep accents and string lights going.
Powering Outdoor Lighting Plans
Powering outdoor lighting starts with planning the electrical layout early: install a dedicated outdoor circuit or GFCI-protected outlets, and run conduit discreetly through the gazebo to power bar appliances like mini-fridges and under-counter lighting. You’ll want integrated lighting that combines task lighting with ambient lighting to enhance atmosphere, using weatherproof fixtures rated for damp or wet locations.
Plan electrical needs early and choose LED strip under the counter, recessed LED puck lights in the ceiling, and pendant lights with outdoor-rated cords. Install dimmers and color-temperature control (2700K–4000K) to switch between bright work light and warm ambiance as weather or events change. Ensure wiring is outdoor-rated, with weatherproof enclosures, sealed junction boxes, and gutters that won’t funnel water onto connections. Keep cords neatly always concealed.
Weatherproof Electrical Safety Measures
Wondering how to keep gazebo lighting and appliances safe outdoors? You install GFCI outlets and weatherproof enclosures for all connections to prevent shock hazards in the bar area. Use UV-rated, outdoor fixtures with sealed IP65+ ratings and route wires in conduit to shield against moisture and debris. Run dedicated, gauged circuits for your fridge, blender, and other gear, with a weatherproof disconnect near the gazebo away from water sources.
- Install GFCI-protected outdoor outlets and weatherproof enclosures for all connections.
- Use UV-rated, IP65+ lighting fixtures in conduit.
- Run dedicated, gauged circuits for bar appliances with a weatherproof disconnect near the gazebo.
Elevate and secure wiring off the ground with conduit and waterproof connectors, away from cooking areas. Implement dusk-to-dawn or programmable lighting with voltage control.
Water and Plumbing Setup for Sinks
Plan your water supply routing from the house with a 1/2-inch line and a shut-off valve you can reach from inside the gazebo. Tie in drainage with a minimum 2-inch trap arm, ensure proper venting, and consider a grease trap if you’ll be handling food waste. Keep everything outside-ready in a weatherproof sink cabinet with proper drainage to the household sewer and a vented line.
Water Supply Routing
How should you route the water for your gazebo sink to stay clean, code-compliant, and winter-ready? Plan a dedicated supply line from a nearby exterior faucet or indoor plumbing, using PEX or HDPE tubing with a shut-off valve accessible from outside the gazebo. Install a backflow防止 device and a dedicated cold-water feed to meet local code requirements and prevent contamination. Route and insulate exposed lines, use corrosion-resistant fittings for outdoor use, and install a frost-free outdoor faucet. Include a carry-in or pass-through design to connect the sink bowl and disposal, if applicable, without compromising accessibility or aesthetics.
- Route the supply line with a dedicated exterior shut-off.
- Use PEX or HDPE with weather-rated fittings and insulation.
- Install a frost-free faucet and compliant cold-water feed outside.
Drainage and P-Trap
After setting up a dedicated supply line, you’ll want a trapped drainage system that keeps sewer odors out and drains reliably. A proper gazebo bar sink needs a P-trap to seal out gases and guarantee steady drainage. For outdoors, choose corrosion- and weather-resistant materials like PVC or ABS, and keep the trap accessible for cleaning and winterization. Use 1-1/4″ or 1-1/2″ diameter piping, with a 180-degree bend to hold a water seal. Elevate the drain line slightly to maintain roughly 1/4″ per foot slope toward the trap, preventing standing water and backflow. Include a downstream cleanout so debris won’t clog your gazebo plumbing and you can clear it quickly. This arrangement also simplifies winterization and routine maintenance for seasons of use in any weather.
Sink Venting Considerations
Typically, proper sink venting prevents trap siphonage and keeps drainage steady. You’ll want a dedicated vent within 6 feet of the trap, connected to the household drainage, not shared with the bar’s dishwasher or disposal, to avoid backflow, and this ensure s steady drainage and prevents gurgling.
- Install a P-trap directly beneath the sink, with no more than 24 inches of vertical drop between the trap and the vent to maintain proper flow.
- If the gazebo sits far from the house, consider in-slab or above-ground venting with a 1/4 inch per foot slope toward the main line for unobstructed venting.
- For outdoor plumbing, use weather-resistant fittings and insulate exposed pipes to prevent freezing.
Follow these basics to keep your sink piping reliably year-round, no surprises.
Ventilation and Sound/Entertainment Options
Good ventilation starts with at least one operable opening—like a window, vent, or louver—and an exhaust or range hood if you’ll be cooking nearby to keep smoke and heat from piling up. Install a quiet, weatherproof ceiling fan or misting system to circulate air without raising noise, preserving the bar’s ambience. Pair airflow with smart placement to avoid drafting guests and to vent humid air efficiently.
For the electrical side, separate high-heat appliances and sound equipment from general lighting, using outdoor-rated GFCI outlets and weatherproof wiring enclosures. For entertainment, consider a weatherproof outdoor TV or a sound system with sealed, rust-resistant components and IP ratings suited for humidity and heat. Use soft-landing materials—curtains, acoustic panels, or insulated ceilings—to minimize echoes and vibrations in space.
Weatherproofing and Drainage Solutions
Protect your gazebo bar from rain and moisture by using weather-resistant counter materials—stone, concrete, or treated wood—and sealing a waterproof top to guard surfaces. You’ll need a dedicated drainage solution with a gentle slope away from the gazebo and a hidden gutter or drain pan to prevent pooling. Add an overhang or roof extension with rain gutters to channel runoff away from the bar and seating, reducing water intrusion on stored equipment. Choose outdoor-rated appliances and enclosures with weatherproof seals to minimize moisture entry, and establish a maintenance routine for cleaning, seal checks, and clearing drainage paths to prevent mold and deterioration.
- Install a drainage pan for easy inspection.
- Keep gutters clear and sloped away from bar.
- Seal enclosures tightly to minimize moisture entry.
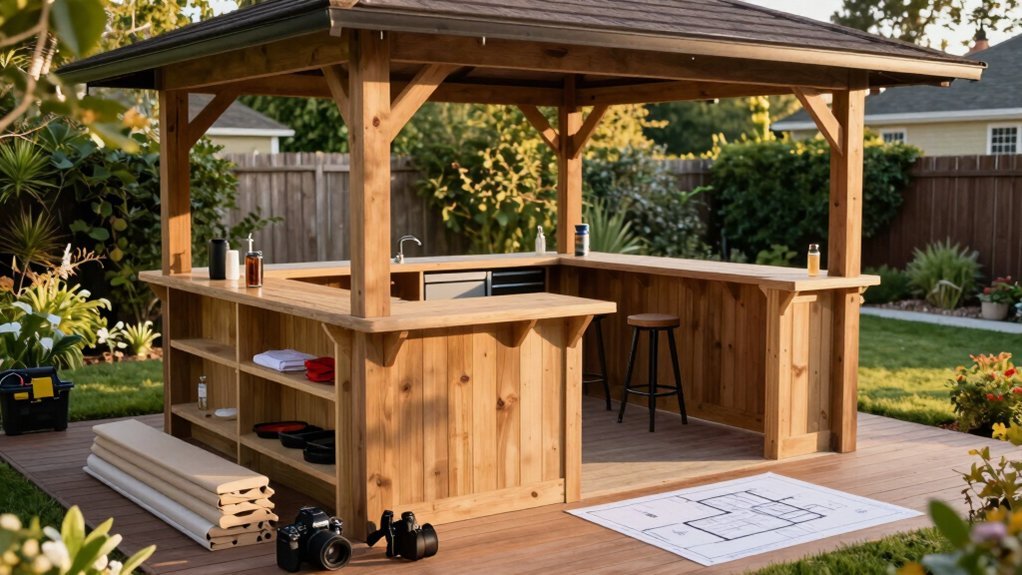
Building the Gazebo Frame and Roof Integration
Start by lining up the frame with the gazebo’s posts and roof height to ensure seamless integration of the built-in bar and solid framing. Outline a header integration plan that ties into the perimeter ledger and specify structural supports and cross-bracing to handle wind loads and the bar’s weight.
Consider drainage and waterproofing at the roof-line, and map routes for electrical and plumbing so you’re serviceable and safe.
Frame and Roof Alignment
How do you align the gazebo frame so the roof lines up with the top plate and header, ensuring the posts stay square and plumb to carry the load? You align the frame by matching the top plate to the header using a real header to transfer loads to the foundation. Keep posts square and plumb, then verify spacing between posts matches standard roof geometry. Use bracing at key junctions and install weather-resistant roof decking with flashing to seal joints, so wind forces stay off the structure for safety.
- Ensure equal post spacing for balanced load distribution.
- Install a real header and cross-members to transfer roof loads to posts and foundation.
- Add bracing and flashing integrated with frame to resist wind and water intrusion.
Header Integration Plan
Because the header carries the roof loads into the posts, your plan must specify header dimensions, material choices (engineered lumber or LVL), bearing lengths, and precise connection details to ensure reliable load transfer. You’ll frame the header between support posts, confirm bearing surfaces, and coordinate with the gazebo’s roof trusses to avoid conflicts. Choose materials that resist outdoor exposure, and plan protective finishes and weatherproofing to extend longevity. Ensure compliance with local building codes and permit requirements for permanent installations, and document fastener types, spacing, and corrosion resistance. Include details for inspection access and maintenance, so you can verify continued load transfer over time. This plan sets a solid foundation for a stable, durable gazebo bar framework you can trust for years to come.
Structural Support Details
If you’re building the gazebo frame, start with a sturdy, load-bearing skeleton that can safely transfer roof loads to the posts and resist wind and the weight of the bar setup; use properly sized beams, secure connections, and weather-resistant framing to keep the structure stable over time. Prioritize service access for plumbing and equipment while keeping the frame tidy and load paths uncompromised, and service channels.
- Use a header as part of the plan to transfer roof loads to the posts, ensuring structural integrity and compliance with gazebo design standards.
- Choose weather-resistant framing materials and corrosion-proof fasteners, so outdoor conditions won’t compromise the frame or bar connections.
- Design roof integration for wiring, lighting, and ventilation with proper clearances, flashing, headroom, and accessible service channels.
Finishing Touches: Seating, Decor, and Accessibility
Several well-chosen details pull the space together, from weather-resistant seating with outdoor cushions to subtle ambient lighting.
Choose weather-resistant seating with cushions made from outdoor-rated fabric to withstand sun and rain, keeping guests comfortable near the gazebo bar.
Incorporate ambient lighting such as LED strip under the bar overhang and pathway lanterns to create usable ambiance after dark.
Keep a barrier-free layout by maintaining a minimum 36-inch clearance around the bar for easy movement and wheelchair access.
Add decor accents like potted greenery, weatherproof bar signage, and decorative throw blankets for a welcoming, cohesive look.
Ensure accessibility by including a reachable storage cabinet and a lower-height portion of the counter (about 34 inches) for guests of varying heights.
This setup invites relaxed, inclusive gatherings.
Maintenance, Safety, and Upkeep
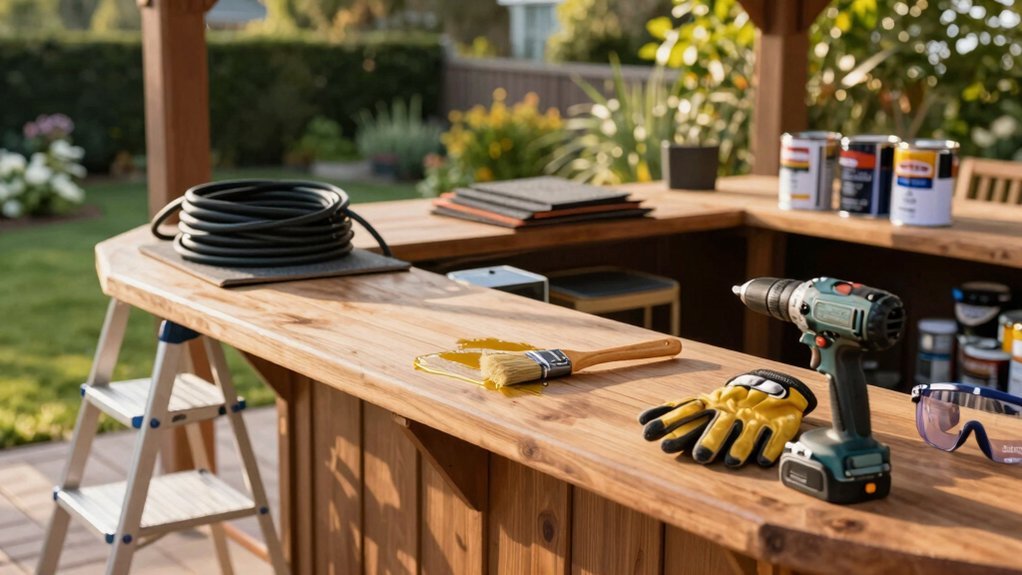
Want a gazebo bar that’s reliable, safe, and low-maintenance? Regular upkeep keeps surfaces clean weekly, seals wood annually to prevent moisture damage, and preps weatherproofing before extreme seasons. You’ll protect finishes with weather-resistant countertops and UV sealants, and log cleaning, sealing, appliance servicing, and repairs to extend lifespan.
- Use outdoor-rated outlets with GFCI protection and anchor heavy appliances to prevent tip-overs.
- Inspect structural posts, grout, rusted hardware, and rub rails monthly, addressing issues promptly.
- Maintain safety by checking weather seals and keeping a maintenance log for easy reference.
A simple log minimizes guesswork and saves you time when storms threaten. Track findings, schedule reapplications, and review during seasonal shifts to keep your gazebo bar sturdy and inviting year-round. Stay proactive, not reactive, year after.
Frequently Asked Questions
What Are Common Gazebo Mistakes?
Common gazebo mistakes include underestimating your header and reinforcement, skipping weatherproofing for the bar area, overloading with heavy equipment, neglecting proper electrical and plumbing hookups, and failing to leave adequate spacing for traffic and safety.
Is It Cheaper to Build Your Own Gazebo?
Depends on your plan, but you can save money by DIYing and reusing a frame. If you source affordable materials and handle the build yourself, you’ll cut labor costs, though missteps can raise expenses too.
Do Gazebo Bars Add Property Value?
Yes, gazebo bars can add property value, especially if you use weatherproof materials, smart drainage, built‑ins, and compliant permitting; they boost appeal but depend on local market and overall integration with your home’s style too.
What Is the Best Material for an Outdoor Bar Top?
Concrete is the best outdoor bar top choice for you, especially engineered or high-performance concrete reinforced with composite rebar; it’s durable, weather-resistant, and pairs well with granite or stone, offering longevity beyond wood outdoors today.

Leave a Reply