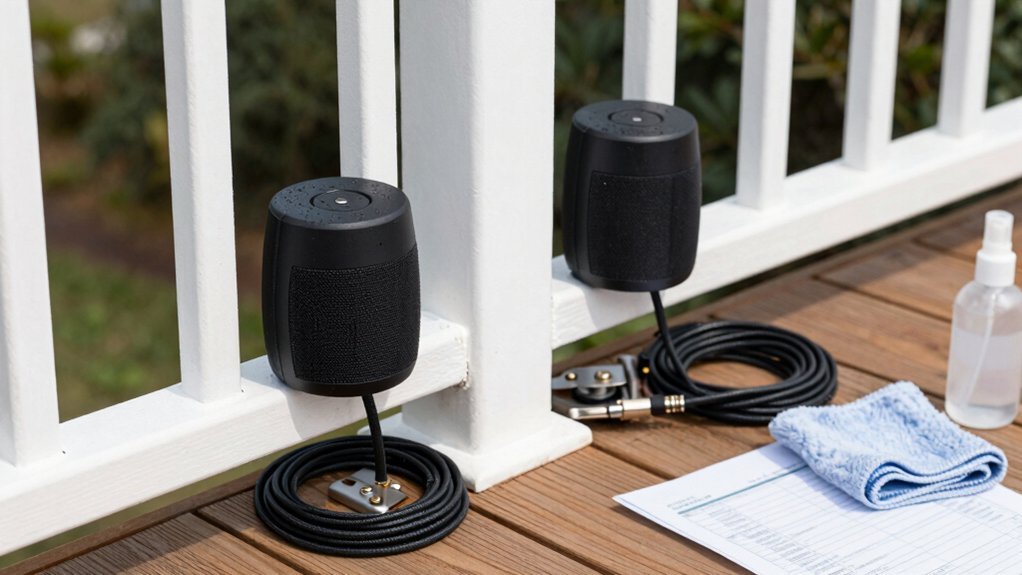
You’ll mount wireless speakers on deck railings using weatherproof brackets and the Quick Twist Cap Mount system, which uses a half-inch threaded fastener for universal compatibility. Start by cleaning your rail surface thoroughly, then measure the circumference for proper strap fit. Position speakers at ear level, spacing them two to five feet apart for even coverage. Apply vibration-dampening isolators to minimize wobble. Route any necessary cables along the railing’s underside through protective conduit. For deeper installation guidance and optimization strategies, there’s plenty more to discover about maximizing your outdoor audio setup.
Choosing the Right Speakers for Deck Rail Mounting
Why settle for speakers that can’t withstand the elements? You’ll want outdoor-rated speakers with robust weather resistance—look for high IP ratings and UV-resistant housings that protect against sun exposure and rain. Dual-voice-coil or multi-driver speakers deliver broader frequency coverage and superior stereo imaging across your deck space, ensuring you don’t sacrifice sound quality for convenience.
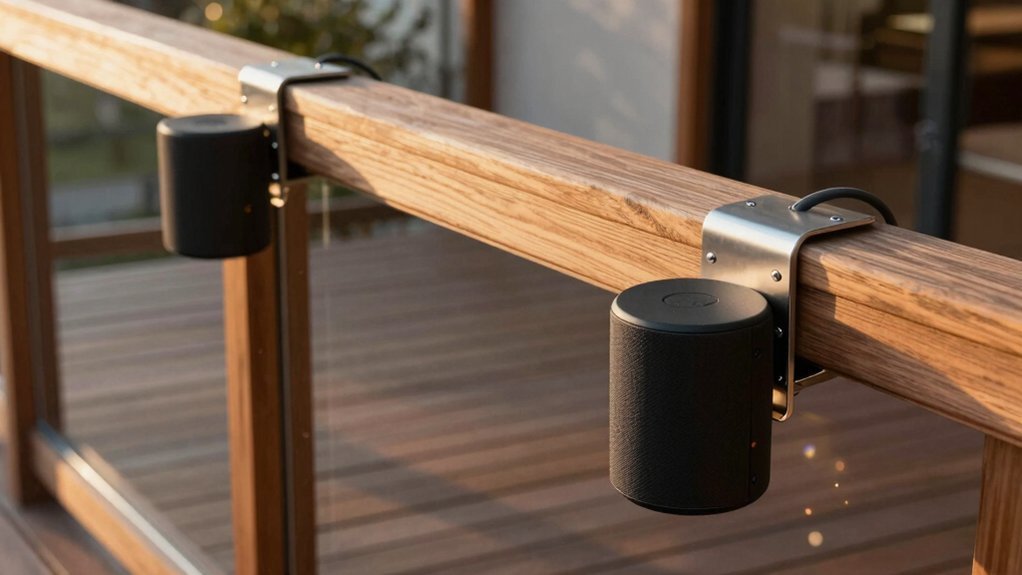
When selecting speakers, prioritize models designed for rail mounting with enclosures or mounts compatible with your railing’s diameter. This compatibility ensures secure clamping without damaging your railing’s structural integrity. Pair your speakers with weatherproof mounting accessories like quick-twist or strap mounts that provide stability while allowing easy seasonal removal. This combination gives you elevated, even sound distribution with minimal footprint impact.
Understanding the Quick Twist Cap Mount System
How does a single mounting system adapt to ground stakes, railings, trees, and eaves? The Quick Twist Cap Mount does exactly that. You’ll use a half-inch threaded fastener as your universal connection point, enabling installation virtually anywhere on your deck or yard.
The system supports two primary methods: ground stake installation for freestanding placement or surface/rail mounting for structures already in place. You’ll appreciate the included components—the Quick Twist Cap, 12-inch Ground Stake, Burial Conduit Junction, and Surface Mount Bracket—which work together seamlessly.
What makes this mount genuinely universal is its ability to fit various speaker circumferences without specialized hardware. Whether you’re securing speakers to railings, trees, or under eaves, you’re working with the same intuitive quick-connect design. This flexibility eliminates the need for multiple mounting solutions across your outdoor space.
Assessing Your Deck Layout and Speaker Placement
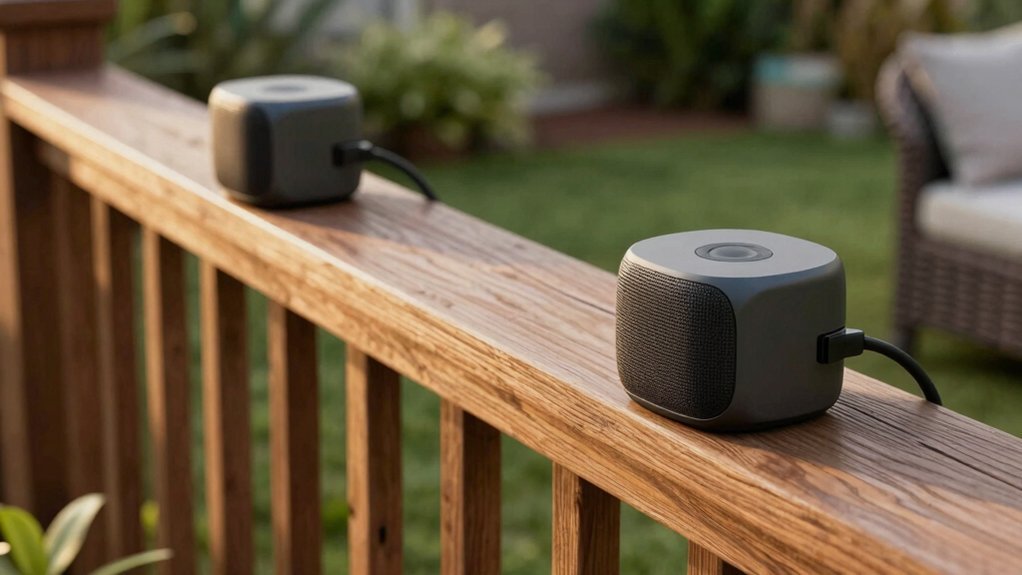
Before you install a single speaker, you’ll need to evaluate your deck’s dimensions and layout to determine optimal placement. For a 40-foot deck, position four speakers evenly across the length using spots near the 2/5 and 4/5 marks to balance coverage effectively. Avoid direct back-to-back alignment between adjacent units, as this creates harsh echoes. Instead, space them strategically with adequate gaps between each speaker.
Consider your deck’s sun exposure and weather patterns when selecting mounting locations. Under-deck mounting or rail brackets work best, keeping drivers at consistent heights for even sound dispersion. Choose weather-resistant enclosures rated for full-sun and all-weather conditions. This systematic approach ensures uniform audio distribution while protecting your equipment from environmental damage throughout the seasons.
Preparing the Rail Surface for Installation
Once you’ve determined where your speakers will go, you’ll need to ready the railings for mounting hardware. Start by cleaning the rail surface thoroughly with mild detergent and water to remove dirt, oil, and chalk. Dry completely before proceeding further.
Next, inspect the railing for stability and corrosion. Ensure it can support your mounting hardware and speaker weight without flexing. Measure the rail circumference and available clearance to select appropriately sized straps or brackets that won’t obstruct movement or drainage.
Apply non-slip, weather-resistant adapters or padding where straps contact the railing. This prevents scratches, improves grip, and protects your deck investment. Finally, verify your mounting hardware’s compatibility with your rail material—whether metal, wood, or composite—and confirm UV and salt-spray resistance for outdoor durability.
Installing Speakers on Deck Railings
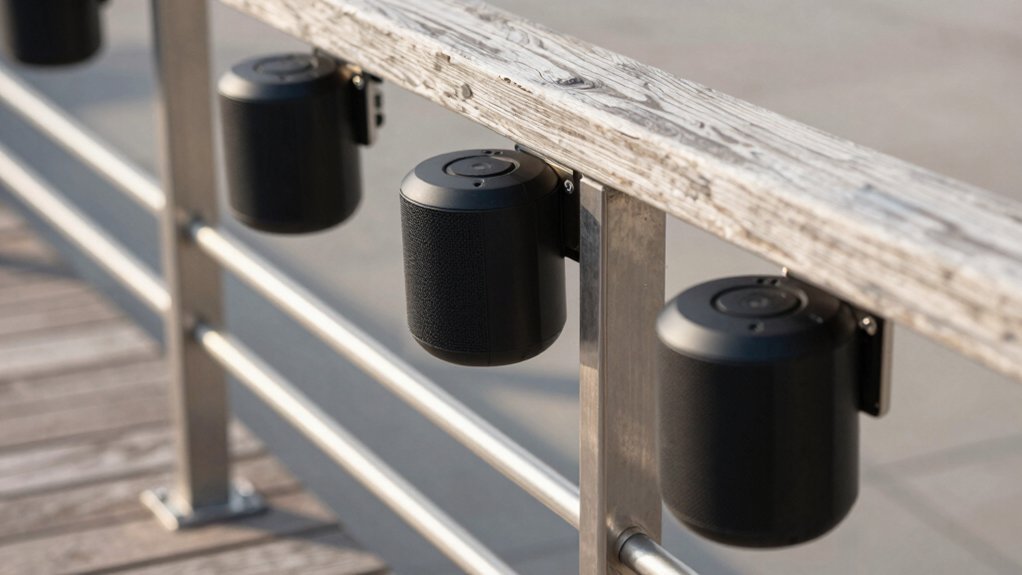
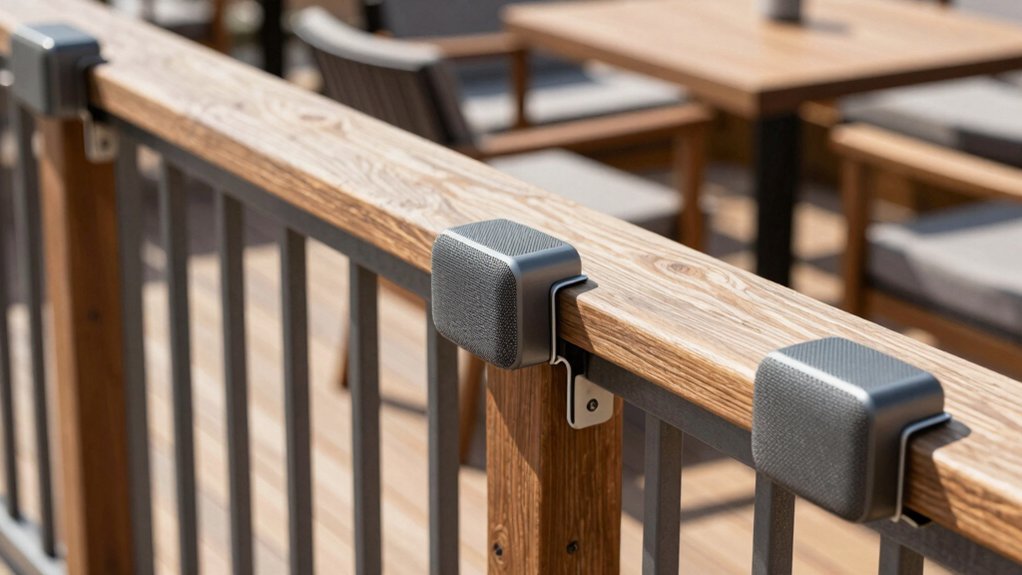
Now that your railing is prepared, you’re ready to secure your speakers using rail-mounted brackets or clamps specifically designed for outdoor use. Select weather-resistant speakers with UV and water exposure ratings to withstand outdoor conditions. Mount them at ear level to optimize your listening experience from seating areas.
Position speakers evenly along the railing, spacing them two to five feet apart for uniform sound coverage. Attach vibration-dampening isolators or mounts to minimize deck surface resonance and prevent wobble from wind or footsteps.
Route all cables discreetly along the railing’s underside or through protective conduit, keeping them away from walkways and moisture exposure. This strategic placement ensures both aesthetic appeal and functional reliability for your outdoor entertainment space.
Exploring Alternative Mounting Options
If you’re looking for greater flexibility in speaker placement, systems like MartinLogan’s Quick Connect offer multiple mounting solutions beyond traditional rail brackets.
You can deploy ground stakes for yard corners, bury conduit junctions beneath landscaping, or use surface-mount brackets on eaves and soffits. This modular approach lets you customize audio coverage based on your outdoor layout’s unique dimensions.
Weather-resistant brackets withstand sun exposure and year-round conditions, ensuring durability regardless of placement.
The half-inch threaded Quick Twist Cap enables quick repositioning as your entertaining needs change seasonally.
Optimizing Audio Coverage Across Your Outdoor Space

You’ll achieve balanced sound distribution by positioning speakers symmetrically along your deck—placing units at the 2/5 and 4/5 marks of a 40-foot span creates even left-right and front-back coverage without dead zones. Strategic placement lets you plan zones where sound overlaps minimally, so you’re distributing audio evenly rather than creating hotspots that overwhelm certain seating areas. This approach lets you run multiple smaller speakers at moderate volumes, which keeps conversations audible and maintains a pleasant acoustic environment throughout your outdoor gathering space.
Strategic Speaker Positioning
Where should your speakers go to deliver consistent sound throughout your deck? Space four speakers evenly across your 40-foot deck at the 2/5 and 4/5 positions to create balanced coverage. This strategic placement eliminates dead zones while preventing acoustic overlap that muddies sound quality.
Orient each speaker to face your seating areas with slight inward angles toward the main gathering zone. This positioning maximizes intelligibility and ensures everyone hears dialogue and music clearly, regardless of where they’re seated.
Pair dual-voice-coil drivers per channel to distribute sound evenly and minimize interference between adjacent units. Mount speakers under-deck or on rails using weather-resistant enclosures that protect equipment while maintaining optimal sight lines.
Use multiple smaller speakers at moderate volumes rather than one high-power unit, reducing acoustic overpower and improving crowd-following coverage across your entire outdoor space.
Zone Coverage Planning
How do you eliminate dead zones and acoustic hotspots across your entire deck? You’ll space four outdoor speakers at the 2/5 and 4/5 positions along your deck’s length, creating balanced coverage that minimizes sound leakage beyond your seating area. For a 40-foot deck, plan eight channels or use four dual-voice-coil drivers, pairing two per channel for even distribution. Weather-rated zone amps like the DMA-1240 or Sonos Amp multi-room setups let you control each zone independently while maintaining consistent impedance across driver pairs. Mount speakers under-deck or on railing housings to shield them from sun and rain. Adjust mounting angles to match your seating layout, preventing loudness clashes between adjacent zones and ensuring uniform sound pressure levels throughout your outdoor space.
Securing Cables and Managing Weatherproofing
Three critical steps’ll protect your wiring from the elements: using proper conduits, securing fasteners, and sealing connection points.
Run power and audio cables through weatherproof conduits along railings, keeping them hidden below the top rail to minimize tripping hazards. Secure cables with outdoor-rated zip ties every 12–18 inches, avoiding sharp bends that cause signal loss and wear.
- Seal every entry and exit point with UV-resistant gaskets to prevent water infiltration that damages equipment
- Use stainless steel or coated hardware to eliminate rust that compromises structural integrity
- Consider wireless connections where possible to eliminate cabling complexity entirely
For necessary wired connections, apply moisture-sealed terminations and weatherproof enclosures around connectors. These measures ensure your outdoor audio system remains reliable and safe for years, protecting both equipment and deck users from potential failures and hazards.
Maintenance and Seasonal Care for Outdoor Speakers
You’ll want to develop weather protection strategies that shield your speakers from sun, rain, and temperature extremes using weatherproof enclosures and sealed connections. During winter months or extended harsh conditions, you should store non-weatherproof components indoors to prevent damage and extend their lifespan. Regular seasonal maintenance—including cleaning mounting surfaces, tightening fasteners, and inspecting hardware—keeps your outdoor setup secure and functional year-round.
Weather Protection Strategies
Why do outdoor speakers fail prematurely? Exposure to harsh weather breaks down protective coatings, corrodes hardware, and degrades seals—ultimately destroying your investment. You’ll want to implement strategic weather protection to extend your speakers’ lifespan.
- Apply protective covers during extreme seasons like winter to shield against snow, ice, and UV rays that crack plastics and fade finishes
- Schedule biannual maintenance checks to catch deterioration early—testing waterproof seals and replacing degraded gaskets before failure occurs
- Clean regularly with mild soap and water to prevent grime buildup that traps moisture and accelerates corrosion
You should inspect mounting brackets and fasteners seasonally, retightening them after temperature swings and heavy winds. These proactive steps keep your deck speakers performing reliably year-round while protecting your outdoor audio investment.
Seasonal Storage Guidelines
When the outdoor season winds down, proper storage becomes essential for protecting your speakers’ internal components and extending their operational lifespan. Start by disconnecting all power and network cables, then remove any detachable components like brackets or stands.
Store your speakers in a dry, temperature-stable environment that shields them from freezing temperatures and moisture. Cover exposed ports with protective caps to minimize moisture ingress. Even if your speakers are weather-rated, verify their IP ratings and store them indoors when possible—this preserves seal integrity and material longevity.
Use dedicated protective covers or storage bags designed for outdoor speakers to guard against dust, UV exposure, and physical damage during the off-season. These precautions ensure your speakers remain in optimal condition for next season.
Enhancing Your Outdoor Entertainment Experience
How can you transform your deck into an entertainment hub? By strategically positioning wireless speakers, you’ll create an immersive audio environment that elevates every gathering.
Optimize your setup with these enhancements:
- Deploy multiple speakers across your deck using Quick Connect systems to achieve balanced sound coverage, eliminating dead zones where guests lose audio clarity
- Leverage rail-mounted configurations that keep your space visually uncluttered while maintaining professional-grade sound quality for movies, music, and conversations
- Combine ground and elevated placements—anchoring speakers to trees or under eaves alongside rail-mounted units—to establish three-dimensional audio that surrounds your audience
MartinLogan’s weather-resistant outdoor system ensures your speakers withstand seasonal elements while delivering consistent performance. Universal strap mounts accommodate various speaker sizes, giving you flexibility to upgrade or adjust your setup. Your deck becomes a premium entertainment destination where technology complements natural outdoor ambiance seamlessly.
Frequently Asked Questions
What Is the Difference Between a Bluetooth Speaker and a Wireless Speaker?
You’ll find that Bluetooth speakers connect directly to your device within 30–100 meters, while wireless speakers use Wi-Fi or mesh networks for multi-room audio. You’ll enjoy better range, synchronization, and features with wireless systems, though Bluetooth’s simpler setup won’t require your home network.
Where to Put Wireless Speakers?
You should position your wireless speakers at the 2/5 and 4/5 points along your 40-foot deck railing. Place them in shaded areas under eaves, use secure clamps for stability, and mount two speakers per zone on opposite ends for balanced sound distribution.
Can You Connect Decks to a Bluetooth Speaker?
Yes, you can connect your deck to a Bluetooth speaker. Most decks support Bluetooth connectivity, though you’ll get the best range—30 to 100 feet—when you position the speaker with a clear line-of-sight and away from obstructions like walls or metal railings.
Do Outdoor Bluetooth Speakers Need Power?
Yes, you’ll need to power your outdoor Bluetooth speakers. You can use rechargeable batteries lasting 6-40 hours, or connect them to weatherproof outlets for continuous power. Some models support USB-C charging while you’re using them outdoors.

Leave a Reply