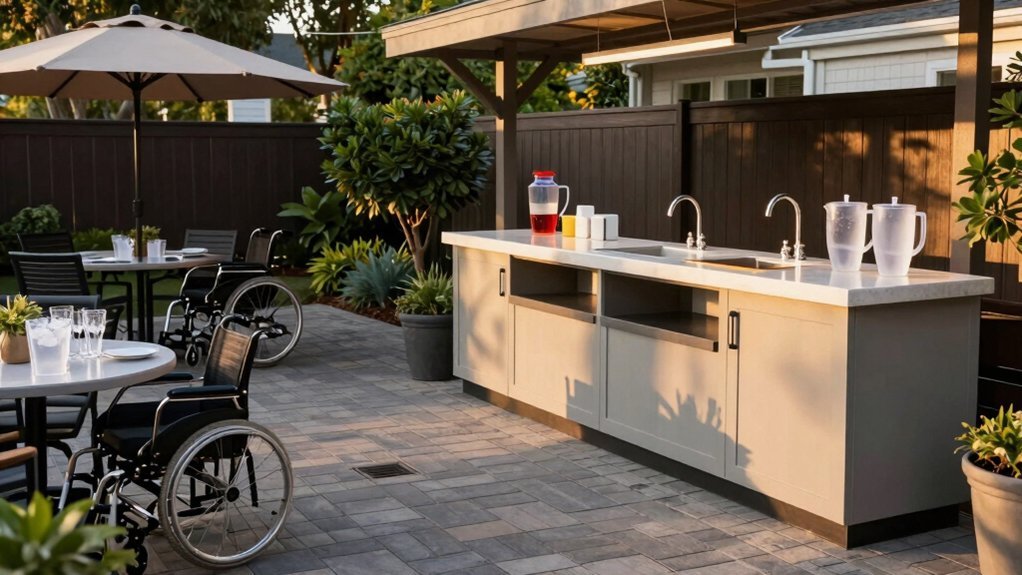
When designing accessible patio beverage stations, position them in flat, shaded areas with clear pathways. Create multi-level serving surfaces (28-30″ for wheelchair users, 34-36″ for standing adults) and organize items in distinct zones with frequently used products at eye level. Use weatherproof, shatterproof containers with clear labels and proper lighting for visibility. Install GFCI-protected outlets nearby for safety. These thoughtful adjustments ensure all guests can comfortably access and enjoy drinks outdoors.
Strategic Placement for Maximum Accessibility
Where you position your patio beverage station can make or break its functionality. Choose a flat, shaded area that’s protected from wind to prevent spills on uneven surfaces and keep drinks colder longer. This thoughtful placement ensures stability while maintaining beverage quality.
Arrange your station with frequently used items at eye level and within arm’s reach to minimize stretching or searching. You’ll want to create distinct zones by grouping related items together—separate alcohols from mixers and garnishes using multi-level surfaces like ladder shelves or repurposed bookcases.
For added convenience, design your station with mobility in mind. Use modular components like trays on cinder blocks or stacked concrete blocks that can be easily disassembled and relocated during setup or cleanup phases.
Weather Protection for Year-Round Enjoyment
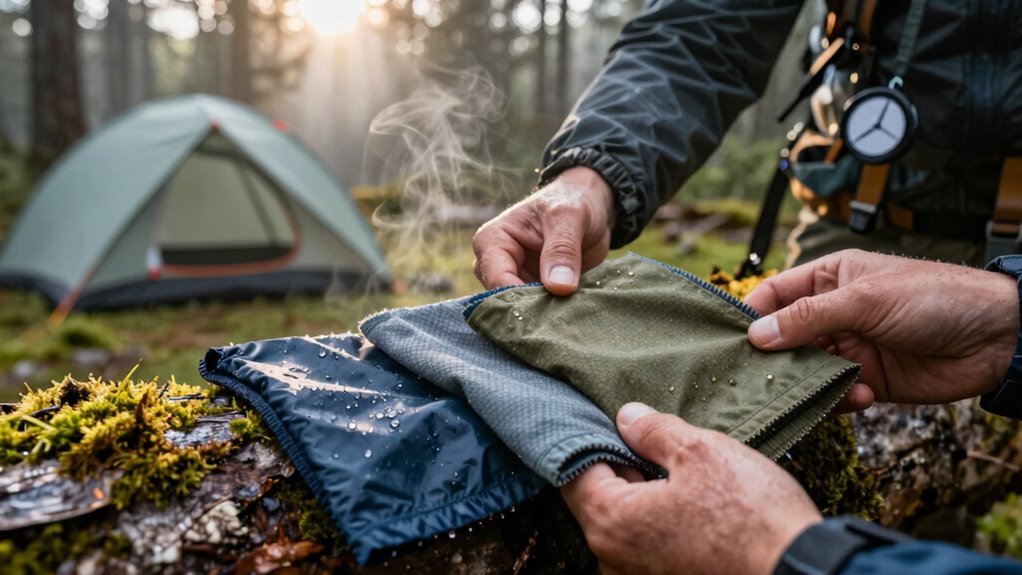
Why limit your outdoor entertaining to perfect weather days when proper protection can extend your beverage station’s usability through multiple seasons? Choose a wind-sheltered location with natural shade to keep drinks cold longer and protect items from harsh elements. When natural coverage isn’t available, add an umbrella or install a permanent shelter.
| Season | Protection Needed | Material Recommendation | Placement Tip |
|---|---|---|---|
| Summer | Shade from UV rays | Spar urethane finishes | North-facing areas |
| Fall | Wind barriers | Exterior stains | Near structure walls |
| Winter | Waterproof covering | Weather-resistant hardware | Close to home entry |
| Spring | Rain protection | Moisture-resistant surfaces | Under existing eaves |
Always position your station on flat ground to prevent tipping, and keep electronic components near power sources with proper cord management for safety.
Height-Adjustable Serving Surfaces
You’ll create a truly inclusive patio experience with height-adjustable beverage stations that accommodate guests of all abilities.
Consider incorporating multi-level serving areas with adjustable table options ranging from modular cinder block bases to convertible leg systems that can be easily reconfigured.
Designate universal reach zones where ice, drinks, and garnishes remain accessible to everyone, whether they’re seated in wheelchairs or standing.
Adjustable Table Options
When designing an accessible patio beverage station, height-adjustable surfaces can transform the experience for hosts and guests alike. You’ll find several practical options that balance functionality with stability.
Consider tables with locking legs that can be quickly positioned at different heights—perfect when transitioning from mixing drinks to serving. Counterweight systems offer exceptional stability on uneven patio surfaces, eliminating wobble concerns during use. For maximum versatility, look for models that pair vertical storage with adjustable surfaces, creating under-table clearance while accommodating various glassware heights.
The best adjustable tables allow you to raise the surface when filling and mixing drinks, then lower it to create comfortable eye-level access for seated guests. This thoughtful design prevents spills by aligning work areas with natural arm reach zones.
Multi-Level Serving Areas
How effectively can a single surface truly serve everyone at your gathering? Not very, which is why multi-level beverage stations are game-changers for your patio entertaining.
Start with a ladder shelf or tiered stand as your base, creating distinct zones that separate alcohol, mixers, and accessories without crowding. Position frequently used items like glasses and garnishes on top levels, while storing ice buckets and napkins on lower shelves for easy access.
Vary shelf depths and heights to add visual interest while ensuring guests of different heights can comfortably reach what they need. Coordinate finishes across all levels—wood, metal, or glass—to maintain a cohesive look while standing up to outdoor conditions. This vertical approach keeps your top surface uncluttered and supports efficient self-service that works for everyone.
Universal Reach Zones
Beyond the tiered approach, true accessibility demands surfaces that adapt to your guests’ specific needs. Height-adjustable components allow everyone—seated, standing, and those using mobility aids—to comfortably reach beverages and garnishes. Consider tables with adjustable legs that can transform from indoor coffee table height to taller outdoor configurations.
| Height Range | Ideal For | Accommodates |
|---|---|---|
| 28-30″ | Wheelchair users | Glasses, ice buckets |
| 34-36″ | Standing adults | Mixing, garnishing |
| 24-26″ | Children, seated guests | Self-service drinks |
| 40-42″ | Bar-height standing | Quick service areas |
| Adjustable | Universal access | Changing party needs |
Always design with clear knee space underneath surfaces where wheelchair users will position themselves. Locate frequently used items within the middle reach zone—approximately 20-44″ from the ground—to minimize stretching and bending for all guests.
Self-Serve Layout and Ergonomic Design

A well-designed self-serve beverage station should incorporate height-adjustable serving areas that accommodate guests of all abilities and physical statures. Create clearly labeled drink zones with printed tags or chalkboard markers to eliminate confusion and help guests navigate their options independently. Position beverage dispensers with spigots at comfortable reaching heights and angled slightly forward to make pouring intuitive and minimize spills.
Height-Adjustable Serving Areas
When designing an inclusive patio beverage station, height-adjustable serving areas become the cornerstone of accessibility for all guests. Create multi-level surfaces with a lower accessible shelf (30-32 inches) for wheelchair users and a standard counter (36 inches) for standing guests.
Position frequently used items within 12-18 inches of the primary grabbing zone to minimize reaching. Incorporate vertical storage solutions like tiered stands and wall-mounted racks to maximize space while maintaining accessibility.
Don’t forget to add clear labels with high-contrast colors on adjustable components—this helps all guests locate items quickly. For safety, secure your adjustable elements with locking mechanisms and sturdy bases. Use reinforced frames or cinder blocks beneath surfaces to prevent tipping when guests interact with your station.
Labeled Drink Zones
Intelligently organizing your patio beverage station with labeled drink zones transforms a chaotic free-for-all into an intuitive self-serve experience for all guests. Use clear signage with words and icons to guide guests to “Water,” “Iced Tea,” or “Cocktails,” reducing congestion and search time.
Position dispensers and supplies at accessible heights on sturdy surfaces, minimizing reaching. Create a separate, lower station for children to prevent bottlenecks at adult beverage areas.
| Zone Type | Ideal Height | Organization Tips |
|---|---|---|
| Adult Primary | 36-38 inches | Color-coded labels for mixers/bases |
| Children’s | 24-30 inches | Simple icons for drink options |
| Garnish Station | Arm’s reach | Common items front, rare items back |
| Glassware | Eye level | Arrange by drink type with pictograms |
Intuitive Spigot Placement
Beyond labeled zones, the physical arrangement of beverage dispensers directly impacts guest comfort and independence. Position your spigots at waist to chest height so guests can easily operate them while standing or seated, eliminating awkward bending. Group related beverages together with clear labeling to create an intuitive flow.
For maximum accessibility, remember these key design elements:
- Mount dispensers on sturdy, low-profile surfaces with spigots aligned for gravity-fed flow to prevent drips and spills
- Install a backboard or wall mount behind stations to support hoses and prevent accidental pulling or tipping
- Place primary beverage taps at wrist height with adequate spacing between options so guests don’t need to reach over others
This thoughtful arrangement ensures everyone can serve themselves confidently without assistance.
Power Source Integration and Safety
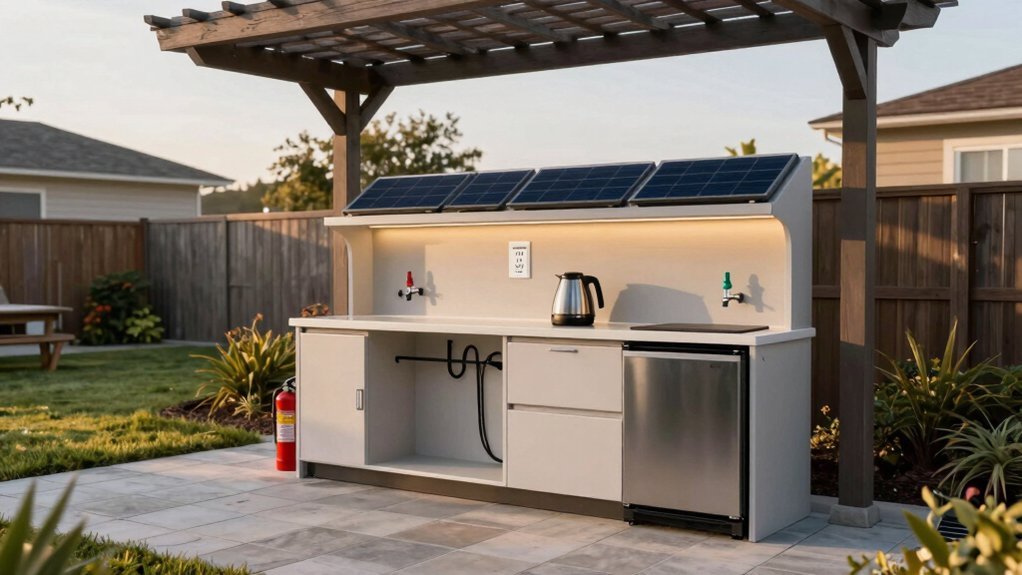
How effectively you manage power sources can make or break your accessible patio beverage station. Position your station near power sources to avoid stretching cords across walkways, which creates tripping hazards for guests.
| Power Element | Safety Consideration | Implementation Tip |
|---|---|---|
| Outlets | Use GFCI protection | Install weather-rated covers |
| Cords | Minimize exposure | Use cord management channels |
| Appliances | Check power requirements | Group similar voltage items |
| Furniture | Built-in solutions | Select items like Mainstay Bar Credenza |
When planning your outdoor space, choose furniture with built-in cord management to keep cables organized and hidden. Always weatherproof electrical components for outdoor use, especially in areas that might experience moisture or precipitation. You’ll create a safer environment while maintaining the aesthetic appeal of your patio beverage station.
Inclusive Container and Glassware Selection
When planning your patio beverage station, place frequently-used glassware at arm’s reach while storing backup items on higher shelves for selective accessibility. Choose lightweight, shatterproof acrylic or polycarbonate vessels that mimic traditional glass but eliminate outdoor safety concerns. You’ll want a mix of sizes with textured grips and distinctive shapes so guests of all abilities can easily identify and handle their preferred drinks.
Practical Height Options
Creating truly accessible patio beverage stations means thoughtfully considering height options that work for everyone. Use multi-level bases like ladder shelves or tiered stands to position frequently used items at comfortable reaching heights while freeing up main surfaces for accessibility.
Position your elements strategically by:
- Mounting mugs and stemware on mid-height hooks or pegs to minimize bending
- Installing wall-mounted racks for bottles and glassware paired with a small tabletop for essentials
- Arranging items by frequency of use with varying vertical levels that ensure taller items don’t block daily-use essentials
Choose cohesive finishes across your shelves, racks, and bases—wood, metal, or glass—to maintain visual unity while maximizing function. This thoughtful arrangement creates both aesthetic appeal and practical accessibility for all your guests.
Shatterproof Vessel Alternatives
Safety and inclusivity converge in the selection of shatterproof vessels for your patio beverage station. Choose materials that balance durability with aesthetic appeal while ensuring everyone can enjoy drinks without worry.
| Beverage Type | Recommended Vessel | Material | Benefits |
|---|---|---|---|
| Hot Drinks | Double-walled mugs | Stainless steel | Prevents burns, reduces condensation |
| Cold Drinks | Tumblers with secure lids | BPA-free plastic | Minimizes spills on uneven surfaces |
| Garnishes/Mixers | Dispensers & pitchers | Tritan co-polyester | Maintains glass-like clarity without fragility |
| All Beverages | Colored drinkware | Tempered materials | Enables easy identification with color-coding |
For a cohesive look, select neutral-toned vessels and add color-coordinated labels. This approach maintains your patio’s style while prioritizing function—ensuring guests of all abilities can confidently handle their drinks without fear of breakage.
Clear Labeling and Visual Organization
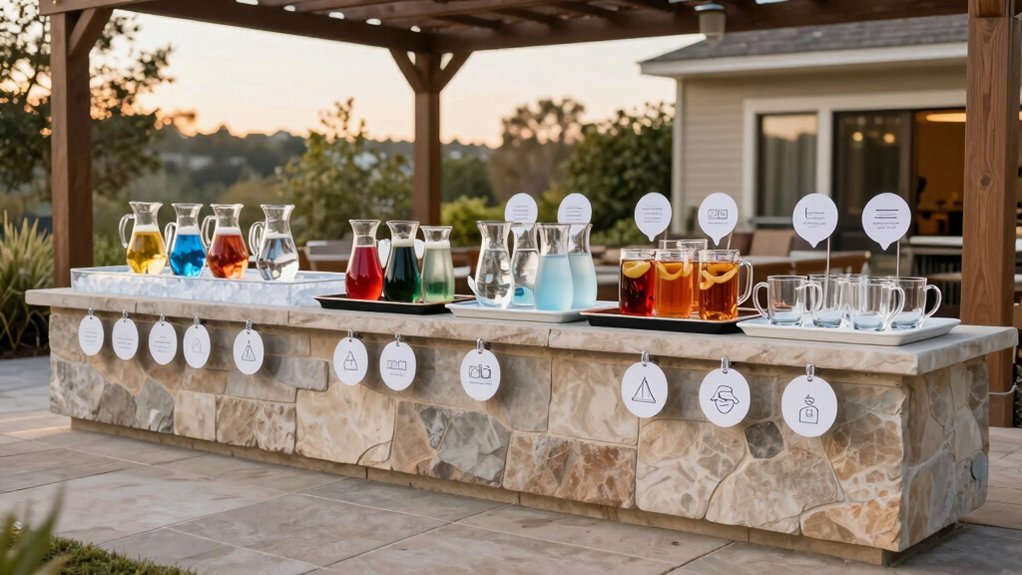
Clarity transforms a patio beverage station from merely functional to truly accessible. You’ll want to implement visible labels on all dispensers, bottles, and jars to help guests quickly identify contents without hesitation. Choose consistent fonts and colors that complement your patio’s aesthetic while maintaining readability.
Create a systematic layout that follows intuitive patterns:
- Position drinkware on top tiers for easy visibility and grab-and-go convenience
- Arrange bottles and mixers at mid-level, grouping similar items together with dedicated signage
- Store ice, garnishes, and accessories at the bottom with clear labels to prevent cross-contamination
Don’t forget to incorporate writeable surfaces like chalkboard tags for seasonal offerings or special drinks. This flexibility lets you update information without creating confusion or compromising your station’s organized appearance.
Mobility-Friendly Navigation Paths
While clear labeling makes beverage contents accessible, the physical navigation around your patio station determines who can comfortably use it. Design with movement in mind by creating obstacle-free pathways wide enough for mobility aids and comfortable traffic flow.
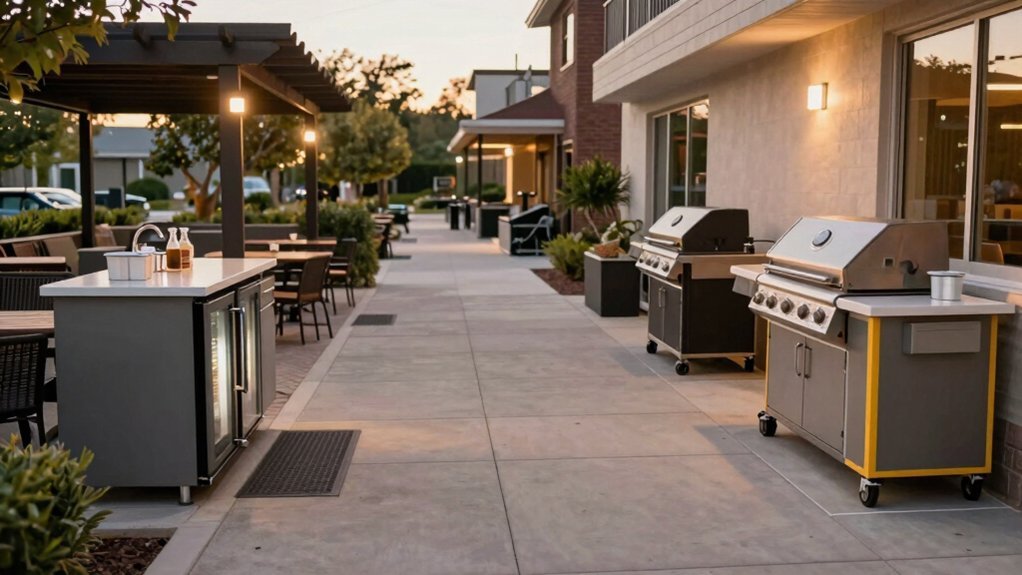
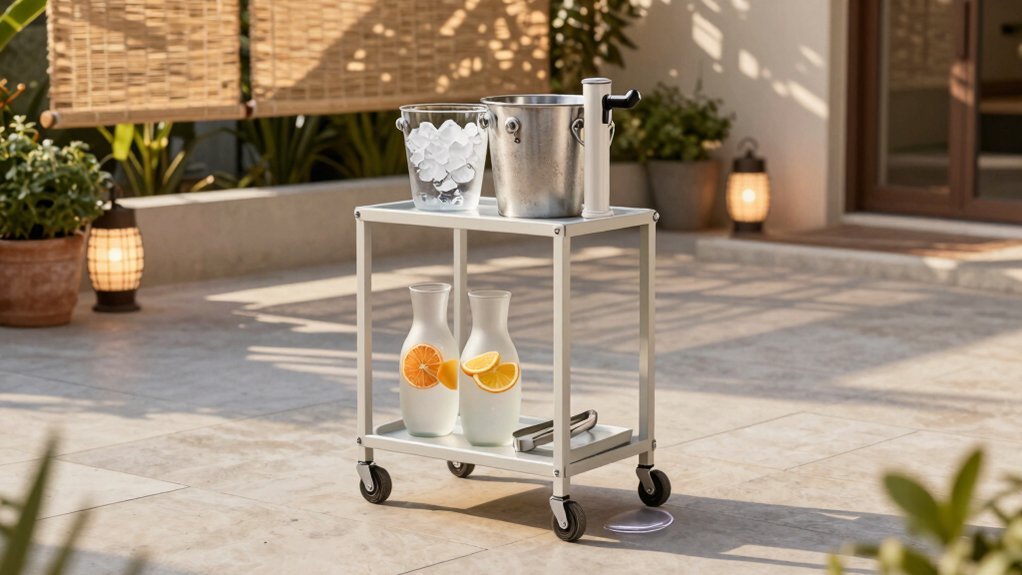
Invest in a rolling beverage cart or portable bar to move drinks between indoor and outdoor spaces without heavy lifting. This flexibility accommodates changing needs and weather conditions.
Mobility transforms hospitality—wheeled beverage stations adapt to your space and guests rather than demanding the opposite.
Arrange your station’s layout with items organized by frequency of use—keep everyday essentials at waist level, less-used items higher up. Multi-level designs like tiered stands or ladder shelves maximize vertical space while maintaining accessibility.
Wall-mounted racks and hooks free up valuable counter space and create storage opportunities at various heights. Remember that stable surfaces prevent spills and provide security for those with balance concerns.
Adaptive Serving Tools and Equipment
Adaptive serving tools transform an ordinary patio beverage station into an inclusive space where everyone can participate.
Install wall-mounted racks and hooks to free up valuable counter space, allowing guests with mobility devices to approach comfortably.
Multi-level bases create vertical organization that improves access while keeping everything within reach.
For ultimate flexibility, incorporate portable options that enhance independence:
- Rolling bar carts that can be positioned at various heights and moved between conversation areas
- Tiered stands that separate spirits, mixers, and garnishes for easier selection and reach
- Wall-mounted dispensers paired with compact tabletops that maximize functionality in tight spaces
Don’t forget eco-conscious elements like reusable glassware and accessible garnish containers, which support both sustainability and independence for all your guests.
Lighting Solutions for Evening Accessibility
When darkness falls, your patio beverage station requires thoughtful illumination to remain functional for all guests. Implement layered lighting that combines ambient, task, and accent options so everyone can clearly see labels, garnishes, and serving equipment.
| Lighting Type | Best Placement | Benefits |
|---|---|---|
| LED Strips | Under shelves | Reduces glare, highlights surfaces |
| Battery Lanterns | Tables, countertops | Portable, decorative light sources |
| Solar Path Lights | Along walkways | Eco-friendly, defines approaches |
| Backlit Menus | Behind drink lists | Enhances readability for all guests |
Position fixtures to eliminate shadows, especially around vertical storage areas like bookcases. Always choose weatherproof, IP-rated options and avoid open flames. Adding illuminated drink identifiers enables guests to self-serve with confidence, regardless of visibility challenges.
Frequently Asked Questions
What Are Some Creative Beverage Station Ideas?
You’ll love using rolling bar carts, self-serve drink dispensers, coastal-themed stations with galvanized tubs, mini-fridges for cold storage, or repurposed vintage suitcases with fold-out serving tables.
How to Design a Beverage Menu?
Design your beverage menu around one batched cocktail and mocktail with seasonal ingredients. Include clear labels, contrasting colors, and garnishes. Let guests add spirits to mocktails if desired for inclusive options.
How to Serve Drinks at an Outdoor Party?
Set up a self-serve station with one alcoholic and one non-alcoholic batch, clear labels, and plenty of ice. Position in a shady spot 15-30 minutes before guests arrive.
How to Keep Drinks Cold at an Outdoor Party?
Use plenty of ice in insulated coolers, add ice blocks with edible decorations, place stations in shade, pre-chill beverages, and consider mini-fridges as backup cooling sources.
Leave a Reply