
You’ll transform your pergola into an intimate entertaining space by installing privacy screens that block sightlines while maintaining airflow. Start by measuring your opening dimensions and assessing wind exposure and sun direction. Choose from wood slats, lattice, fabric drapes, or glass panels based on your privacy needs and style. Use corrosion-resistant brackets spaced 16–24 inches apart, pre-drill pilot holes, and level everything for proper alignment. Install tracks for retractable options, then test all mechanisms before your guests arrive. The specifics of each installation method deserve deeper exploration.
Understanding Pergola Privacy Screens
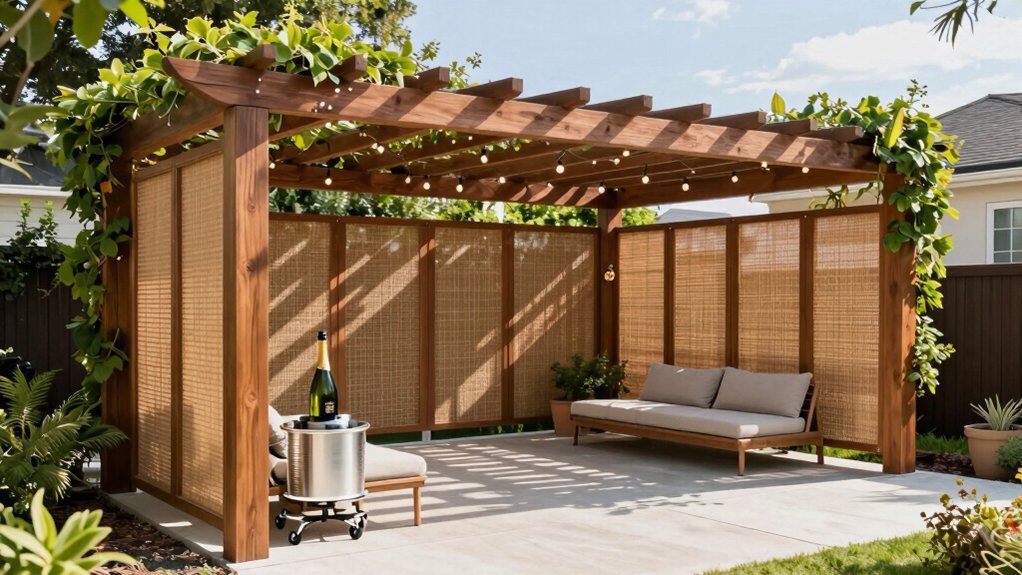
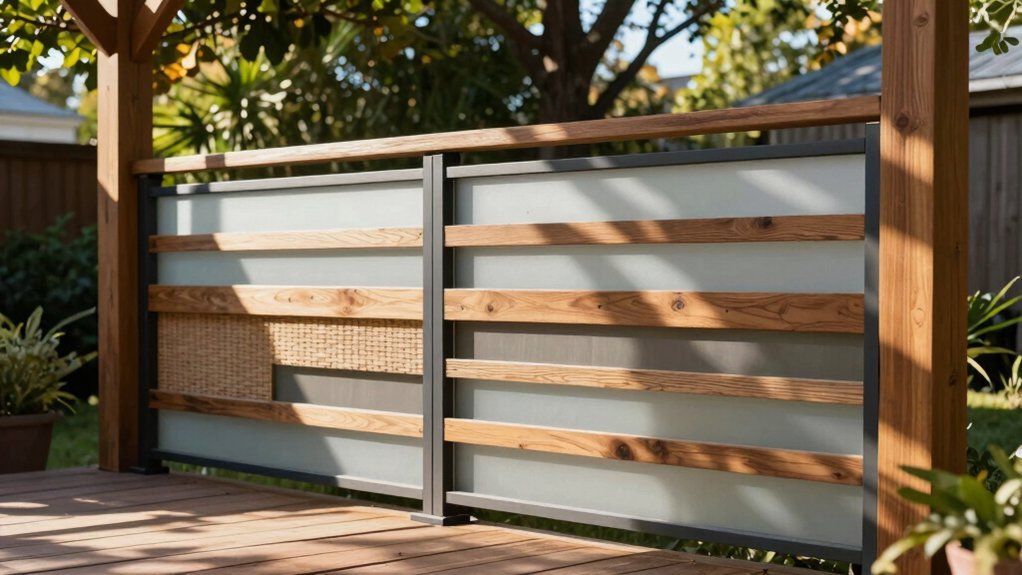
Why settle for an open pergola when you can customize it with privacy screens that suit your style and needs? You’ll find several material options, each with distinct advantages. Wood delivers a natural aesthetic and complete visual barriers, while lattice panels offer a lighter approach that allows sunlight through. Aluminum provides durability and low maintenance, whereas fabric and glass deliver modern alternatives.
Your choice depends on your priorities. Need maximum privacy? Solid wooden slats work best. Want to balance coverage with light? Lattice panels excel. Prioritizing longevity and minimal upkeep? Consider aluminum or glass.
You can pursue DIY installations for personalized designs matching your décor, or invest in commercial options for professional finishes and enhanced durability. Either path transforms your outdoor space into a private retreat.
Assessing Your Pergola’s Dimensions and Environment
Before you install privacy screens, you’ll need to take precise measurements and evaluate your pergola’s setting.
Start by measuring the width and height of your pergola opening to determine material quantities. Next, assess environmental factors: identify wind exposure patterns, note your area’s typical sun direction, and observe nearby structures that might affect installation stability.
| Factor | Assessment Method |
|---|---|
| Dimensions | Measure opening width and height |
| Wind Exposure | Observe surrounding landscape features |
| Sun Direction | Track daily light patterns |
Locate attachment points on posts and beams where you’ll mount screens, checking what hardware or brackets you’ll need. Consider whether you want partial shading through lattice panels or full enclosure with solid materials. Finally, review local building codes and HOA regulations—they may restrict screen height, materials, or mounting techniques in your area.
Choosing the Right Screen Materials and Style
Once you’ve measured your pergola and assessed your space, you’ll need to select materials that balance privacy, aesthetics, and functionality for your party setting. Each option offers distinct advantages depending on your needs.
Consider these popular choices:
- Lattice panels provide partial privacy while allowing light and airflow—ideal for semi-enclosed gatherings
- Fabric drapes offer adjustable openness and weather-resistant options you can color-coordinate with your décor
- Wooden slats create solid privacy with a natural appearance, though they require sealing or painting for weather protection
Bamboo and plant-based screens add tropical or rustic charm while naturally filtering sightlines and enhancing shade. Glass panels deliver a modern aesthetic with high visibility, but pair them with sturdy framing and proper ventilation to prevent that boxed-in feeling during events.
Essential Tools and Materials for Installation
You’ll need a measuring tape, level, drill, screwdriver, saw, and ladder to properly install your privacy screens, along with weatherproof brackets, screws, and fasteners designed for outdoor durability. Your material choices—whether wood, metal slats, vinyl, fabric, lattice, or glass—directly impact both the installation process and long-term maintenance requirements. Understanding the costs associated with each material option and tool investment helps you budget effectively for your pergola project.
Tools Required for Installation
What’s the difference between a wobbly privacy screen and a sturdy one? You’ve got the right tools.
You’ll need these essentials for a successful installation:
- Measuring tape – determines screen length and post locations, ensuring even gaps and proper alignment
- Level – keeps horizontal beams and mounting hardware perfectly square for maximum stability
- Drill with appropriate bits – drives screws and secures hardware into pergola posts and mounting brackets
A saw cuts wooden slats, lattice panels, and framing to your exact specifications before installation. A sturdy ladder gives you safe access to higher mounting points. Each tool serves a specific purpose in achieving a professional result.
Don’t skip quality tools. They’re investments that directly affect your screen’s stability and longevity for countless parties ahead.
Materials and Material Selection
How do you choose the right materials for your pergola privacy screen? You’ll want to balance privacy, durability, and maintenance based on your needs and budget.
| Material | Privacy Level | Durability | Maintenance |
|---|---|---|---|
| Wood Slats | High | Medium | Regular staining/sealing |
| Lattice Panels | Medium | High | Minimal |
| Fabric Drapes | High | Medium | Seasonal cleaning |
| Bamboo | High | Medium | Occasional treatment |
| Aluminum Panels | Medium | Very High | Minimal |
For outdoor use, select pressure-treated wood, powder-coated metal, or vinyl composites that resist sun and rain damage. If you’re installing fabric curtains, choose UV-resistant, weather-resistant options with rustproof rods or tracks. Pair your material choice with appropriately sized fasteners and mounting hardware that fit your pergola posts securely.
Cost Estimation and Budgeting
Before you commit to a pergola privacy screen project, understanding the costs involved—both for materials and tools—will help you plan effectively.
DIY installation typically runs £50–£500 for materials, while professional installation ranges from £1,000–£2,500. Your budget depends on several factors:
- Material choice: Fabric panels cost £20–£100, wooden slats £15–£40 per linear foot, lattice £25–£60 per panel, and aluminum or glass £60–£150 per panel
- Project scope: Larger or complex setups require more materials and labor
- Additional features: Weatherproofing finishes, climbing plants, and wind-load reinforcement add £50–£300
You’ll need basic tools like measuring tapes, levels, drills, saws, and safety equipment. Essential hardware includes brackets, screws, anchors, and weatherproof fasteners. Account for these expenses upfront to avoid budget surprises mid-project.
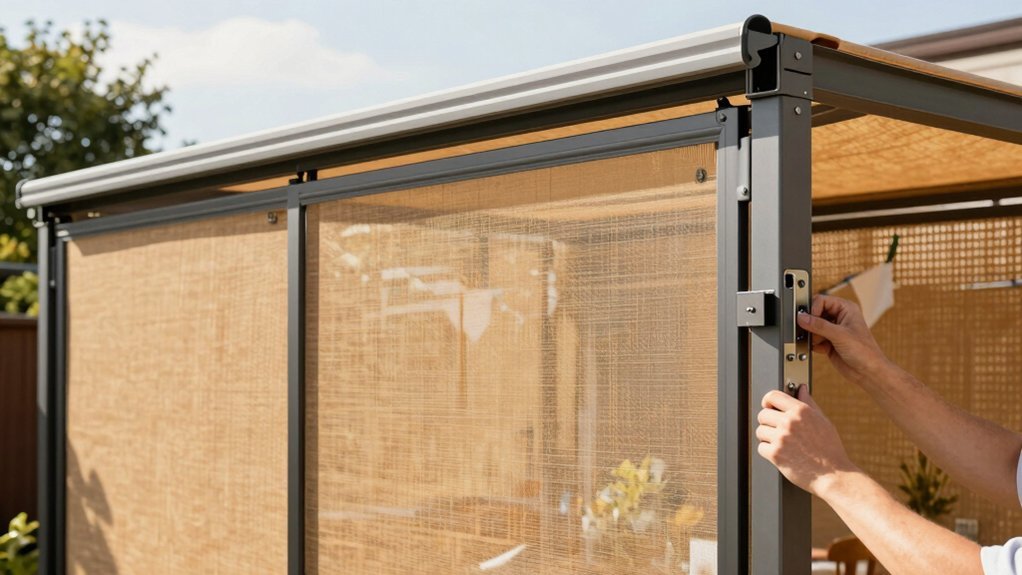
Mounting Hardware and Bracket Installation
You’ll want to select corrosion-resistant brackets made from stainless or galvanized steel that match your screen’s weight and material type.
Pre-drill pilot holes and use a spirit level to ensure perfect alignment before you secure each bracket, spacing them evenly 16–24 inches apart around your pergola’s perimeter.
After installation, seal all screw holes with outdoor-grade sealant to protect against water damage and wood rot at the joints.
Bracket Types and Selection
Selecting the right mounting brackets is critical to your privacy screen’s stability and longevity. You’ll find three primary bracket types that suit different installation needs:
- Angle brackets provide side support and distribute lateral forces effectively
- Post brackets attach directly to pergola posts for maximum stability
- Corner brackets reinforce joints at pergola corners, preventing twisting
Match your bracket material—wood, metal, or composite—to your climate’s corrosion demands. Stainless-steel fasteners or weatherproof coatings protect against rust and degradation. Ensure brackets fit your beam dimensions snugly and accommodate your screen material, whether lattice, fabric, or slats. Calculate your total weight load and distribute it across multiple brackets to prevent sagging. Pre-drill all holes and verify plumb alignment before final fastening.
Secure Installation Techniques
How stable’s your foundation? You’ll need to mount posts 60 cm deep in concrete for a rock-solid base. Use corrosion-resistant brackets and fasteners—stainless steel or galvanized options withstand outdoor exposure best.
| Installation Step | Tool Required | Critical Detail |
|---|---|---|
| Mark mounting points | Measuring tape | Ensure accuracy |
| Pre-drill pilot holes | Power drill | Prevent splitting |
| Level posts and beams | Spirit level | Guarantee even hanging |
Precisely level everything during installation so your privacy material hangs evenly and functions properly. Mark your mounting points accurately, then pre-drill pilot holes before attaching brackets. Check all connections thoroughly before final tightening—this prevents warping and looseness later. For freestanding pergolas, reinforce with cross-bracing and tracked hardware to support sliding or retractable privacy options effectively.
Hardware Spacing and Alignment
Getting your brackets properly spaced and aligned is essential for a structurally sound pergola that’ll support privacy panels evenly.
Start by marking mounting locations at consistent intervals along the pergola’s outer edges. Install a temporary level string line to ensure all brackets align in a straight plane—this prevents uneven panel installation and visual inconsistencies.
Follow these key spacing guidelines:
- Space horizontal cross beams 16–24 inches on center for uniform attachment points
- Use a level to verify each bracket is perfectly vertical before securing
- Pre-drill pilot holes to prevent wood splitting and use corrosion-resistant screws
For concrete footings, dig 60 cm deep, pour concrete, and allow 24–48 hours to cure before mounting brackets. This prevents movement and ensures lasting stability for your privacy screen system.
Installing Tracks and Guide Systems
The backbone of any adjustable privacy screen system is a reliable track and guide setup that lets you control your pergola’s openness with ease. You’ll mount tracks to your pergola’s top or sides, ensuring level alignment and secure anchoring with appropriate brackets.
| Material | Best For | Durability |
|---|---|---|
| Aluminum | Outdoor exposure | Highly durable |
| Stainless steel | Wet climates | Corrosion-resistant |
For heavy panels, you’ll need reinforced rollers and larger track spans to prevent sagging. After installation, maintain your system by cleaning exposed tracks regularly, lubricating hardware with weatherproof grease, and checking fasteners for wind-induced wear. This straightforward approach ensures smooth panel operation throughout party season and beyond.
Testing and Securing Your Retractable Screens
Once you’ve installed your retractable screens, you’ll want to test them thoroughly before your first party to assure they operate smoothly and securely.
Fully extend each screen and verify they lock firmly at both ends. Inspect the fabric for snags or creases, and check seals or gaskets along edges to prevent light leaks and wind intrusion. Test motorized or manual mechanisms for responsive operation and listen for unusual noises that might indicate wear.
Next, conduct a wind-test in a safe area:
- Note any strain on mounting hardware or posts
- Temporarily reduce extension during gusty conditions
- Clean tracks and wipe down fabric after use
Regular maintenance prevents dirt buildup that could hinder retraction or cause sticking, keeping your screens functioning reliably throughout the season.
Party-Ready Setup and Maintenance Tips
How do you transform your tested screens into the perfect party backdrop? Strategic lighting makes all the difference. String lights and lanterns along privacy boundaries create ambiance while maintaining your desired sightline control. Position them to highlight fabric textures and panel edges without overwhelming the space.
Before guests arrive, inspect all panels for damage or loose components. Tighten any hardware that’s shifted during testing. Clean fabric surfaces to remove dust and debris that accumulated during installation.
After the party ends, conduct immediate maintenance. Check joints and seals for weather damage, especially if you’ve exposed screens to wind or moisture. Reseal as needed to prevent deterioration. Clean outdoor curtains according to fabric specifications and store retractable panels properly. This proactive approach preserves your privacy investment for future events.
Frequently Asked Questions
How Do You Anchor an Outdoor Privacy Screen?
You anchor outdoor privacy screens by securing posts to solid surfaces using rated fasteners and brackets. For freestanding screens, you’ll dig posts at least 60 cm deep with concrete footings. You can also attach them to pergolas using steel brackets that distribute load evenly.
How Do You Add Privacy to a Pergola?
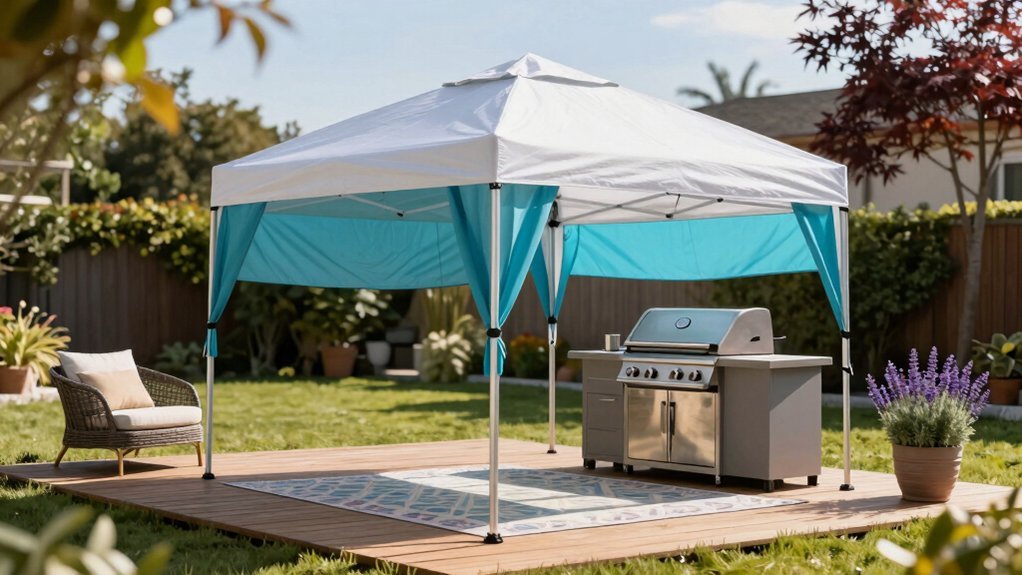
You can add privacy to your pergola by installing climbing plants like ivy, adding weather-resistant outdoor curtains, attaching lattice panels, placing tall planters with bamboo, or installing a solid roof or retractable canopy for maximum enclosure.
Are Pergola Screens Worth It?
Yes, pergola screens are worth it. You’ll create an intimate outdoor space that reduces noise and visual distractions, making your gatherings more enjoyable. They’re affordable—DIY options start at £50—and extend your entertaining season while boosting mood and comfort.
How Do I Stop My Privacy Screen From Blowing Over?
You’ll stop your privacy screen from blowing over by securely anchoring posts into solid ground, using wind-rated stainless steel brackets, and installing tension mechanisms on fabric panels. You can also pair lightweight screens with fixed lattice elements at the perimeter.

Leave a Reply