To install a smart pool automation system, you’ll start by mounting the main control panel within 50 feet of your equipment pad and connecting it to a dedicated circuit breaker. After turning off power at the breaker, you’ll wire your pump, heater, and lights to the controller’s relay terminals. Then pair the hub to your home Wi-Fi and download the companion app to configure your devices. The sections below cover each step in detail.
Understanding Smart Pool Automation Components and Features
Before diving into installation, you’ll need to understand what makes up a modern smart pool automation system. The central control hub serves as your system’s brain, connecting all components and enabling smartphone or tablet management.
Key components include variable speed pump controllers, which regulate water circulation while cutting energy costs. Automated chlorinators and pH monitors maintain water chemistry without manual testing. Heater controls let you adjust temperature remotely, while LED lighting systems create ambiance with programmable color options.
You’ll also find valve actuators that direct water flow between your pool, spa, and water features. Most systems integrate with smart home platforms like Alexa or Google Home. Understanding these components helps you determine which features match your pool’s specific requirements and your budget constraints.
Assessing Your Current Pool Equipment for Compatibility
Examine your existing pool equipment to determine what’s compatible with automation systems. Check your pump, filter, heater, and chlorinator for digital control capabilities. Most equipment manufactured after 2010 includes automation-ready ports or can interface with universal controllers.
Before upgrading to smart pool controls, assess your current equipment for automation compatibility—most systems built after 2010 are ready to connect.
Locate the model numbers on each piece of equipment and cross-reference them with your chosen automation system’s compatibility list. Single-speed pumps may require relay switches, while variable-speed pumps typically connect directly to automation hubs.
Inspect your electrical panel for available circuits and amperage capacity. Smart controllers need dedicated power supplies and often require 120V or 240V connections depending on the system.
Document the age and condition of your equipment. Older components might work initially but could fail under automated cycling schedules, making upgrades more cost-effective than retrofitting.
Choosing the Right Smart Pool Automation System for Your Needs
Once you’ve assessed your existing equipment, you’ll need to match an automation system to your specific pool setup and lifestyle preferences. Consider whether you want basic scheduling capabilities or full smartphone control with voice assistant integration. Entry-level systems handle pumps and lights, while premium options manage heaters, chemical dispensers, and water features.
Evaluate connectivity requirements carefully. Wi-Fi-based systems offer remote access but depend on reliable internet. Some homeowners prefer hardwired controllers for consistent performance. Check compatibility lists from manufacturers like Pentair, Hayward, or Jandy to guarantee seamless integration with your existing equipment.
Budget plays a significant role in your decision. Basic systems start around $500, while all-inclusive setups can exceed $3,000. Factor in professional installation costs if you’re uncomfortable handling electrical work yourself.
Gathering Essential Tools and Materials for Installation
Before you begin installing your smart pool automation system, you’ll need to gather all the required hardware components and necessary installation tools.
Your system’s hardware typically includes the main control unit, valve actuators, sensors, and compatible pump equipment.
Having the right tools on hand—such as screwdrivers, wire strippers, PVC cutters, and a multimeter—ensures you can complete the installation efficiently without unnecessary delays.
Required Hardware Components
Gather all necessary hardware components before starting your smart pool automation installation to guarantee a smooth, uninterrupted workflow.
You’ll need a main automation controller, which serves as your system’s brain, along with compatible actuators for valve control and relay modules for equipment switching.
Stock up on weatherproof junction boxes, conduit fittings, and appropriate gauge wiring rated for outdoor use.
Don’t forget mounting brackets, stainless steel screws, and silicone sealant for secure, water-resistant installations.
Your system requires sensors including water temperature probes, flow sensors, and pH/ORP monitoring devices if you’re automating chemical management.
Purchase a compatible smart hub or Wi-Fi bridge for remote connectivity.
Keep spare wire nuts, cable ties, and electrical tape handy for connections.
Verify all components match your pool’s voltage requirements before proceeding.
Necessary Installation Tools
With your hardware components ready and organized, you’ll need the right tools to bring everything together efficiently. Start with basic electrical tools: wire strippers, multimeter, screwdrivers (both flathead and Phillips), and needle-nose pliers. You’ll also need a drill with masonry and standard bits for mounting equipment.
Gather PVC cutting and gluing supplies if you’re modifying plumbing connections. A pipe cutter, PVC primer, and cement are essential for watertight seals. Keep electrical tape, wire nuts, and waterproof connectors on hand for secure connections.
Don’t forget safety equipment: rubber-soled shoes, safety glasses, and insulated gloves protect you during electrical work. A headlamp frees your hands when working in equipment rooms.
Finally, grab your smartphone or tablet—you’ll need it for app configuration during setup.
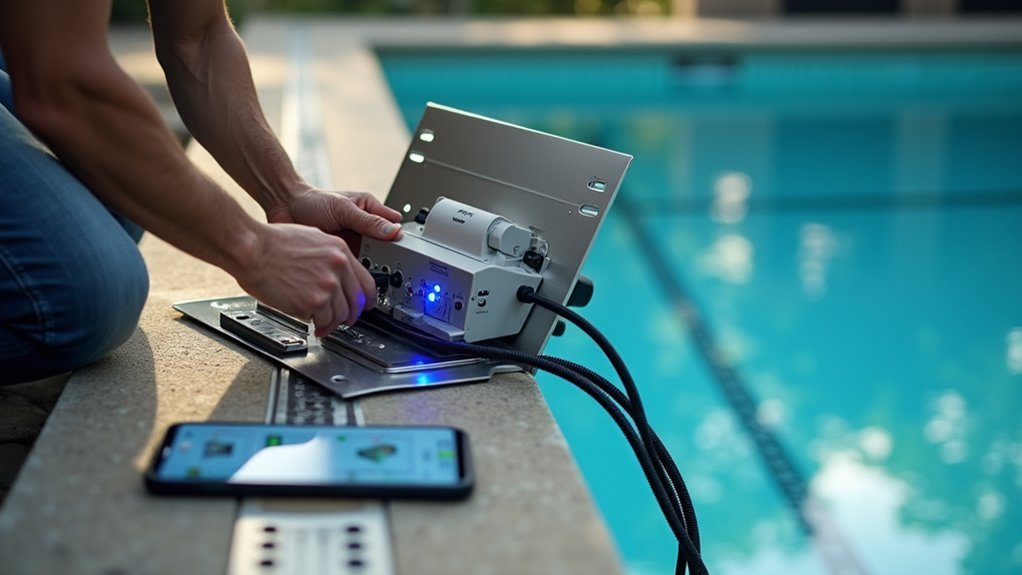
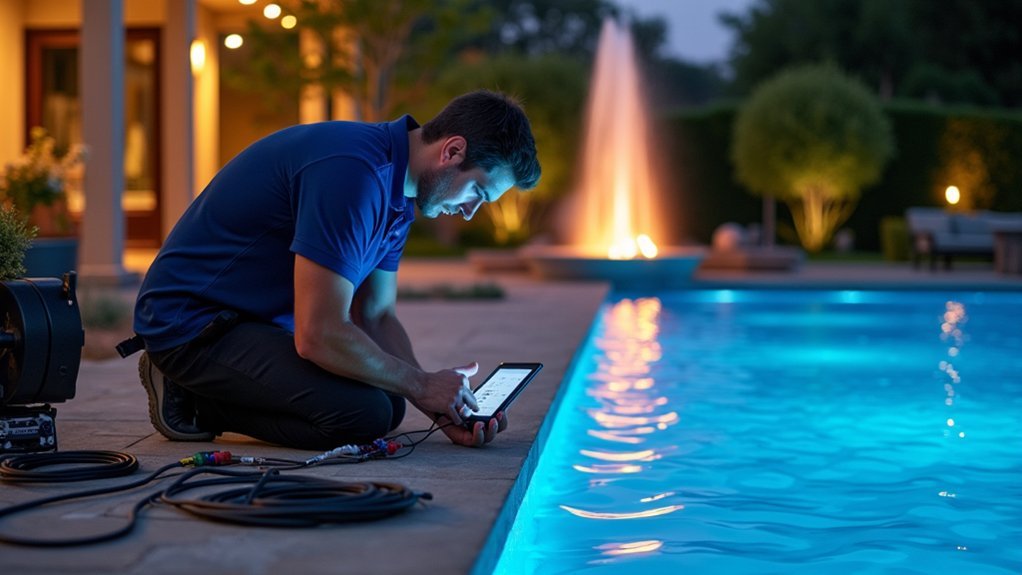
Installing the Main Control Panel and Hub
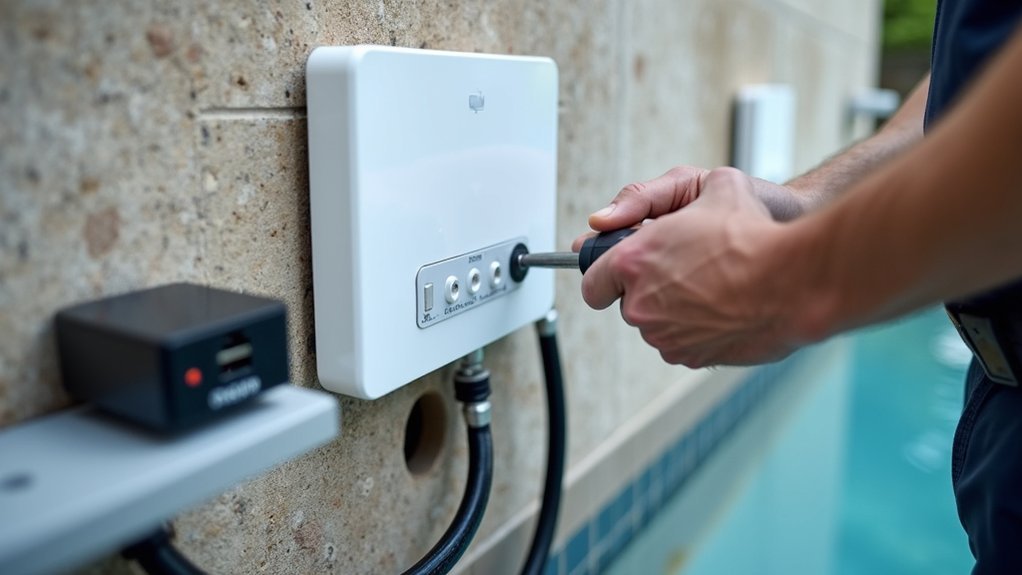
The main control panel serves as the brain of your smart pool automation system, so you’ll want to get its installation right. Choose a location within 50 feet of your pool equipment pad, protected from direct sunlight and moisture. Mount the panel at eye level on a sturdy wall using the included brackets.
Connect the panel to your home’s electrical system through a dedicated circuit breaker. You’ll need to run low-voltage wiring from the panel to each piece of equipment you’re automating—pumps, heaters, lights, and valves.
Pair the hub with your home Wi-Fi network by following the manufacturer’s app instructions. Test the connection before proceeding. Once online, the hub communicates wirelessly with sensors and receives commands from your smartphone or voice assistant.
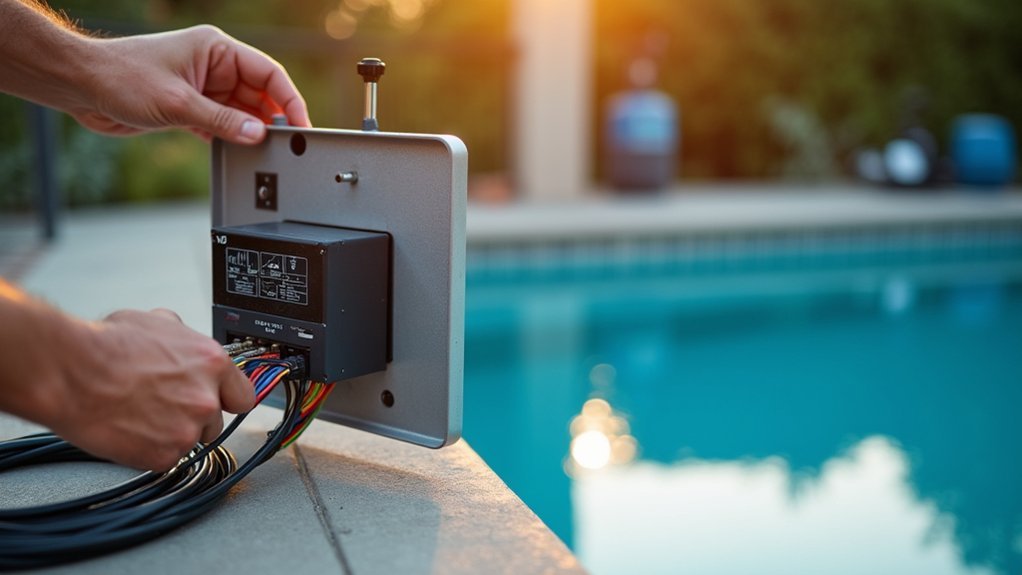
Connecting Pool Pumps and Filtration Systems to the Controller
Once your control panel is online and communicating with your network, you’re ready to wire your pool pump to the system.
Start by turning off all power at the breaker. Locate the pump relay terminals on your controller and connect the pump’s power leads according to your system’s wiring diagram.
For variable-speed pumps, you’ll need to connect communication cables that allow the controller to adjust motor speeds. Run the cable from the controller’s RS-485 or proprietary port directly to your pump’s control interface.
Next, wire your filtration system’s pressure sensors and flow meters to the designated input terminals. These sensors let your controller monitor filter performance and alert you when backwashing is needed.
After completing all connections, restore power and test each component through your controller’s interface.
Integrating Smart Lighting and Water Features
Now that your pool controller is managing pumps and filtration, you’re ready to add smart lighting and water feature controls to your automation system. You’ll start by installing smart LED pool lights that connect directly to your controller, allowing you to adjust colors, brightness, and schedules from your phone or automation panel.
Once your lighting is operational, you can integrate fountains, waterfalls, and other water features using the same control interface for seamless poolside ambiance.
Smart Light Installation Steps
Before you begin installing smart pool lights, you’ll need to turn off all power to your pool equipment at the main breaker and verify the circuit is dead using a non-contact voltage tester.
Once you’ve confirmed the power is off, follow these essential steps:
- Remove the existing light fixture by loosening the mounting screw and pulling the fixture onto the pool deck
- Disconnect the old wiring and connect your new smart light using waterproof wire connectors
- Program the light’s wireless hub according to manufacturer instructions before sealing connections
- Test the fixture in a bucket of water before final installation to check for leaks
After confirming everything works, secure the new smart light into the niche and restore power. Sync the light with your automation controller to enable scheduling and color customization.
Automating Water Feature Controls
With your smart lighting now installed and synced, you’re ready to extend automation to your pool’s water features. Fountains, waterfalls, and jets can all connect to your central automation hub for seamless control.
Start by identifying each water feature’s pump and locating its power source. You’ll install a smart relay or actuator at each pump to enable remote operation. Connect these devices to your automation controller using the manufacturer’s wiring specifications.
Once hardwired, add each water feature to your system’s app. Assign zones and create custom names for easy identification. Program schedules that coordinate with your lighting scenes—imagine your waterfall activating at sunset while colored lights illuminate the cascade.
Test each feature individually before creating combined automation routines that showcase your pool’s full potential.
Setting Up Chemical Monitoring and Dosing Automation
Automating your pool’s chemical management transforms daily maintenance into a hands-off process that keeps water balanced around the clock.
Modern chemical automation systems use sensors to continuously monitor pH and chlorine levels, then dispense precise amounts of chemicals when needed.
You’ll need to install probe sensors in your plumbing line after the filter.
These probes connect to a controller that triggers peristaltic pumps to release chemicals from storage tanks.
Key components for your chemical automation setup:
- pH and ORP sensors for real-time water analysis
- Peristaltic dosing pumps for accurate chemical delivery
- Chemical storage tanks with proper ventilation
- Controller unit with Wi-Fi connectivity for remote monitoring
Calibrate your sensors weekly during the first month, then monthly once you’ve established baseline readings.
This guarantees accurate dosing and prevents over-treatment.
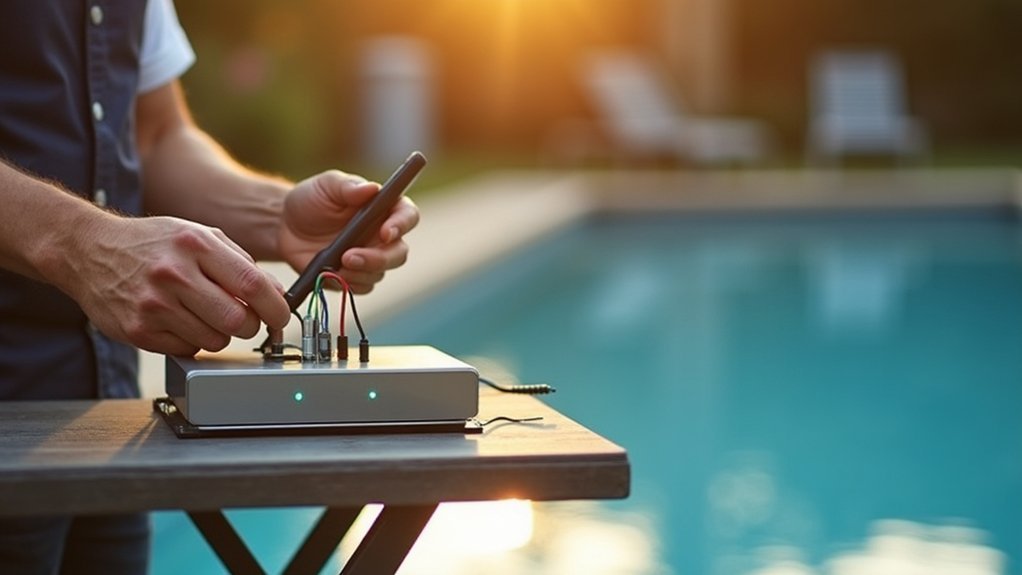
Configuring the Mobile App and Voice Control Integration
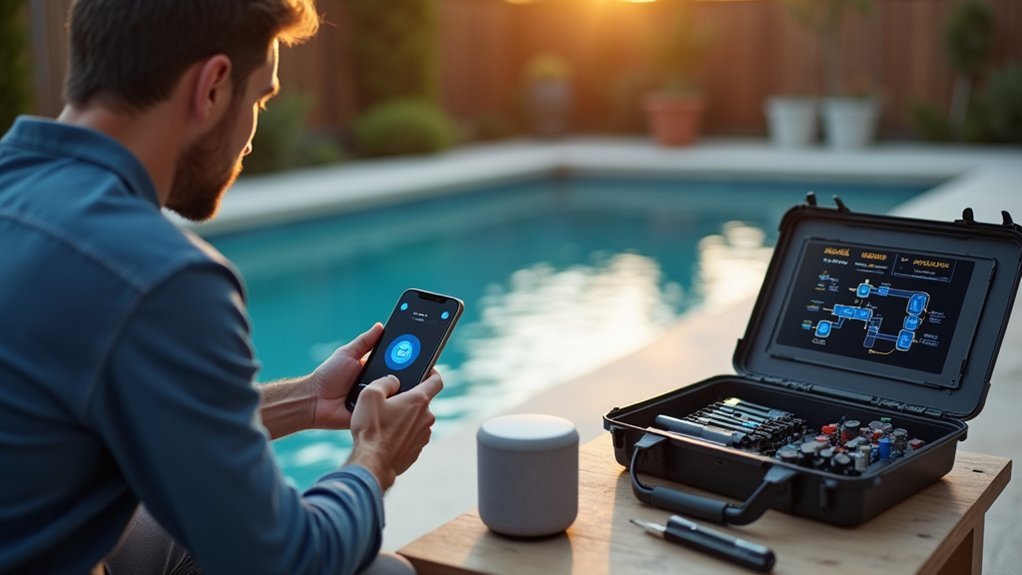
Once you’ve set up your chemical automation hardware, you’ll want to plunge into the mobile app configuration to open remote control and monitoring capabilities.
Download your system’s companion app and create an account using your email. Connect your smartphone to the same Wi-Fi network as your pool controller, then follow the in-app pairing instructions. You’ll typically scan a QR code or enter a device ID found on your control panel.
For voice control integration, link your pool system to Amazon Alexa or Google Home through their respective apps. Navigate to the smart home section, search for your pool automation skill, and authorize the connection. Create custom voice commands like “turn on pool lights” or “heat the spa to 102 degrees” for hands-free operation.
Programming Schedules and Automation Routines
Your mobile app and voice controls give you instant access to your pool system, but the real power comes from setting up automated schedules that run without any input from you.
Start by programming your pump’s daily run times based on your pool’s volume and usage patterns. Most systems need 8-12 hours of filtration daily, ideally during off-peak electricity hours.
Create automation routines that trigger multiple actions simultaneously:
- Morning startup: Pump on, solar cover retracts, temperature check initiates
- Evening swim mode: Lights activate, heater adjusts, water features enable
- Chemical dosing: pH and chlorine dispensers operate at optimal intervals
- Freeze protection: Equipment activates automatically when temperatures drop below 38°F
Test each schedule manually before relying on full automation to confirm proper execution.
Testing and Troubleshooting Your Smart Pool System
Before you fully rely on your automated pool system, you’ll need to verify that every component communicates properly and responds as expected. Start by testing each device individually through your control panel or app. Turn pumps on and off, adjust valve positions, and cycle through lighting modes to confirm responsiveness.
Next, run through your programmed schedules manually. Watch for delays, failed commands, or devices that don’t activate. Check your Wi-Fi signal strength at each component’s location, as weak connectivity causes intermittent failures.
Common issues include incorrect wiring, incompatible firmware versions, and range limitations. If a device won’t connect, power cycle it and re-pair with your hub. For persistent problems, consult error logs in your app and verify all connections are secure and properly grounded.
Frequently Asked Questions
How Much Does Professional Smart Pool Automation Installation Typically Cost?
You’ll typically pay between $1,500 and $5,000 for professional smart pool automation installation. Your costs depend on system complexity, existing equipment compatibility, and labor rates in your area. Premium systems can exceed $10,000.
Will Smart Pool Automation Work During Power Outages?
No, your smart pool automation won’t work during power outages since it relies on electricity. You can install a backup battery system or generator to maintain control and keep essential functions running when power fails.
Can I Install Smart Automation on an Above-Ground Pool?
Yes, you can install smart automation on your above-ground pool. You’ll find systems designed specifically for above-ground setups that control pumps, filters, lighting, and heating through smartphone apps for convenient management.
How Long Do Smart Pool Automation Systems Typically Last?
You can expect your smart pool automation system to last 7-15 years with proper maintenance. You’ll extend its lifespan by keeping components clean, updating software regularly, and protecting equipment from extreme weather conditions.
Does Smart Pool Automation Affect My Homeowner’s Insurance Rates?
Smart pool automation typically doesn’t raise your insurance rates and may actually lower them. You’ll benefit from safety features like automatic shutoffs and leak detection that reduce risk, which insurers often reward with discounts.


Leave a Reply