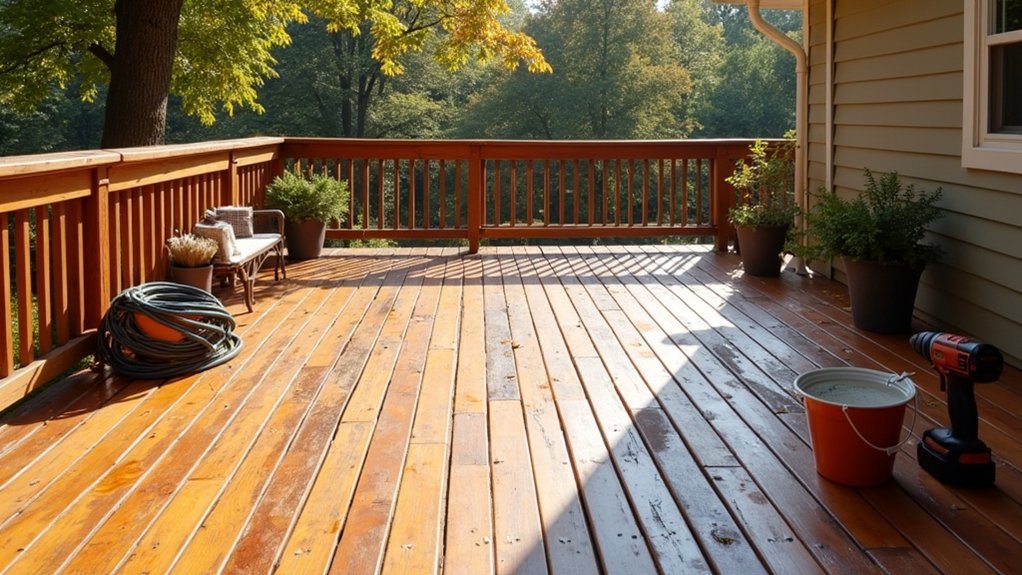
Your seasonal deck maintenance checklist should include inspecting boards for cracks and warping, cleaning debris from board gaps, and checking railings for stability. You’ll want to examine ledger board connections and flashing, then apply fresh sealant or stain for protection. Test structural posts for rot, power wash to remove mold, clear nearby gutters, and assess stairs for safety hazards. Each of these essential tasks helps prevent costly damage and keeps your outdoor space safe year-round.
Inspect All Deck Boards for Cracks and Warping
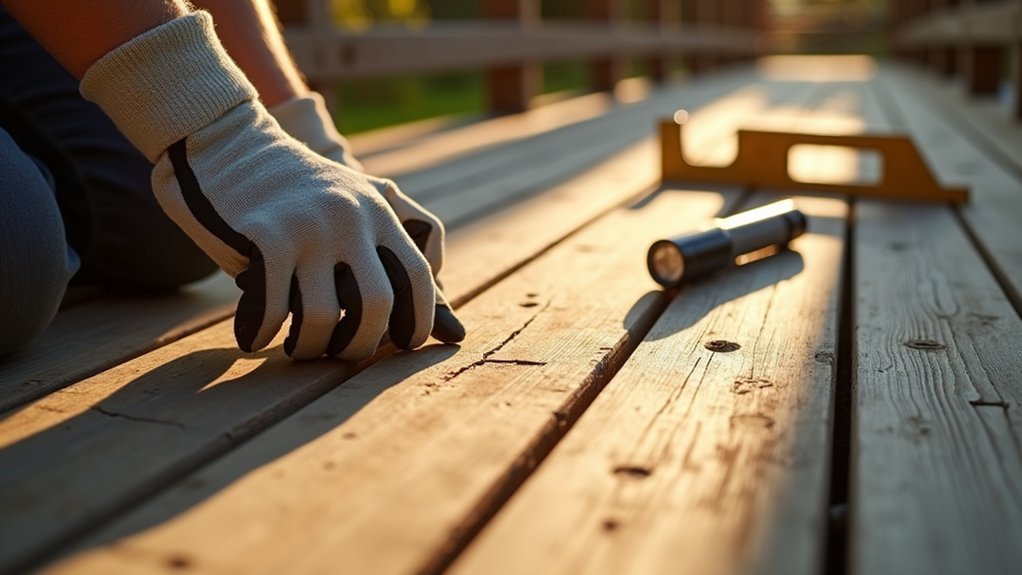
When spring arrives and you’re ready to enjoy your outdoor space again, walking your deck’s surface should be your first priority. Check each board carefully for visible cracks, splits, or signs of warping that developed over winter.
Run your hand along the wood to detect raised splinters that could injure bare feet. Pay close attention to high-traffic areas near doors and stairs where wear occurs fastest. Look for boards that have cupped, twisted, or pulled away from joists.
Mark problem spots with painter’s tape so you don’t miss them during repairs. Small cracks can often be filled with wood filler, but severely damaged boards need complete replacement. Addressing these issues now prevents moisture infiltration and structural damage that’ll cost more to fix later.
Clean and Remove Debris From Between Board Gaps
You’ll need a few simple tools to effectively clean debris from between your deck board gaps, including a putty knife, stiff brush, or specialized gap cleaner.
Removing trapped leaves, dirt, and organic matter isn’t just about appearance—it’s essential for preventing mold and mildew growth that can damage your deck’s structure.
Regular gap cleaning allows proper airflow and drainage, which keeps moisture from settling and creating the damp conditions where harmful fungi thrive.
Tools for Gap Cleaning
Clearing out debris from between your deck boards prevents moisture buildup and the rot that follows. You’ll need the right tools to tackle this task effectively.
A putty knife works well for scraping packed dirt and leaves from narrow gaps. For deeper cleaning, grab a specialized deck gap cleaner tool with a hooked blade designed to pull debris upward. A pressure washer with a fan tip attachment blasts out stubborn grime, though you should use moderate pressure to avoid damaging the wood.
Don’t overlook simple solutions—a flathead screwdriver handles tight spots, while a stiff-bristled brush loosens surface-level buildup. For composite decking, use plastic tools to prevent scratching. Keep a shop vacuum nearby to collect loosened debris as you work along each gap.
Preventing Mold Growth
Beyond keeping your deck looking tidy, regular gap cleaning serves a more important purpose: stopping mold before it takes hold.
Trapped debris creates the perfect environment for mold spores to flourish, holding moisture against wood surfaces and blocking airflow.
To prevent mold growth between your deck boards, follow these essential steps:
- Clean gaps thoroughly every two weeks during fall when leaves accumulate fastest
- Apply a mold-inhibiting solution to gap areas after cleaning
- assure proper drainage beneath your deck to eliminate standing water
- Trim nearby vegetation to increase sunlight exposure and air circulation
Don’t wait until you spot visible mold.
Check Railings and Balusters for Stability

Your deck’s railings and balusters protect your family from falls, so you’ll want to test every connection by gripping each component and pushing firmly in multiple directions.
Tighten any loose screws, bolts, or brackets immediately, and replace hardware that’s stripped or corroded beyond repair.
While testing stability, inspect the wood carefully for soft spots, discoloration, or crumbling—telltale signs of rot that compromise structural integrity.
Test for Loose Connections
When you’re inspecting your deck for seasonal maintenance, don’t overlook the railings and balusters that keep everyone safe. Loose connections pose serious safety hazards and can worsen quickly if ignored.
Test each connection point by applying firm pressure and checking for movement. Here’s what to examine:
- Post-to-deck connections – Grab each post at the top and push in multiple directions to detect wobbling.
- Railing-to-post joints – Check where horizontal rails meet vertical posts for separation or gaps.
- Baluster attachments – Shake individual balusters to make sure they’re firmly secured at both ends.
- Hardware condition – Inspect bolts, screws, and brackets for rust, corrosion, or stripping.
Tighten any loose fasteners immediately and replace damaged hardware. If posts show significant movement, you’ll need to reinforce or replace the mounting system.
Inspect for Wood Rot
Even connections that feel solid can hide a dangerous problem beneath the surface: wood rot. Use a screwdriver or awl to probe suspect areas, particularly where railings meet posts and where balusters attach to top and bottom rails. Soft, spongy wood that accepts the tool easily indicates decay requiring immediate attention.
Pay special attention to horizontal surfaces where water pools and end grain that absorbs moisture readily. Check beneath decorative caps and at joints where paint has cracked or peeled. Early-stage rot often appears as discolored or darkened wood before structural integrity fails.
Don’t skip areas that look fine—rot frequently develops internally while surfaces appear intact. Replace compromised components promptly, as deteriorated railings pose serious fall hazards for anyone leaning against them.
Examine Ledger Board Connections and Flashing
The ledger board serves as your deck’s critical connection point to your home, making it one of the most important areas to inspect each season.
You’ll want to check this connection thoroughly since failures here cause most deck collapses.
Examine these four key areas during your inspection:
- Lag bolts and screws – Confirm they’re tight and show no signs of rust or corrosion
- Flashing condition – Verify the metal flashing sits properly above the ledger board to direct water away
- Wood deterioration – Look for soft spots, discoloration, or fungal growth on the ledger
- Gap inspection – Check that no gaps exist between your home’s rim joist and the ledger
Address any issues immediately to prevent water intrusion and structural damage.
Apply Fresh Sealant or Stain for Weather Protection

After inspecting your ledger board connections, you’ll want to protect your deck’s surface by applying a fresh coat of sealant or stain.
Start by selecting a high-quality product designed for your deck’s wood type, then prepare the surface properly through cleaning and sanding.
You’ll achieve the best results by timing your application during ideal weather conditions—typically dry days with moderate temperatures.
Choose Quality Sealant Products
Selecting a high-quality sealant or stain makes all the difference in how well your deck withstands harsh weather conditions throughout the year. Don’t cut corners with bargain products that’ll fail within months.
When shopping for deck sealants, prioritize these key features:
- UV protection – Prevents sun damage and fading that weakens wood fibers
- Water repellency – Blocks moisture penetration that causes rot and warping
- Mildew resistance – Stops fungal growth before it takes hold
- Penetrating formula – Soaks deep into wood rather than sitting on the surface
You’ll find oil-based and water-based options available. Oil-based products typically offer superior protection but require longer drying times.
Water-based sealants dry faster and clean up easily. Check manufacturer ratings for your specific wood type before purchasing.
Proper Surface Preparation Steps
Even the best sealant won’t perform properly if you skip surface preparation. Start by cleaning your deck thoroughly with a pressure washer or deck cleaner to remove dirt, mildew, and old finish residue. Let the wood dry completely—typically 48 to 72 hours depending on weather conditions.
| Preparation Task | Why It Matters |
|---|---|
| Sand rough spots | Creates smooth, even absorption |
| Remove loose debris | Prevents bumps under finish |
| Check moisture levels | Guarantees proper sealant adhesion |
Next, inspect for any remaining problem areas. You’ll want to address splintering boards and raised nail heads before applying your sealant. Use 80-grit sandpaper for rough patches, then sweep away all dust particles. Your deck’s now ready for that protective coat.
Best Application Weather Conditions
Timing your sealant application around the right weather conditions can make or break your deck’s protection. You’ll want to check the forecast carefully before starting this project.
Follow these essential weather guidelines for optimal results:
- Temperature range: Apply sealant when temperatures stay between 50°F and 90°F for at least 24 hours.
- Dry conditions: make certain no rain is expected for 48 hours after application.
- Low humidity: Choose days with humidity below 85% to promote proper drying and adhesion.
- Avoid direct sunlight: Work in shaded conditions or during overcast days to prevent the sealant from drying too quickly.
Don’t rush the process. If weather conditions aren’t ideal, postpone your application rather than risk poor adhesion or uneven coverage.
Tighten Loose Screws and Replace Corroded Hardware
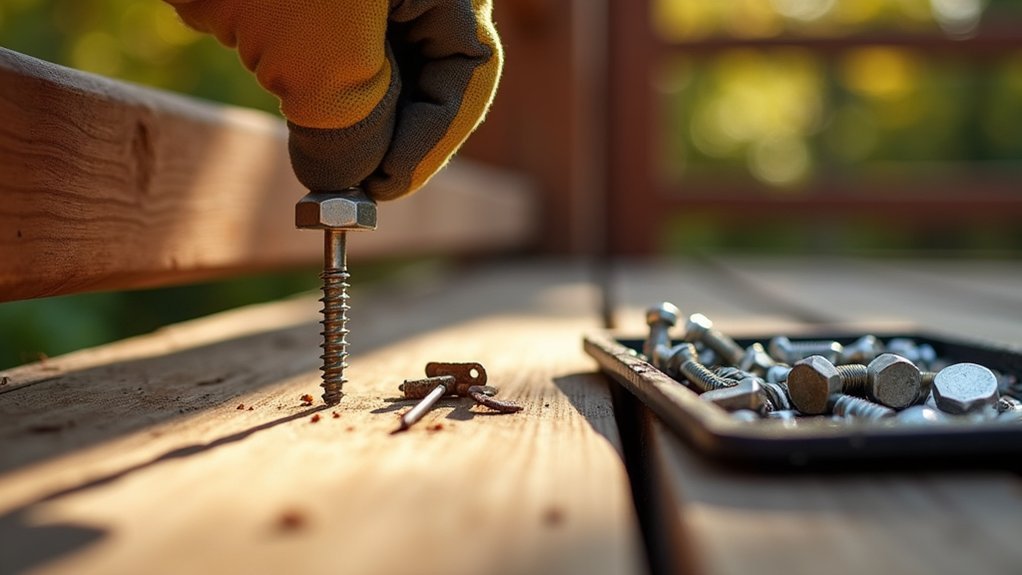
Grab your drill and screwdriver because loose fasteners and corroded hardware won’t fix themselves. Walk your entire deck and test each screw by applying gentle pressure to surrounding boards. Wobbly sections indicate fasteners that need attention.
Tighten any loose screws, but don’t overtighten—you’ll strip the wood or crack composite materials. If a screw spins without gripping, remove it and install a slightly longer or thicker replacement in the same hole.
Inspect all metal hardware for rust, including joist hangers, brackets, and railings. Corroded fasteners compromise structural integrity and leave unsightly stains. Replace any hardware showing significant rust with stainless steel or coated alternatives designed for outdoor use. While you’re at it, check that railing posts remain firmly anchored and stable.
Test Structural Posts and Support Beams for Rot
Your deck’s structural posts and support beams do the heavy lifting, so rot in these components poses serious safety risks. Use a screwdriver or awl to probe wood near ground level and where beams connect to posts. Soft, spongy wood indicates decay that requires immediate attention.
Structural posts and beams carry your deck’s full weight—soft, spongy wood means decay that demands immediate action.
Follow these steps to thoroughly inspect your deck’s structure:
- Check posts at ground level where moisture accumulates most frequently
- Examine beam-to-post connections for discoloration or soft spots
- Look for fungal growth, which signals advanced decay beneath the surface
- Test ledger boards where your deck attaches to your home’s framing
Don’t ignore minor soft spots—they spread quickly. Replace compromised structural members promptly, as failed posts or beams can cause sudden deck collapse during normal use.
Power Wash Surface to Remove Mold and Mildew
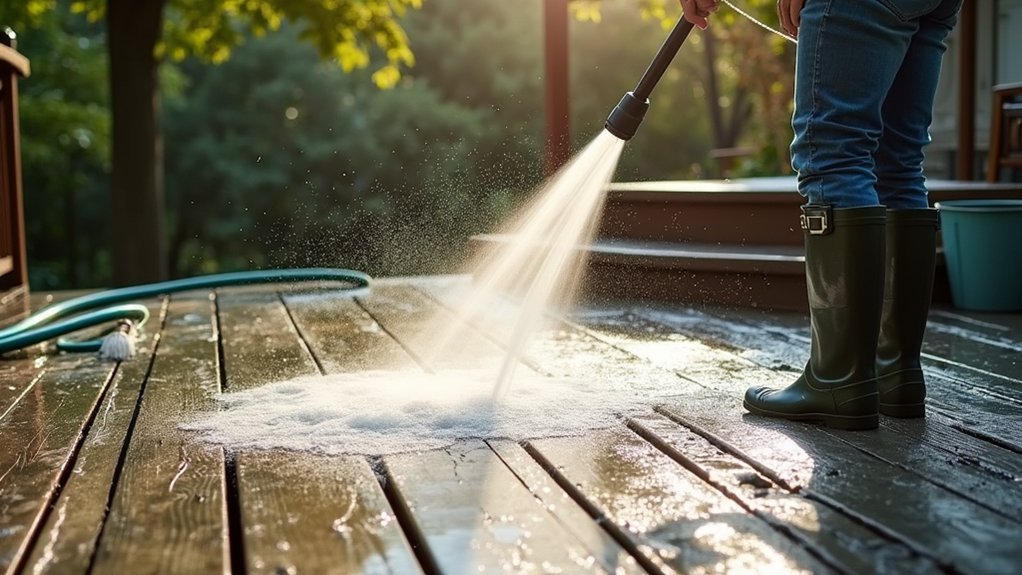
Once you’ve confirmed your deck’s structural integrity, tackle the grime that’s accumulated over winter and spring. Set your power washer between 1,500 and 2,500 PSI to avoid damaging wood fibers. Hold the nozzle 8 to 12 inches from the surface and work with the wood grain, not against it.
Start at one end and move systematically across your deck, overlapping each pass slightly. Pay extra attention to shaded areas where mold thrives and corners where debris collects. For stubborn mildew stains, apply a deck-specific cleaning solution before washing.
Let the wood dry completely—typically 24 to 48 hours—before applying any sealant or stain. This step removes harmful organisms that break down wood and creates a clean canvas for protective treatments.
Clear Gutters and Drainage Areas Near the Deck
Clogged gutters and blocked drainage areas can wreak havoc on your deck’s longevity, so don’t skip this critical maintenance step. When water can’t flow away properly, it pools around your deck’s foundation and support posts, accelerating rot and structural damage.
Neglected gutters and poor drainage are silent deck destroyers—proper water flow is essential for structural longevity.
Follow these steps to guarantee proper drainage:
- Remove leaves, twigs, and debris from all gutters adjacent to your deck
- Check downspouts for blockages and flush them with a garden hose
- Clear any debris from deck drainage gaps between boards
- Inspect the ground slope around your deck to confirm water flows away from the structure
You should also verify that splash blocks or drainage extensions direct water at least three feet from your deck’s base. Complete this task every spring and fall.
Assess Stairs and Treads for Safety Hazards
Beyond drainage concerns, your deck’s stairs demand regular inspection since they endure more wear than any other component.
Check each tread for cracks, warping, or splintering that could cause trips or injuries.
Press firmly on every step to detect any bounce or movement indicating loose fasteners or structural weakness.
Examine the stringer boards supporting your stairs for rot, especially where they contact the ground.
Look for gaps between treads and stringers, which signal deteriorating connections.
Test your handrails by applying lateral pressure—they shouldn’t wobble or feel unstable.
Replace any treads showing significant wear patterns or damage immediately.
Tighten loose screws and add additional fasteners where needed.
Consider installing anti-slip strips on smooth surfaces, particularly in shaded areas where moisture accumulates and creates slippery conditions.
Frequently Asked Questions
How Often Should I Perform Seasonal Maintenance on My Deck?
You should perform seasonal maintenance on your deck at least twice a year—ideally in spring and fall. However, you’ll get the best results if you inspect and clean it quarterly to prevent costly damage.
What Time of Year Is Best for Deck Maintenance Tasks?
You’ll get the best results by tackling deck maintenance in spring or fall when temperatures stay between 50-80°F. These moderate conditions help cleaning solutions work effectively and allow stains or sealers to cure properly.
Can I Do Deck Maintenance Myself or Hire a Professional?
You can handle basic deck maintenance yourself, including cleaning, inspecting for damage, and applying sealant. However, you’ll want to hire a professional for structural repairs, replacing damaged boards, or addressing serious rot issues.
How Much Does Professional Deck Maintenance Typically Cost?
You’ll typically pay $200 to $500 for basic professional deck cleaning and sealing. More extensive maintenance, including repairs and staining, can run $500 to $1,500 or more, depending on your deck’s size and condition.
When Should I Consider Replacing My Deck Instead of Maintaining It?
You should consider replacing your deck when you notice widespread rot, structural damage, wobbly posts, or extensive board warping. If repairs cost more than 50% of replacement, it’s time for a new deck.

Leave a Reply