Before you replace your spa pump motor, you’ll want to record the horsepower, voltage, frame size, and RPM from your current motor’s label. Always shut off the dedicated circuit breaker and verify zero voltage with a multimeter before touching any components. Take photos of all wire connections, then match your replacement motor’s specifications exactly—don’t assume fit based on horsepower alone. Following proper mounting, alignment, and testing procedures will help make certain your new motor runs smoothly for years.
Identify Your Current Spa Pump Motor Specifications
Before you start shopping for a replacement motor, you’ll need to gather the exact specifications from your current spa pump motor. Look for the manufacturer’s label on your motor’s housing, which contains critical information you’ll need to match.
Record the horsepower rating, voltage requirements, and frame size. You’ll also want to note the service factor, RPM speed, and whether it’s a single-speed or two-speed motor. Check the diameter of the shaft and measure the through-bolt pattern if your motor uses this mounting style.
Don’t overlook the amp draw specifications and electrical configuration. Take photos of the label for reference while shopping. If the label is worn or illegible, contact your spa’s manufacturer with your model number to obtain the correct motor specifications.
Gather the Right Tools Before Starting
Once you’ve identified your replacement motor specifications, you’ll want to assemble all necessary tools to guarantee a smooth installation process. Having everything within reach prevents frustrating mid-project trips to the hardware store.
Gather your tools before you start—preparation prevents those annoying mid-project hardware store runs.
You’ll need a socket wrench set, adjustable wrenches, and screwdrivers in both flathead and Phillips varieties.
Grab a multimeter to test electrical connections and confirm the power is off before starting work.
Keep pliers, wire strippers, and electrical tape handy for any wiring adjustments.
Don’t forget safety equipment: rubber-soled shoes, safety glasses, and work gloves protect you during installation.
A flashlight helps illuminate tight spaces around the pump housing.
Consider having Teflon tape ready for pipe connections and a shop vacuum nearby to clean debris from the equipment area before installing your new motor.
Safely Disconnect Power to Your Hot Tub
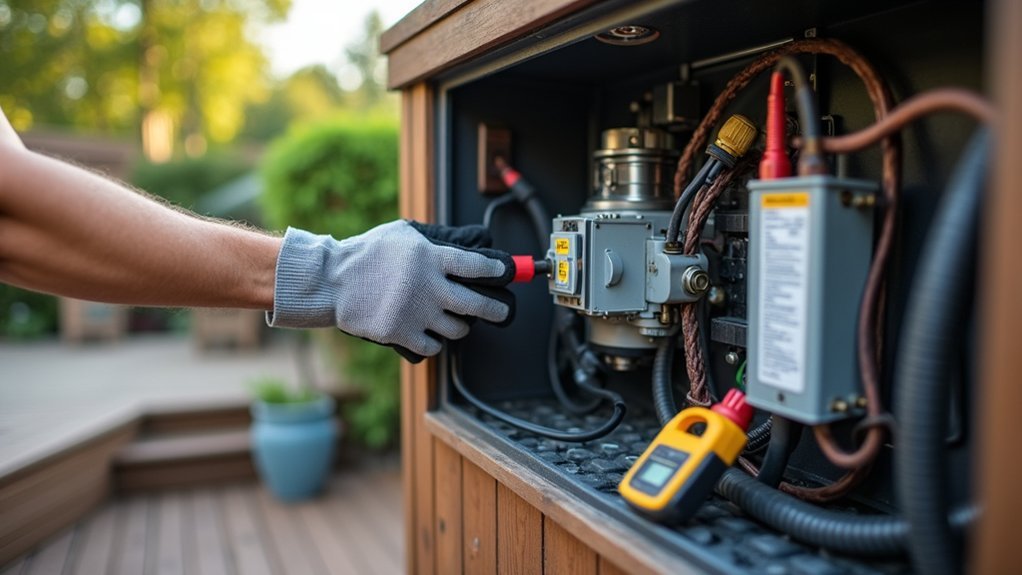
Before you touch any components, you’ll need to completely shut off power to your hot tub to prevent electrical shock.
Start by locating the dedicated circuit breaker for your spa, then use a voltage tester to check for any residual power still present in the system.
Finally, disconnect the GFCI outlet to make certain the unit is fully de-energized before proceeding with your motor replacement.
Locate the Circuit Breaker
Before flipping the breaker, keep these safety points in mind:
- Never work on electrical components with wet hands
- Use a voltage tester to confirm power is off
- Look for a secondary disconnect box near the spa
- Turn off the GFCI breaker if your spa has one
- Wait 30 seconds after shutting off power before proceeding
Once you’ve switched the breaker to the “off” position, verify there’s no power reaching the spa equipment.
Test for Residual Power
Even after you’ve switched off the circuit breaker, residual electrical charge can remain in your spa’s components, making it essential to test for power before touching any wiring.
Grab a non-contact voltage tester, which you can find at any hardware store for under twenty dollars.
This tool detects electrical current without requiring direct contact with wires.
Hold the tester near the spa’s control box and motor terminals. If it beeps or lights up, power is still present, and you’ll need to identify the correct breaker.
Test multiple points, including the pump’s power leads and any junction boxes.
Once you’ve confirmed zero voltage readings at all connection points, you can safely proceed.
Never skip this step—it takes seconds but prevents potentially fatal electrical shock.
Disconnect the GFCI Outlet
Now that you’ve confirmed no voltage is present at the motor terminals, you’ll need to disconnect the GFCI outlet that serves as your hot tub’s primary electrical safety device.
Locate the GFCI breaker in your electrical panel or the dedicated disconnect box near your spa.
Turn off the GFCI breaker and unplug the spa’s power cord from the outlet. This creates a complete break in the electrical circuit.
Before proceeding, verify the disconnection by checking:
- The GFCI breaker is in the “off” position
- The power cord is fully removed from the outlet
- No indicator lights remain illuminated on the spa control panel
- The pump doesn’t respond when you press the jet button
- Your multimeter confirms zero voltage at the motor
This double verification guarantees your safety during the motor replacement process.
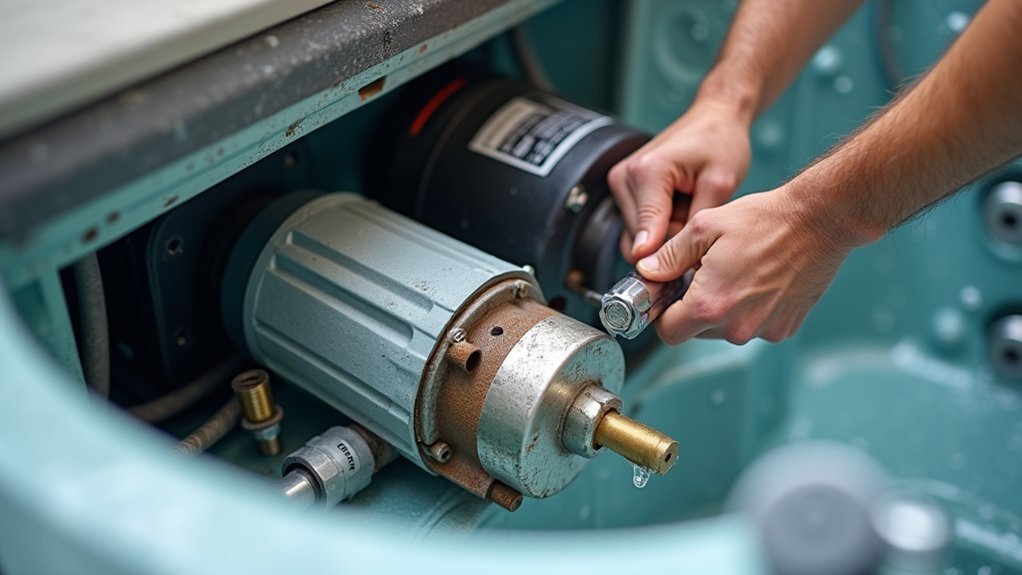
Remove the Old Pump Motor Properly
Before touching any components, double-check that you’ve completely disconnected the power supply from your hot tub at the breaker panel.
Take photos of all wire connections on the old motor, noting which wires connect to which terminals.
You’ll thank yourself later when it’s time to wire up your new motor correctly.
Disconnect Power Supply First
When you’re ready to remove your old spa pump motor, the first and most critical step is disconnecting the power supply. Working with live electrical connections can cause serious injury or death, so you can’t skip this safety measure.
Before touching any wires or components, follow these essential steps:
- Turn off the spa’s circuit breaker at your main electrical panel
- Unplug the spa if it uses a standard outlet connection
- Use a voltage tester to confirm no power flows to the unit
- Wait at least five minutes for capacitors to discharge
- Lock out the breaker to prevent accidental re-engagement
Once you’ve verified the power is completely off, you can safely proceed with disconnecting the motor’s wiring connections.
Document All Wire Connections
With the power safely disconnected, you’ll want to grab your smartphone or a camera before touching any wires.
Take clear, close-up photos of every wire connection on your pump motor. Capture the terminal positions, wire colors, and any labels or markings visible on the motor housing.
Don’t rely on memory alone. Wiring configurations vary between manufacturers, and even a single misplaced connection can damage your new motor or create a safety hazard.
Label each wire with masking tape and a marker, noting exactly where it connects.
Pay special attention to the ground wire, capacitor connections, and any speed selection terminals if you have a two-speed pump.
These photos become your reference guide during installation, saving you troubleshooting time and potential costly mistakes later.
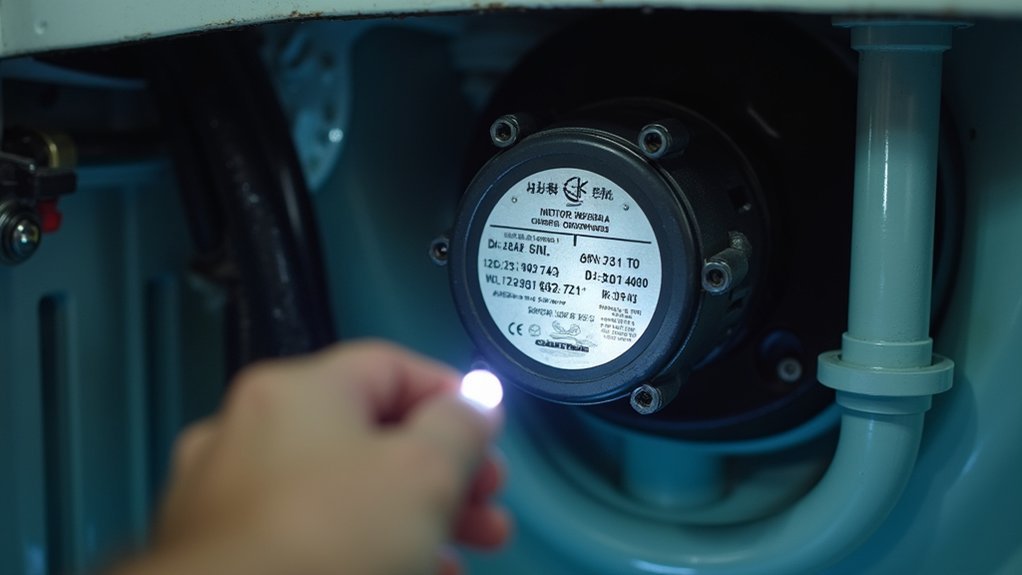
Match the Correct Replacement Motor to Your Spa
Finding the right replacement motor requires you to gather specific information from your existing pump. Check the motor’s label for critical specifications before shopping for a replacement.
Look for these key details on your current motor:
- Horsepower rating (typically ranges from 1.0 to 5.0 HP)
- Frame size (48-frame or 56-frame are most common)
- Voltage requirements (115V or 230V)
- Speed configuration (single-speed or two-speed)
- Shaft diameter and length measurements
You’ll also need to verify the rotation direction and mounting orientation. Take photos of the motor label if the text is faded or difficult to read.
Many manufacturers offer cross-reference guides that match old motor models to current replacements. Don’t assume a motor will fit simply because the horsepower matches—frame size compatibility is equally important.
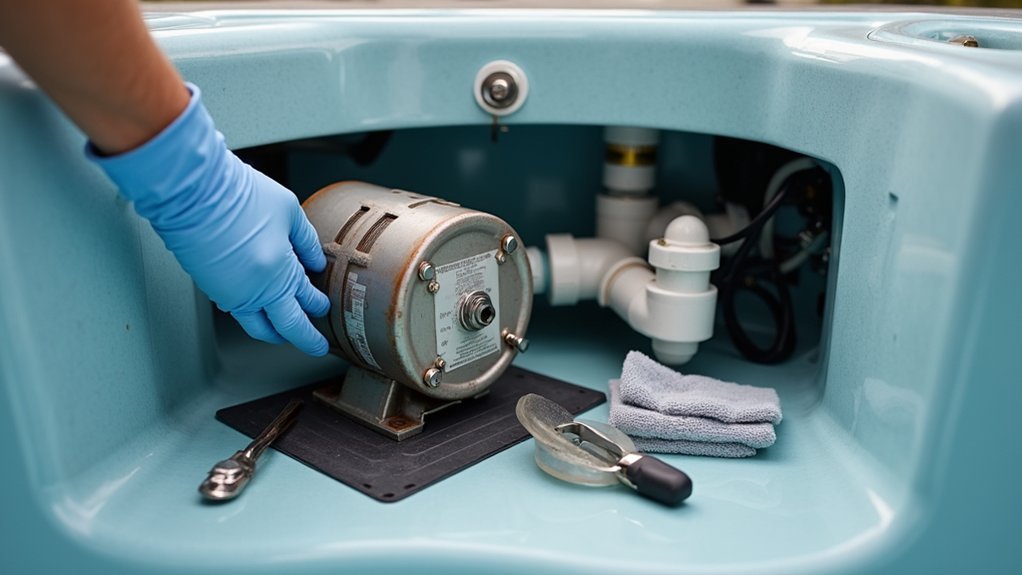
Install and Secure the New Pump Motor
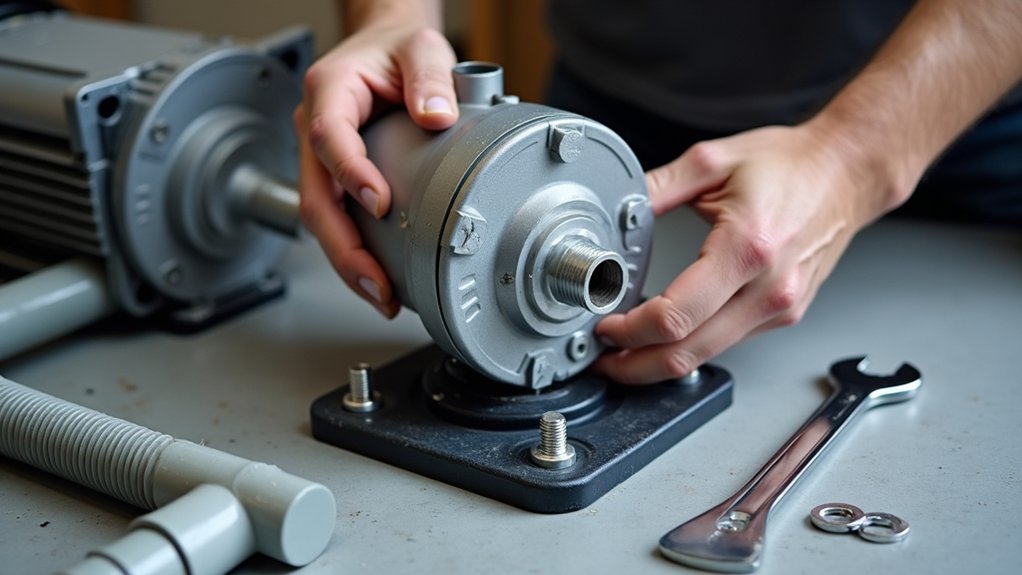
After you’ve confirmed your replacement motor matches the original specifications, you’re ready to begin installation.
Position the new motor onto the wet end, aligning the bolt holes precisely. Thread the bolts by hand first to prevent cross-threading, then tighten them in a star pattern to make certain even pressure on the seal plate.
Connect the electrical wires according to the wiring diagram on your motor’s label. Match wire colors and secure all connections with appropriate wire nuts. Double-check that the ground wire attaches properly to the designated terminal.
Verify the motor shaft spins freely before powering up. Secure any loose wiring away from moving parts using zip ties. Make certain all mounting brackets are tight and the motor sits level to prevent vibration damage during operation.
Test Your Spa System After Installation
You’ll always want to test your spa system thoroughly before assuming the job’s complete. Start by restoring power and filling your spa to the proper water level. Turn on the pump and observe its operation for several minutes.
Check for these critical indicators during testing:
- Unusual vibrations or grinding noises from the motor
- Water leaks around seal connections and fittings
- Proper water flow through all jets
- Correct rotation direction of the impeller
- Appropriate pressure readings on the gauge
Run your spa through multiple cycles, including high and low speeds if applicable. Monitor the motor temperature—it should remain warm but not hot. If you notice any issues, shut down the system immediately and recheck your connections before calling a professional.
Frequently Asked Questions
How Long Does a Typical Spa Pump Motor Last Before Needing Replacement?
You can expect your spa pump motor to last 5-10 years with regular use. Factors like water chemistry, maintenance habits, and how often you run your spa will greatly affect your motor’s lifespan.
Can I Upgrade to a More Energy-Efficient Motor Than My Original?
Yes, you can upgrade to a more energy-efficient motor. Look for variable-speed or two-speed motors that’ll reduce electricity costs substantially. Just make certain the new motor matches your pump’s horsepower, voltage, and frame size specifications.
What Are Warning Signs That My Spa Pump Motor Is Failing?
You’ll notice warning signs like unusual humming or grinding noises, water flow that’s weaker than normal, the motor overheating frequently, tripped breakers, or visible leaks around the pump housing.
Should I Replace the Entire Pump or Just the Motor?
You should replace just the motor if your pump’s wet end is in good condition. You’ll save money and time. However, if you notice corrosion or leaks in the housing, replace the entire pump.
Is It Better to Hire a Professional or Do It Myself?
You can save money doing it yourself if you’re comfortable with basic electrical work and plumbing. However, you should hire a professional if you’re unsure, as improper installation can void warranties or cause damage.


Leave a Reply