When replacing trampoline springs, always wear work gloves to protect your hands and use a T-hook tool for leverage. Measure your springs correctly from hook to hook before ordering replacements. Install springs in a cross-pattern to distribute tension evenly across the mat. Work with a helper to manage resistance and prevent imbalance. Finally, inspect all springs after installation to verify secure connections and proper engagement. These five safety tips will make your trampoline maintenance much smoother and safer.
Gather the Right Tools and Safety Equipment
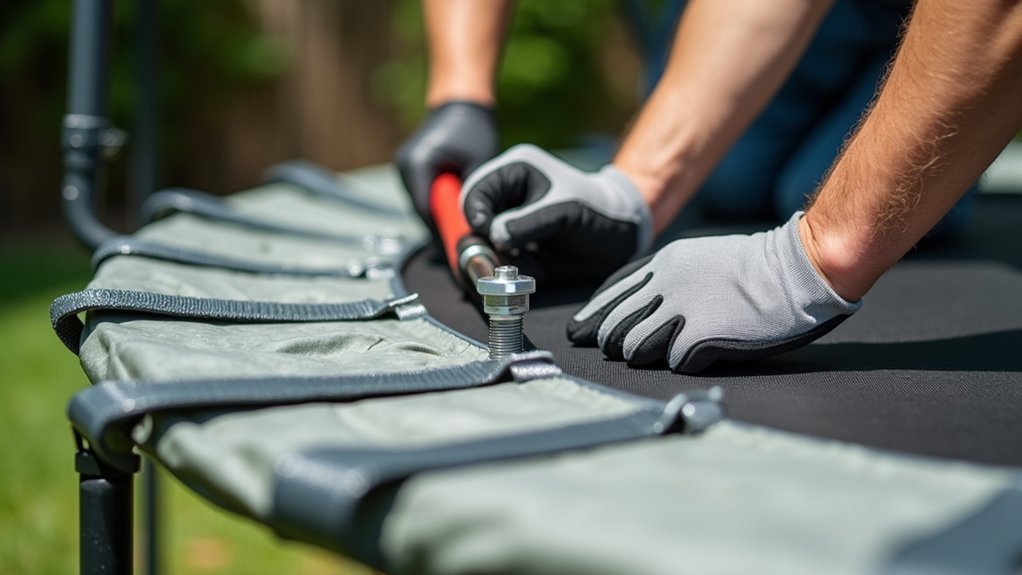
Why attempt replacing trampoline springs without proper preparation? Having the right tools makes the job safer and more efficient. Start by acquiring work gloves to protect your hands from sharp edges and prevent painful pinching when handling tensioned springs.
A dedicated trampoline spring tool (T-hook) is essential—it provides the leverage needed to hook springs onto the frame while keeping your fingers away from pinch points. Keep pliers nearby as a backup for stubborn springs.
Prepare a labeled container to organize removed springs, ensuring proper reassembly later. This simple step prevents confusion and maintains even tension distribution.
Finally, don’t tackle this job alone. Having a helper will make the process faster and safer by allowing you to distribute tension evenly as you work around the frame.
Identify and Measure Your Trampoline Springs Correctly
How often do trampoline owners replace springs with the wrong size? Unfortunately, it’s a common mistake that can compromise safety and performance.
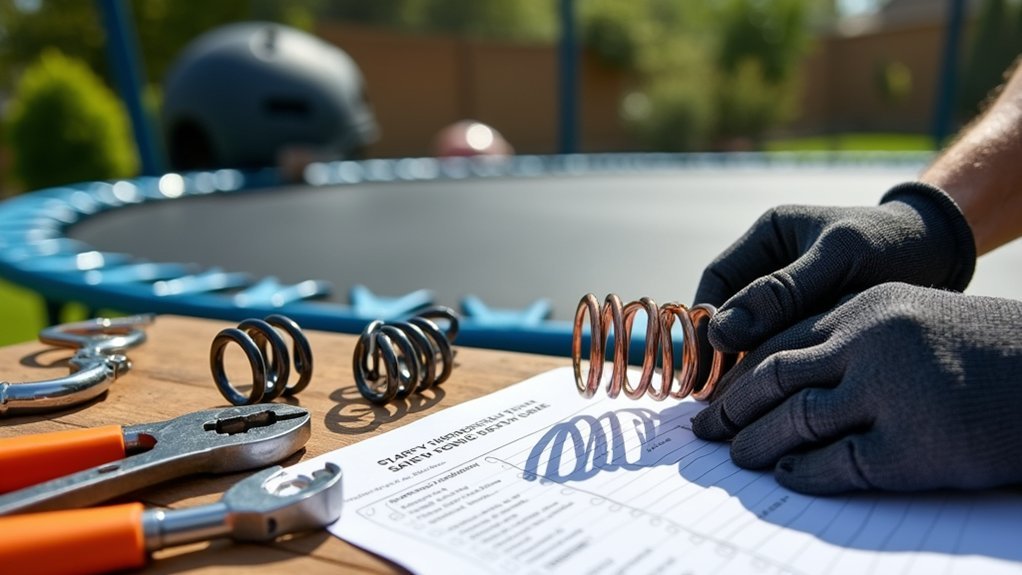
Start by counting the springs around your frame, noting whether they’ve loops or hooks at both ends. Most trampolines use 6-8 springs per section. Measure the total length from hook to hook, then measure from the longest hook to the coil edge to confirm exact dimensions.
Don’t overlook the spring’s center diameter and wire thickness at the hook shank—these measurements ensure compatibility with your frame and mat.
Always use manufacturer-recommended springs and avoid mixing different tensions, which can create dangerous imbalances. Select high-quality steel springs specifically designed for trampolines, and inspect them for defects before installation.
Follow a Cross-Pattern Replacement Technique

Once you’ve identified the correct springs for your trampoline, proper installation becomes your next priority. The cross-pattern technique is essential for maintaining even tension across the mat.
Begin by attaching springs at opposite sides of the frame, creating an X shape. This balanced approach prevents the mat from pulling to one side during installation. Continue working outward from these initial points, maintaining consistent spacing between springs.
If you encounter resistance when seating a spring, don’t force it. Instead, gently tap the hook with a rubber mallet while maintaining a safe grip. Count springs as you go and verify that each one securely connects to both the frame and mat loops.
After completing installation, recheck tension throughout and adjust any springs that feel looser than others to ensure even bounce performance.
Maintain Even Tension During Installation
The proper distribution of tension across your trampoline mat is essential for both safety and performance. Begin by installing springs in an X pattern, attaching them to the frame first, then to the mat loops. This method distributes tension evenly from the start.
Work gradually around the trampoline, alternating placement sides rather than completing one section at a time. If a spring won’t seat properly, give it a gentle tap to ensure the hook fully engages the frame hole. Remember to periodically recount springs to verify uniform distribution.
Don’t overstretch springs during installation or final seating. Excessive tension on individual springs disrupts the balanced load across all connections. With careful attention to even tension throughout the process, you’ll create a balanced jumping surface that performs as designed.
Inspect and Test Before Jumping Again
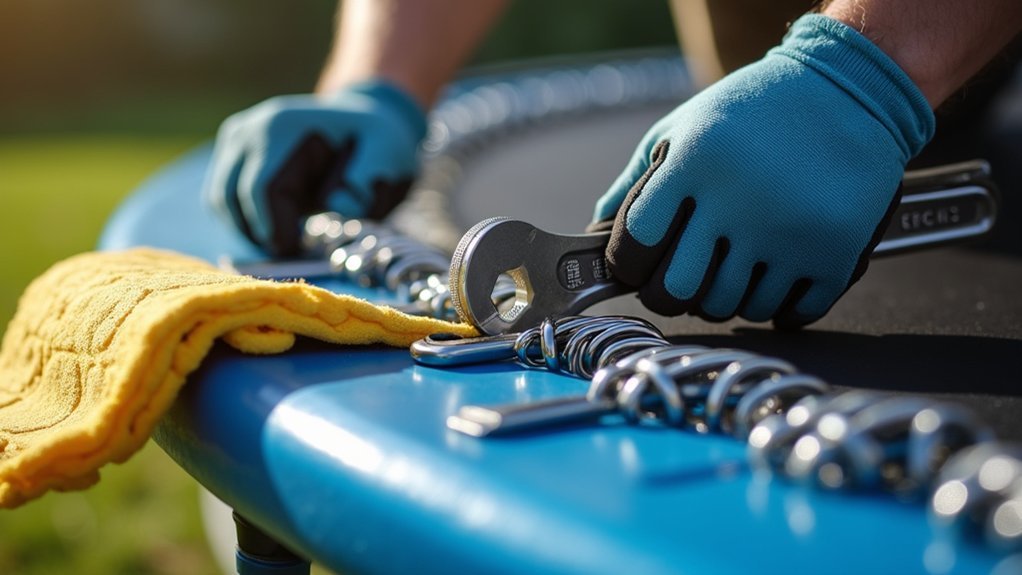
With your springs properly tensioned, it’s time to verify everything before anyone steps foot on the trampoline again. Carefully examine each spring for rust, deformation, or missing coils that could lead to sudden failure during use. Don’t skip this essential inspection step.
Test every installed spring by gently pulling to confirm it’s securely engaged with both the frame holes and mat loops. Always use a spring tool and wear work gloves to prevent pinched fingers and reduce hand fatigue during this process.
Once you’ve checked individual springs, recount the total number installed to ensure none were missed or miscounted. Finally, establish a monthly inspection schedule, especially during peak usage periods, to identify any springs showing signs of wear or overstretch before they create unsafe jumping conditions.
Frequently Asked Questions
What Is the Easiest Way to Put the Springs on a Trampoline?
Start at a corner, use a spring-pulling tool, and wear gloves for protection. Install springs in an X-pattern for even tension. You’ll find it easiest if you alternate sides while working around the frame.
How to Replace Trampoline Springs Without a Tool?
You can use pliers or a nail puller as alternatives. Wear thick gloves, start at corners, work diagonally, and pull springs gradually. Ask someone to help apply leverage while you hook springs into place.
Can You Replace Trampoline Springs?
Yes, you can replace trampoline springs. It’s recommended for safety and performance. Always use matching springs, replace them all at once, and wear gloves during installation. Regular inspections will extend your trampoline’s life.
What Is the Best Tool to Use for Trampoline Springs?
A dedicated spring puller (T-hook) is your best tool for trampoline springs. You’ll protect your fingers, reduce effort, and prevent damage. Wear gloves for safety and keep pliers handy for stubborn springs.


Leave a Reply