You’ll master five essential methods: first, select IP-rated, UV-stable housings with corrosion-resistant hardware. Next, plan your wiring using 16 AWG direct-burial cable buried 12 inches deep. Then, secure speakers with stainless steel bolts and EPDM washers on galvanized brackets. Mount units around 4 feet high, tilting downward to target seating areas. Finally, test your power supply and verify code compliance with a multimeter. Each method builds on the previous one—explore the details to ensure a professional installation.
Selecting Weather-Resistant Housings and Mounting Hardware
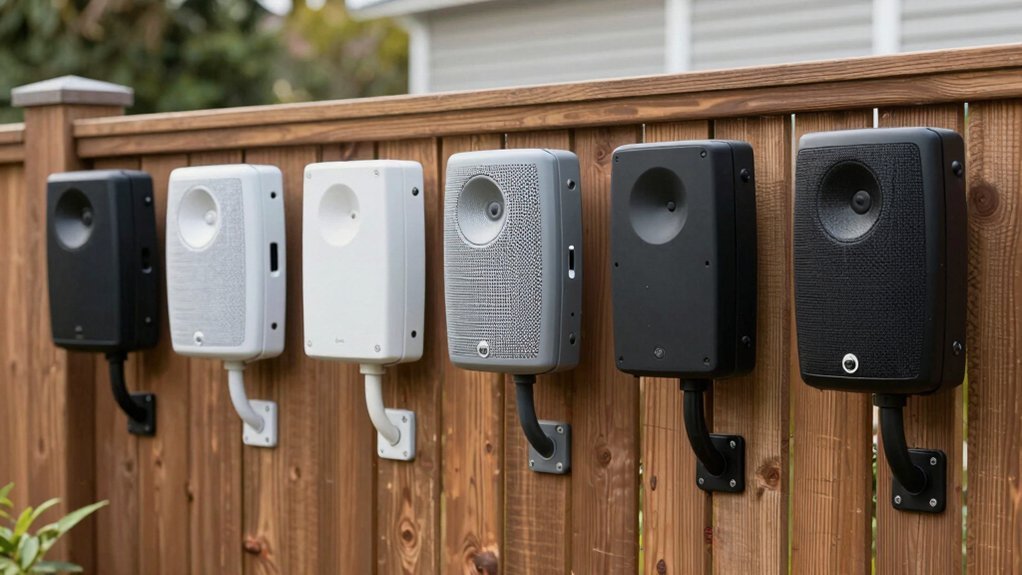
Why settle for indoor speakers that’ll deteriorate in months when you’re investing in a fence-mounted outdoor system? You’ll want housings with IP-rated dust and water protection to shield against rain and moisture. Choose UV-stable materials that resist fading and cracking under intense sunlight and temperature fluctuations.
Your mounting hardware must support the speaker’s weight while maintaining vibration-free alignment during windy conditions. Look for brackets specifically rated for outdoor use with corrosion-resistant finishes. Weatherproof grommets and cable entry brackets are essential—they maintain waterproof seals at mounting points, preventing water infiltration that could damage internal components.
Investing in quality housings and hardware upfront eliminates costly replacements and ensures your fence-mounted speakers perform reliably for years.
Planning Wiring Paths and Cable Management
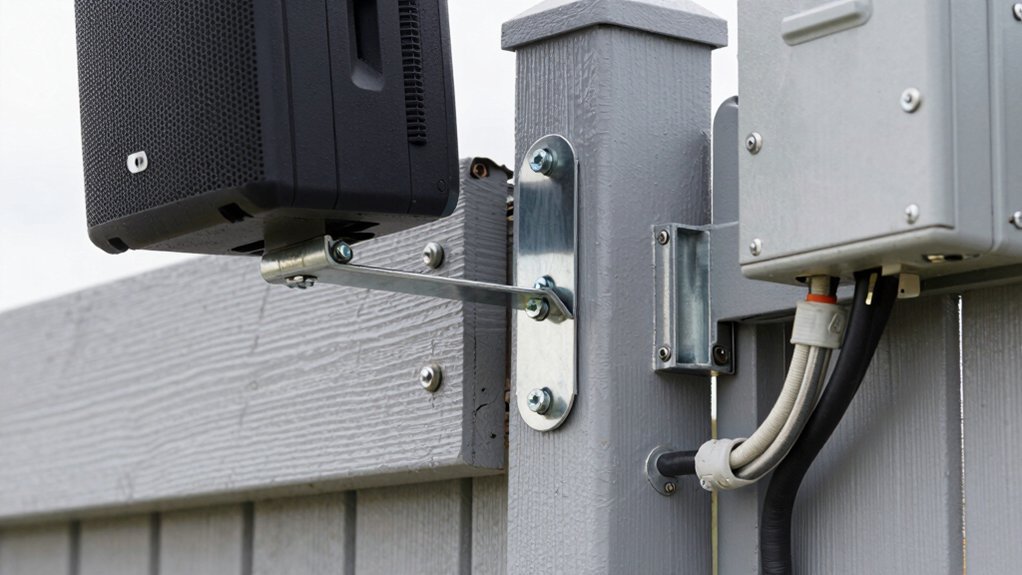
How you route your speaker cables will determine whether your outdoor system performs flawlessly or succumbs to environmental damage. Plan the shortest, tidiest path from your indoor amplifier to fence-mounted speakers to reduce interference and cable run length.
You’ll want to use outdoor-rated 16 AWG or 14 AWG direct-burial cable, burying it at least 12 inches deep while following local codes. Route cables along garden beds or through your garage roof when possible, hiding them inside building fabric or landscape features to shield them from sunlight, water, and physical damage.
Treat wiring like electrical installations by minimizing exposure to environmental hazards. Consider a four-core cable approach when daisychaining left and right channels to multiple speakers, which simplifies your setup and maintains proper impedance throughout your system.
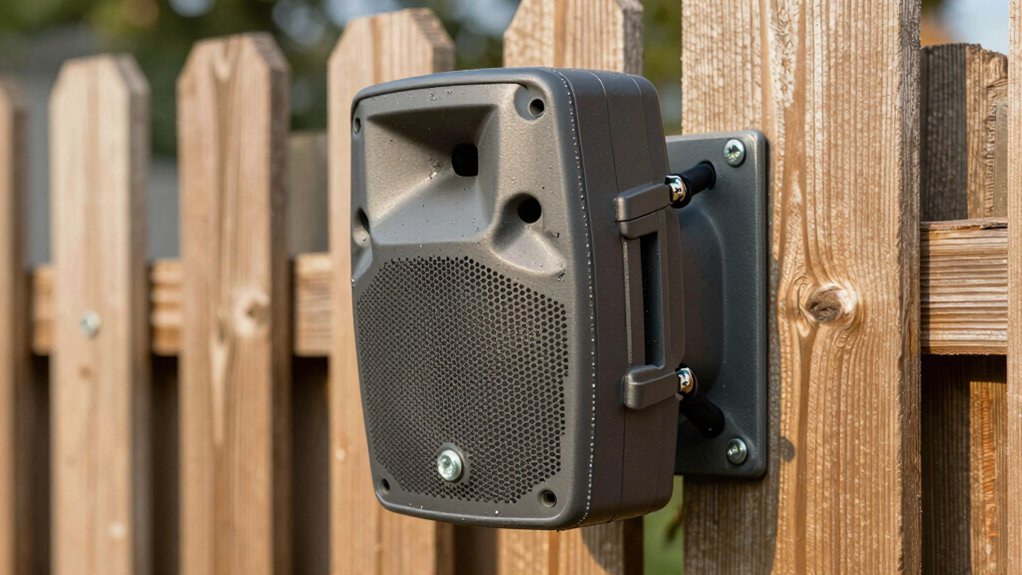
Securing Attachment to Fence Structures
Once you’ve planned your cable routes, you’ll need to secure your speakers firmly to the fence with weatherproof, outdoor-rated mounting hardware that won’t corrode or loosen over time. Seal all screw holes with weatherproof sealant to prevent water intrusion and rust.
| Hardware Type | Material | Benefit |
|---|---|---|
| Stainless Steel Bolts | 304/316 Stainless | Corrosion-resistant, long-lasting |
| Rubber Washers | EPDM Rubber | Vibration dampening, water protection |
| Galvanized L-Brackets | Zinc-coated Steel | Heavy-duty support, rust prevention |
| Silicone Sealant | Outdoor-grade | Complete weatherproofing at penetrations |
Mount your AW6500 boxes approximately 4 feet high to optimize driver dispersion while minimizing ground reflections. Position Bose Freespace 360° units on vertical surfaces to maximize omnidirectional coverage. Double-check all connections periodically, especially after severe weather, ensuring hardware remains tight and corrosion-free.
Optimizing Speaker Height and Sound Dispersion
Getting the height and angle right makes all the difference in how your fence-mounted speakers perform across your outdoor space. You’ll want to mount speakers around 4 feet high on aluminum fence posts to balance sound dispersion and minimize obstruction. For larger installations, consider mounting at 8–10 feet, which optimizes your listening sweet spot while protecting drivers from weather.
Tilt speakers slightly downward to direct sound toward your seating areas rather than neighboring properties. Your speaker choice matters too: AW6500 models are more directional, allowing you to control coverage, while Bose 360° speakers provide omnidirectional sound.
For irregular zones like a 65′ x 37′ space, start with 2–4 units and add more if coverage gaps emerge. Account for fence materials behind speakers, as they affect tonal brightness.
Testing Power Supply and Code Compliance

Before you power up your outdoor speaker system, you’ll need to verify that your setup meets local electrical codes and safely handles the current draw. Check your amplifier’s power requirements and ensure your circuit breaker can accommodate the load without tripping. Use a multimeter to test voltage at the amplifier input, confirming it matches manufacturer specifications. Inspect all weatherproof connections, including your Express Seal Butt Splice Connectors and heat-shrink tubing, for proper sealing—any moisture infiltration risks short circuits or equipment damage. Verify that your 14–16 AWG direct-burial cable can handle your system’s amperage without overheating. Contact your local building department about outdoor electrical installation permits and grounding requirements. Once you’ve confirmed compliance and safety measures, you’re ready for initial system testing.
Frequently Asked Questions
What Is the 83% Rule for Speakers?
You should aim for about 83% of your speakers’ maximum volume or power handling capacity. This approach helps you maintain headroom, reduce distortion, and extend your equipment’s lifespan in outdoor environments where conditions constantly change.
What Is the 1 3 Rule for Speaker Placement?
You’ll position your speakers approximately one-third of the way from your listening area to the far boundary. This placement optimizes stereo imaging, reduces edge reflections, and guarantees even sound distribution throughout your outdoor space.
How to Mount Outdoor Speakers to Siding?
You’ll mount outdoor speakers to siding by securing sturdy brackets to wall studs, positioning them 8–10 feet high at a slight downward angle. Use corrosion-resistant fasteners, weatherproof seals, and route wiring through conduit to prevent moisture damage and maintain performance.
What Is the Best Way to Wall Mount Speakers?
You’ll achieve the best results by mounting speakers 8–10 feet high at slight downward angles for optimal coverage. Use weather-rated outdoor enclosures, route cables through conduit, and alternate left/right channels across multiple units to minimize distortion and neighbor impact.
Leave a Reply